Search This Blog

Taystit by Hasna

Food, Recipes, and Beyond

  • Home
  • About Me
  • Recipes
    • Main Course
    • Snacks
    • Desserts
  • Uncategorized
    • Chicken
    • Meat
    • Vegetarian
    • Rice
    • Malabar Food
    • Baking
    • Breakfasts
    • Snacks
    • Fish
    • Pasta
    • Drinks
    • Soups
    • Desserts
  • Contact Me

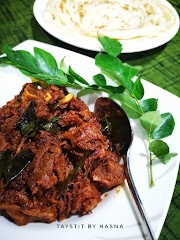
Creamy Coconut Hariyali Chicken 


Green chicken curry you might think? Well, this one is no less than a sibling of the famous butter chicken! Green chicken curry also known as Hariyali Chicken curry has its fame and origin from North India, as the name itself suggests its a curry that is green in color. Now the color comes from the green leaves like Coriander, mint, spinach etc that are added in to give it it's vibrant green. For me vibrant dishes just attracts me instantly, and hariyali chicken has always been my go to whenever I have lots of "greens" in stock.

My recipe of Hariyali Chicken is quite different, like I always say, fusion is my thing. So, this time it's a fusion between North and south Indian flavors. To bring in that creamy and rich texture I used coconut milk in my curry base, whereas the original recipe calls for yogurt. And let me tell you this is the best KETO recipe. Now you might think KETO? So have I started a new diet? Lol don't worry, it's not me, it's the hubster who is on Keto diet, so I will be sharing recipes that include the normal diet as well as KETO. I somehow always hated Keto, the very thought of using only a few ingredients that had no carbs and sugar made me anxious. But really that's when you get a chance to experiment and invent new recipes. Now that I have started preparing for the Mister I feel like I am on some masterchef Challenge where they give few ingredients and I have to come up with a delicious recipe. Haha. That's the scene happening with me most of the days now.

Nevertheless, if you aren't on KETO, you will love it even more, I guarantee. This vibrantly green hariyali chicken gets a makeover by adding coconut milk and Cashew paste that makes me want to call it a sibling of butter chicken.


This goes very well with chappathi, rice appam, naans etc. Here, in the images you see Cauliflower rice, it's so good that you won't know its Cauliflower because it is so bland, and when paired it with this amazing gravy, ooohhh soooo goood, with the flavors of Indian spices called the Garam masala hits the mark that brings out the flavor of this gravy, since coconut milk, in itself is rich, Cashew paste isn't necessary, but adding it gives that extra richness.

This is one chicken gravy that you wouldn't want to miss, it's super easy, really! No messy works like chopping onions, tomatoes etc. It's delicious combination of the coconut milk brings out its flavors even more than yogurt does. And the best part, it's KETO friendly! This can be prepared using both boneless and bone in chicken. My family always prefers bone in chicken any day. So without further a do let's begin making my delicous Creamy Coconut Hariyali Chicken. 

Ingredients :

  • 1 tbsp butter
  • 1 tbsp olive oil*
  • 500 gms chicken (bone in /boneless) 
  • 6 garlic cloves
  • 1 inch piece ginger
  • 1 handfull of Coriander leaves
  • 1/4 cup mint leaves
  • 1/2 cup Spinach (optional) 
  • 3-4 green chillies
  • 3/4 tsp Garam Masala Powder 
  • 1/2 tsp Cumin powder 
  • Salt as required
  • 3-4 tbsp coconut milk powder*
  • 1/4 cup water
  • 8-10 cashews (soak in hot water for 10 minutes) 

Instructions : 

  1. Grind the mint leaves, Coriander leaves, spinach, ginger garlic, and green chillies and grind to a smooth paste. 
  2. In a pan or deep pan, add in 1 tbsp butter and olive oil. 
  3. Add in the ground paste of leaves and add Sautee for a couple of minutes. 
  4. Next add Garam masala powder and cumin powder and Sautee well. 
  5. Add chicken that has been marinated in salt. Cover and cook for 20 minutes on medium low heat. 
  6. Whilst at that, grind cashews with coconut milk powder and 1/4 glass of water. 
  7. After cooking the chicken for 20 minutes add in your coconut cream. 
  8. Combine well and add water as required and allow to boil for a minute or two. 
  9. Serve hot with chappathi, appam, naan, rice etc. 
  10. I have served with Cauliflower rice as a keto side. 
  11. Enjoy! 

Notes:
  • As this is a keto friendly dish I used butter and olive oil, you may use ghee too. Also vegetable oil is fine if not for keto purpose. 
  • You may use 1/2 cup fresh coconut milk or 1/2 tin canned coconut cream. 

Do try this recipe and don't forget to share your experience/feedback with me here in the comments or feel free to send me a mail. Also, do tag me at #taystedit if you try out my recipes on Facebook, Instagram etc so that I can see when you make it. ♡♡♡♡

Luscious Lotus Waffles


Sometimes indulging right in the morning is the right way to start a day. You can always have a cheat day and today was my cheat day for indulging, this yummy waffles that are crispy outside and soft inside with a dollop of vanilla ice cream takes it to a whole new level. What else are weekend breakfasts for?

I have been daydreaming of this combination, for a few days now. Finally had this, it was sooo delicious and the combination of hot waffles with the cold ice cream is deadly.

This is my go-to waffle recipe that has always given me the best results. Never turns out soggy. I completely detest soggy waffles. I like them crispy and warm. And if you have been following me on Instagram or any social media platform, you might already know my love for lotus spread and their biscuits. I just love it! And I mostly have my waffles with maple syrup, chocolate sauces, fresh cream and fruits. But ever since this idea hit me, I never got a chance to try this. It was oh soooo good! If you are a health freak don't even think of trying this hahaha. Just joking. I mean, this is a super indulgent breakfast waffle. So if you love sweet mornings when your sweet cravings hit real hard, no better way to start your day.

Even though slightly guilty, I was super happy, and to balance the calories I consoled myself with a glass of orange juice. Lol. But let me tell you, this is the best waffle combo, out-of-the-world good!

Why eat out to munch on these yummies, when you can make this at home if you have a waffle maker? Also if you don't have a waffle maker use grill pans or even make pan cakes out of it! 😍 The perfect summer breakfast I must say. A few ingredients and 15-20 minutes of your time and ta daaaa.
Now, do you want to know the secret to my Crispy waffles? Well, the rule of thumb to make the perfect waffles is to allow them to cook no more than 5-8 minutes, they tend to dry out too much, which takes away its actual texture. Now another tip is to keep your waffles, once cooked, in a preheated oven for a couple of minutes on the wire rack directly to crispen up, a tip my fellow foodie friends suggested. Well, my recipe doesn't need that extra step, for that all you have to do is add a little cornflour and voila! You have the perfect waffles of all time👌😍 and for that perfect soft insides whip up your egg whites to stiff peaks and fold them in your waffle mixture. Always comes out perfect 👌 😋 

These warm waffles are topped with a scoop of vanilla ice cream, which is drizzled with some lotus spread sauce. Drooling already? Well, let's not waste any time and make some right away!


Ingredients : (makes for 2-3 people) 

  • 1 egg, yolk and white separated
  • 1 cup buttermilk
  • 1/4 cup vegetable oil
  • 2 tbsp butter
  • 1 tsp Vanilla Essence
  • 3/4cup All purpose flour
  • 1/4 cup Wheat flour*
  • 1/4 cup Corn flour
  • 4 slightly crumbled Lotus Biscoff Biscuits 
  • 1 tsp baking powder
  • A pinch of salt
  • 2 tbsp sugar
  • 2 tbsp Lotus biscoff spread ( microwave 30 seconds) 
  • Vanilla Ice cream as required

Instructions:

  1. Separate the egg yolk and white. Whisk the egg yolk, buttermilk, oil and vanilla essence.
  2. In a separate bowl, whisk together the dry ingredients (flour, baking powder, cornstarch, crumbled lotus biscoff biscuits and salt) and set aside.
  3. Whisk the egg whites with sugar well using an electric mixer until stiff peaks are formed. (if you invert your bowl, the whites shouldn't fall off)
  4. Gradually and slowly add the wet ingredients mixture to the dry ingredients and slowly mix.
  5. Next, gently fold in the whipped egg whites into the mixture, be careful not to deflate the whipped egg white, lumps are totally fine. 
  6. In a preheated waffle maker, pour the batter and cook for 5-8 minutes, no more. 
  7. Finally, serve it with a dollop of vanilla ice cream and drizzle some of your lotus sauce. Enjoy! 


Notes :
  • You may use 1 cup All purpose flour.
  • If your waffles doesn't crispen, a tip is to keep your waffles, once cooked, in a preheated oven for a couple of minutes on the wire rack directly to crispen up. 
  • Double the recipe if you are making it for more people, considering only 1 tbsp extra sugar.

Do try this recipe and don't forget to share your experience/feedback with me here in the comments or feel free to send me a mail. Also, do tag me at #taystedit if you try out my recipes on Facebook, Instagram etc so that I can see when you make it. ♡♡♡♡

Creamy Kadai Mushroom Gnocchi


Did you know gnocchi is an Italian pasta made from potatoes, egg, and flour and is pronounced NO-KEE? Well, this is one such fusion dish where I have yet again combined the flavors of Italian and Indian cuisines. Fusion is my weakness. I love how different flavors when they come together form delicious recipes. This is one such experiment.

I love mushrooms, so what better way to use it to flavor up the Italian Gnocchi with some Indian spices and flavors. This was basically an experiment, something that I came up with instantly. I wanted something creamy (like always). So I brainstormed I finally settled for Kadai mushroom flavors. Since I did not want to overburden myself I made the task of cooking, pureeing the onions and tomatoes and straining etc. Instead, I used tomato paste. Tomato paste is such a life savior! Since tomatoes have this umami flavor, it instantly adds that punch.

Gnocchi is simply made by boiling potatoes for 20 minutes and cooling it, then peel off the skin, and use a potato ricer or a grater. Now make a well in the middle of the grated potatoes, add in egg yolk, salt as required and enough flour to bring them together to a soft, slightly sticky dough. The dough is then cut into equal portions and rolled into these "snakes" and are cut into small pieces. These small pieces are placed on floured fork and pressed lightly and rolled outward to form a shell-like shape. This prepared gnocchi is then slowly dumped into hot water, increase the flame and allow to cook until the gnocchi floats up and you simply need to fish them out immediately. The more you keep them in the boiling water, they turn denser, which we don't want. This fishing part is my favorite when making gnocchi.


I had no assurance when I started preparing this if it would turn out like I how I imagined. To my surprise, it tasted even better. I was so happy with the outcome. The best part is that if you don't have the time to make gnocchi from scratch, you may use this sauce for your pasta too. It just takes your boring pasta to the next level! I never thought even my little one would devour it. She is such a fussy eater, and she kept peeping on the plate to check if there was some leftover gnocchi. SUPERHIT here! I brought in some for my mom too, she is someone who always keeps everything aside for the kids and my dad, this time she indulged so much that she forgot to keep some for them. I was so happy that this recipe turned out even better than I had anticipated.

I wouldn't say that it isn't time-consuming, it was time-consuming and worth all the effort! Just like the Thalasssry Kakkarotti (Traditional recipe that uses Rice dumplings in a meat gravy). Call in your kids to enjoy a small gnocchi making session, I am sure they will enjoy eating it as much as they enjoyed making gnocchi too. If you have some extra gnocchi dough , shape them and place them on a tray lined with baking paper and allow them to freeze them for an hour and then transfer them to a zip lock and place them in the freezer and use when as and when required, the best part is no need to thaw! 

Bring a zest of Indian flavors to your Italian Gnocchi. My family loved it so much that the bowl was wiped out clean, I am sure your family will love this too. Without further ado, let's get started!

Ingredients: 


Gnocchi: (Makes for 4 people)

  • 3 Medium-sized potatoes (I used 1 super large and one small) 
  • 1 egg yolk
  • 2 cups of All purpose flour (or more)*
  • Salt as required

Creamy kadai Mushroom sauce:

  • 1 tbsp butter
  • 1 tbsp vegetable oil
  • 1 tsp ginger garlic paste
  • 1 medium Onion, finely chopped
  • 3-4 tbsp tomato paste *
  • 1/4 tsp Turmeric powder
  • 1/2 tsp Kashmiri Red chilli powder
  • 1/2 tsp Coriander powder
  • 1/2 tsp Garam Masala
  • 150-200 gms Tender Chicken Breast (sliced) 
  • Salt as required 
  • 1 tsp butter 
  • 150 gms white button Mushroom, sliced
  • 1/4 tsp Red Chilli Flakes 
  • 3 Puck triangle cheese cubes 
  • 3 tbsp thick cream 
  • 3/4 cup full cream milk
  • 1 tsp kasuri methi/ dried Fenugreek leaves 

Instructions :

To make Gnochhi :

  1. In a deep vessel boil enough water to immerse the potatoes and boil for 20 minutes. 
  2. Cool them down immediately by putting the drained potatoes into ice cold water. 
  3. After 5 minutes, remove its tender skin and grate them (using the small holes) or use a potato masher for better results. 
  4. Next make a well in the middle, pop in an egg yolk and Sprinkle salt as required and gradually add in your flour 1/2 cup at a time until you get a slightly sticky shapable dough and make them into the shape of a ball. 
  5. Now cut them into similar sized discs and roll them on your counter top using your palms to make the shape of a snake. 
  6. Next cut them into equal, small sized pasta pieces. 
  7. Now take a fork and flour its ends and place a pasta piece and slowly press with your thumb to form an impression. 
  8. Now slowly roll the pasta away from you to form a shell like pasta/dumpling called gnochhi. (to know how to preserve the leftover gnochhi check notes) 
  9. To cook these pasta, allow to boil some water in a vessel and add in your gnochhi pasta, In a couple of minutes your gnochhi will start to float, immediately fish out and place into a steel plate or strainer. *
  10. Once you have fished out all the gnochhis, prepare your sauce whilst at it. 
  11. Now if you think the gnochhi is sticking to each other, run water through the strainer so that the water helps the gnochhi to keep away from sticking to each other. 

To make the sauce:
  1. In a pan, add butter and oil, next sautee ginger garlic paste for a minute until raw aroma dissappears.
  2. Add in finely chopped onion add salt and allow to become translucent.
  3. Next add in tomato paste and all your spices. Mix well and add in your sliced chicken pieces, season and Sautee for 5-7 minutes until tender and no pink color.
  4. Whilst the chicken cooks add in 1 tsp butter and add in your sliced mushrooms.
  5. Allow to cook for a couple of minutes, add salt as required and Sautee well.*
  6. Next add red chilli flakes and triangle cheese cubes and break the cheese down using a Spatula. 
  7. Gradually add the thick cream and pour in your milk and allow to boil. 
  8. Check salt and check for the consistency of the cream, if it is thick, add more milk. 
  9. Finish off with some dried Fenugreek leaves. Voila! Your delicious creamy kadai Mushroom gnochhi is ready to devour! *
Notes :
  • *remember that you will be adding cheese that contains salt.
  • *did not serve it in a kadai because it is a fusion pasta and I wouldn't want anyone to mistake it for curry. Haha🙈
  • *You may use the same sauce for your store bought pasta too 🤤
  • *Do not keep the gnochhi in the boiling water for too long, or else they turn dense. 
  • *If you have some extra gnocchi dough , place them on a tray lined with baking paper and allow them to freeze them for an hour and then transfer them to a zip lock and place them in the freezer and use when as and when required, the best part is no need to thaw!
  • *I used chicken breast as protein, you may use prawns etc. 
  • *You may use fresh tomatoes for this recipe but you need to sautee it with ginger garlic-onion and then, grind and strain. I made it simpler by using tomato paste. 😁


Do try this recipe and don't forget to share your experience/feedback with me here in the comments or feel free to send me a mail. Also, do tag me at #taystedit if you try out my recipes on Facebook, Instagram etc so that I can see when you make it. ♡♡♡♡

Gulab Jamun - Fool Proof Recipe 


And FINALLY I hit the 5K followers on Instagram .. Alhamdulilah ❤ 
I am completely out of words, I literally had tears of happiness when I refreshed and saw the 5K! Alhamdulilah.. This is all because of you guys! ❤ 

Each of your likes, comment, share and words of encouragement has pushed me to do more and has put me where I am now. This was not something that happened overnight. Days, months and couple of years hardwork, countless sleepless night to write my blog when the toddler catches some sleep (even when she sleeps she wants me beside her) , avoiding a few outings for doing my blog work, having to make the hubster wait for so long until I get the perfect shot etc. Thank you hubsy. 
And finally I cannot thank you guys enough! I am overwhelmed.. I never thought to write this long lecture and bore you guys! If at all you guys think that I deserve this, please keep me and my family in your duaa (prayers) and always keep those encouraging words coming in, they are like drugs for me to do more.. 

It's not about the numbers but hitting 5K has made me realise many things, a few being; 
  • Always support and inspire others
  • find your own niche - get inspired by others and give due credits
  • always remember not everyone wants the best for you, sometimes the very few followers whom I thought to be are my real followers sometimes turn out to be the real ghost followers, while few others have turned out to be super supportive and encouraging to the extent that I really owe.. 
there is a lot more... but for now I would like to share this virtual treat with you guys!
Do try at home if possible and let me know how you liked it.


Being a foodie, my first love, and my favorite Indian dessert was Gulab Jamun. My mom used to make them quite often when I was a little girl. I could not get enough of those. I remember this is where my journey began, the first recipe in my manual Cookbook. This was when I was in 7th std probably, I thought to myself, I need more of these Gulab Jamuns in my life and I immediately found a new notebook, took down the recipe from my dearest mumma then and there. I was so happy to see the first recipe of my small cook book being gulab Jamuns. 
Ever since I followed her recipe and it was always a hit.

Fast forward many years later, after my high school, I placed this Cookbook on my oven and went to Indian for my vacation. When I came back I see this black stained pages on my cook book. No idea what happened there. I was literally heart broken, and soon even before I could realise and recopy the recipe, the book starting tearing off somehow😔, which was during the hustle bustle of my wedding. I did not get the time to note down too. I was literally heart broken because I am someone who keeps my things very carefully and I like to treasure them. Ever since, I have had so many flops, could never nail it. Felt so depressed. 

I have always been on a hunt to find the perfect gulab Jamun recipe. And with many trial and errors I understood my mistakes and took note of this fool Proof recipe. And now since a few years this has been my go to recipe. It's a keeper. 

I remember my mom placing an Almond or Cashew inside. Aaahh.. It was the best! 😍
This recipe uses milk powder. The prepared small balls are fried in oil on a low flame, till all sides are browned well. Drop them in the boiling sugar syrup, and allow them to rise and double. 


Always remember to drop your gulab Jamuns in boiling sugar syrup for the Jamuns to double the size. And place a lid once done and allow to simmer for 5 minutes and you are done. 
I mostly make this when I have sudden guests coming in, as they are very easy to prepare. The blissful moment when you cut through a gulab Jamun using a spoon is priceless. 

Come on! Let's make some delicious Jamuns! 😍😋

Ingredients :

Gulab Jamun:
  • 1 cup Milk powder
  • 1 tbsp maida
  • A little less than 1 tsp baking powder
  • 1 tbsp ghee
  • 1 egg
  • 1 tsp milk (if required) 

Sugar Syrup:
  • 1 3/4 cup water
  • 1 1/2 cup sugar 
  • 3 Cardamoms ground
  • 1 tsp lemon juice 

Instructions :


  1. In a large vessel, add in the ingredients under sugar syrup and allow to boil. *
  2. Meanwhile let's make the gulab jamuns. 
  3. In a bowl add in your milk powder, Maida, and baking powder. Mix well. 
  4. Make a well in the middle and drop in your egg, ghee and milk and mix well. 
  5. Make small balls without making cracks and shallow fry on medium low heat, in batches 3-4 at a time and stir gently to fry them uniformly until golden. 
  6. Using a laddle, scoop the jamuns from the oil and drop in the boiling sugar syrup. Complete the balls similarly and once done place the lid of the sugar syrup vessel and allow to boil for 5 minutes on sim. 
  7. Garnish with nuts of your choice and serve warm or cold. 
Notes:
  • *Don't stir the sugar syrup or else the sugar will crystallize, if you think the sugar isn't melting, gently mix 2-3 times to help the sugar melt. 
  • Don't allow the sugar syrup to boil more than 10 minutes or else they turn thick. If you feel the syrup is turning 1 string consistency add 2-3 tbsp water to loosen it. 
Do try this recipe and don't forget to share your experience/feedback with me here in the comments or feel free to send me a mail. Also, do tag me at #taystedit if you try out my recipes on Facebook, Instagram etc so that I can see when you make it. ♡♡♡♡

Kerala Style Squid Roast


Sometimes the best of lunch is when it is simple and doesn't require much effort. The most delicious naadan lunch scenes are from Thalassery National Hotel and the finest being the 'Odhens Hotel' in Kannur that I can recall. Odhens is a must-visit place whenever we went home for vacation.

I miss all those small pleasures of life. The vacation to the native really rejuvenates and inspires. What makes these hotels stand out is that they have their varieties of sides, uff, that you can't get enough. Not a fan of the rice and curries that they serve, but their side dishes are next level! National Hotel serves side dishes using meat too like brain fry, liver fry etc. While Odhens is all about their Seafood sidedish spree. They are super delicious that even if you aren't a seafood lover I am sure you will relish it! 

Since this year going to our native isn't happening, I have had to find a solution myself. Making them at home.❤️ Squid is something that I love. We call it "Koonthal", while in Tamil kaar Koonthal means hair. So whenever any Tamil shampoo ad came on TV when I was a kid, I used to look at my mom astound. Only to find out later what it means in Tamil. 

Today's lunch was the simple and humble mooru kachiyath, my MIL's speciality, it is so simple that you won't even remember how it reached your plate, haha, alongside I made this yummy Kerala style squid roast that is perfect for lunch. I normally make the varattiya type for dinner (whose recipe is yet to be posted), that is perfect for rice dosa, wheat dosa, vellappam etc. This one is super simple, it only takes about 20 minutes if you have cleaned squid ready to be prepared.


Now coming to the cooking time of squid. Always remember this rule of thumb, either you cook it for 10 minutes or you cook it in a pressure cooker for 7 whistles (about 30-40 minute without cooker). There is no in-between. If you cook for about 20 minutes, it turns rubber-like. I always get this question from my dearest Instagram followers, that how long do we cook squid, it always turns out rubbery etc. So make sure you follow this rule the next time and I am sure you will nail this!

This is the type of  'koonthal roast' that you find in the hotels for lunch. Basically, the washed, cleaned and cut squid are sauteed in coconut oil which is infused with the aroma of ginger garlic paste, curry leaves and spices like turmeric powder, red chilli powder, a dash of coriander powder, a bit of garam masala and black pepper powder along with some chopped onion and tomato. I know what you might be thinking! This is the base of most of the Kerala spiced curries or roast, but of course, it's in the technique on how its done that brings in the right flavours. Super easy and very delicious. To know how, let's begin!

Ingredients: (for 2 people)


  • 250 gms Squid (washed, cleaned and cut)
  • 1/4 tsp turmeric powder
  • 4 tsp Kashmiri red chilli powder
  • 1/4 tsp Coriander powder
  • 1/4 tsp Black pepper powder
  • 1/2 tsp Garam masala powder
  • 1 tsp ginger garlic paste
  • 1 medium onion, chopped
  • 1 medium tomato, chopped
  • Coconut oil for roasting
  • 2 sprigs curry leaves
  • Salt, as required

Instructions:

  1. In a frying pan, pour coconut oil and add in about 2 tsp K Red Chilli Powder, ginger garlic paste and saute for about 30 seconds on low flame.
  2. Next, add in your chopped onions and add in a dash of salt and saute well.
  3. Next, add in your curry leaves (adding it in this stage, so that it doesn't splutter).
  4. Add in rest of the powders except for garam masala and black pepper powder, and saute.
  5. Now add in your chopped tomatoes and place a lid and cook on low until the tomatoes turn mushy.
  6. Finally add in your squid, add salt as required and give it a mix, place the lid and cook on medium flame without adding any additional water.
  7. After 10 minutes, open your lid and add in your garam masala and black pepper powder and finish off with a dash of coconut oil and roast well on high flame until most of the water evaporates, takes about 2 minutes.
  8. Check for salt and your delicious Kerala Style Squid roast is ready to serve! 

Notes:

Do not cook the squid for more than 10-12 minutes, or cook the squid for 7 whistles in a pressure cooker, there is no in-between, or else your squid will turn rubbery.

Do try this recipe and don't forget to share your experience/feedback with me here in the comments or feel free to send me a mail. Also, do tag me at #taystedit if you try out my recipes on Facebook, Instagram etc so that I can see when you make it. ♡♡♡♡

Easy Homemade Chicken Ramen bowl


Okay so I have been contemplating whether to post the recipe here or not. Traditionally ramen being Japanese has its origin from China. I had been contemplating as I did not have authentic ingredients in my pantry to make these. Since its lock down and the hubster gets me my groceries, long gone are those days where I can simply roam around asian grocery stores to find such amazing sauces etc to recreate some real Asian food.

So I thought of creating my own ramen bowl at home with limited ingredients available in my pantry. Imagine yourself sitting in front of a bowl of ramen bowl with some deliciously complex flavor profile of the freshly prepared broth that has a hint of sweetness, spicy and lightly salty and fresh veggies, slices of cooked chicken (you may use leftover chicken too) , and perfectly half boiled eggs that have their yolky yolks oozing out, with a splash of home made Szhechuan sauce and finally finished off with a sprinkle of scallions/spring onions and white sesame seeds. To give it that extra kick I also added a dash of fish sauce to my broth.

I never imagined noodle bowls could be so heart warming made with love right in your own kitchen in under an hour, it was definitely satisfying and looking forward for cooking more ramen bowls in the near future.


The Szhechuan sauce/chutney that I prepared, just took off the flavors to a next level. If you can't get the real Asian store stuff, you are lazy and really want a bowl of hearty warm bowl of ramen, just Kickstart with whatever is available in your pantry just like I did. And oh boy! I just can't describe how appetizing it was.

Some days when you are out of ideas for lunch, this is the best deal. I urge you to try this! Apart from what I demonstrate, if you could get hold of shitake mushrooms and seaweed use that too for extra umami flavor.

I could literally feel the flavors ride on my taste buds when I took the first slurp of this ramen bowl and couldn't get enough, that hint of spiciness from the Szechuan took the ramen to a next level. So delicious that while I type I am thinking of making my next bowl for lunch again.

Well, during the summer it isn't the best dish, because it is warm soup bowl with a kick of spiciness which is perfect for winter! Can't wait for winter and I am sure this is all that I would want, so comforting. I haven't filmed this, as I was not sure how the results would be as I had used a lot of substitutes.

Well, if you are like me, and good food is all that matters, then definitely give it a go, sooo worth it! I love building up such bowls! Definitely is an art and so colorful. Without further a do, let's get started!


Ingredients:

  • 2 ramen noodles/ maggi noodles
  • 4 cups water (2 cups for boiling noodles + 2 cups for the soup broth)
  • 4 garlic cloves, chopped roughly
  • 1 inch ginger
  • 2 eggs
  • 1/2 carrot, julienned
  • 1/4 cup frozen corn, peas, defrosted
  • Spring onions, roughly chopped
  • 100 gms boneless chicken, preferably thighs 
  • 2 tbsp Soy sauce 
  • 1 tsp vinegar 
  • 1 tbsp worcestershire sauce (optional)
  • 1 maggi chicken cube/ fresh chicken broth
  • 1 tsp white sesame seeds

Instant szechuan chutney :
  • 6 dry red chilli, soaked in 1/2 cup hot water for 15 minutes
  • 3 garlic cloves, finely chopped
  • 1/2 inch ginger, finely choppee
  • 1 tbsp Soy sauce
  • 2 tsp brown sugar
  • 1 tsp vinegar
  • 1 tbsp Tomato Ketchup
  • 2 tbsp vegetable oil
  • Salt, as required 
  • Water used for soaking chillies

Instructions:

  1. Boil water for ramen/ maggi noodles with some salt and allow to boil for 3 minutes, until just about done.
  2. Keep a small pan with water to boil, once boiled keep on medium low heat and allow your eggs to boil for exactly 6 minutes and transfer your eggs to a bowl with cold water to stop the cooking process. 
  3. Meanwhile in a deep pan pour 1 tbsp oil and place you salt and pepper marinated boneless chicken in the hot oil and cook for about 6 minutes (3 minutes each side), while searing and applying light amount of pressure for the chicken to cook evenly. 
  4. Set the chicken aside and in the same deep pan, where you have the juices of the chicken, pour in two cups of water. 
  5. To the water add in your garlic cloves, and slightly pulverized ginger. 
  6. Add in half of your spring onions, soy sauce, worcestershire sauce, vinegar and a cube of chicken stock. Once this comes to a boil let it simmer till you prep your veggies. 


For Szhechuan chutney :

  1. Soak your dried red chillies in 1/2 cup water. 
  2. Boil your chillies well, until chillies look tender. 
  3. Take out chillies and grind to a form a paste, reserve the water used to boil the chillies. 
  4. In a pan, pour oil, and Sautee ginger garlic on lowest heat without browning. 
  5. Add in your ground red chillies, brown sugar, ketchup, vinegar, soy sauce and salt, sauté for a couple of minutes, add in your reserved water used to boil chillies and allow to boil until oil separates. 
  6. Use instantly or store in the refrigerator for upto 2 months. 

To build the bowl of ramen:
  • Place a stash of julienned carrots and place your boiled noodles, pour in your soup broth. 
  • Next place your veggies in an orderly manner, as per your likeness. 
  • Now slice the chicken evenly and place the chicken in one side of your bowl. 
  • Add in a dash of your prepared Szhechuan sauce. 
  • Cut your half boiled eggs into two and place them on your bowl. 
  • Finally garnish with some chopped spring onions and white sesame seeds. 
  • Enjoy your warm bowl of slurpy goodness! 😍 

Notes:
I used maggi noodles without using the taste maker. 

Do try this recipe and don't forget to share your experience/feedback with me here in the comments or feel free to send me a mail. Also, do tag me at #taystedit if you try out my recipes on Facebook, Instagram etc so that I can see when you make it. ♡♡♡♡

Mango Mousse Float


It is Mango season here and to be frank this is the only time I splurge on mangoes because you get the finest, juiciest, tastiest mangoes in season time. Mango is called the king of fruits, no wonder why! I just love it! It instantly mingles with anything you add it to, be it juices, cakes, ice creams, etc, and uplifts its flavor profile instantly. Mango Mousse float is a dessert that can be easily be prepared even by kids.

When you get hold of ripe, juicy preferably Alphonso mangoes, look no further, try my mango mousse float. Basically, this was an experiment to try a technique that had dawned on me a few days earlier. Since I had ripe mangoes in hand, I had to make my delicious mango mousse float. This dessert is more like an ice cream cake, the biscuits give you that cake texture and the whipping cream gives you the ice cream feel. I have used Digestive biscuits here to make my technique build up easier, I would suggest you use thinner biscuits like ulker tea biscuits, graham crackers, or Marie biscuits. And for the mousse layer, I had used dream whip sachets as I had run out of whipping cream, I would recommend using fresh whipping cream for better taste, to give that ice cream feel.


Mangoes are a fruit that is loved worldwide. Mango float also called mango royale is basically a Filipino dessert that consists of biscuit layers with whipped cream, condensed milk, and mangoes. In the actual recipe, you have pieces of mangoes going in between the layers, instead, I added a mango mousse layer. Also as the recipe is an easy one, I tried the technique of round desserts. Since I did not have ring molds, I used a plastic mineral water bottle alternatively and cut it in the shape of a ring, then cut it lengthwise and taped it, filled it with the dessert, and set in the fridge. Once set, you just have to remove the tape and pull off the plastic bottle mold and voila! You have your round looking dessert. This is a technique that I came up with, solely something that came up in my mind. If you will not be consuming the dessert immediately use gelatin or china grass to get that perfection without melting.
I haven't used it here as I completely dislike using gelatin for a regular dessert session unlike for parties.


This is the easiest dessert recipe one can make, a perfect recipe where you can ask your kids to join in for some fun making this dessert. I am someone who is very anxious when it comes to allowing my little one to help me! There was a time when she used to ask me if she could help me. That is around 2 years old, Allahumma Baarik; I know you might be thinking that she is too small for that, but I have noticed she grasps everything quickly maa sha Allah. So now when she is 3 and a half years old, I see a little grown up in her, she just pushes the chair to me and helps me in my chores. I just can't accept the fact of how fast kids grow. 

Basically, this dessert involves no cooking, so what is better than involving your little stars in such recipes. Like I said when she saw me prepping this dessert she just pushed the chair and start helping me with the process, It felt so good to have a fun kitchen session with my little one, even though it makes me uneasy. I urge you, you need to try easy recipes with your kids, it strengthens the bond between you and your kids.

Ingredients:


  • 1 old Mineral plastic bottle (for making ring molds)
  • 3 ripe Mangoes, preferably Alphonso
  • 12-15 Digestive biscuits (or any thin tea biscuits, preferably)
  • 2 cups whipping cream or 2 dream whip sachets
  • 1/2 cup condensed milk (1/4 cup each, for cream mixture and mango mousse)
  • 1 cup milk if using dream whip sachets*
  • 1 tsp vanilla essence
  • 10 gms Gelatin/ China grass (optional)
  • 3 tbsp cream (fresh or thick cream)
  • 1/2 cup milk (for dipping biscuits)

Instructions:


  1. Take an old mineral plastic bottle and cut two similar-sized discs, and cut vertically.
  2. Now tape the opening according to the size of your biscuits and set aside.
  3. In a bowl, whip 2 cups whipping cream separately, add 1/2 tsp vanilla essence each, and set aside.
  4. In one bowl of whipped cream, add puree of one mango and add fresh cream in the other bowl of whipped cream.
  5. Next add in 1/4 cup of condensed milk in each of the bowl if using dream whip or use 1/2 cup each if using whipping cream.
  6. Pour your mango mousse and cream mixture in two piping bags and place it in the freezer for 1 hour or 3 hours in the refrigerator for added stability. **


  7. Now dip your biscuits in milk for about 10 seconds and place in your ring molds and pipe in your mango mousse and next add in your dipped biscuit and pipe in your cream mixture. 
  8. Similarly, complete the process until done.
  9. Top the dessert with cube-shaped mangoes.

Notes:
  • Use ripe Alphonso mangoes, for best results use strandless mangoes (mangoes that have thin strands inside)
  • For added stability use 10 gms ( 5 gms each for 1 cup of whipping cream) of powdered agar-agar/china grass or gelatin. (I do not like to use gelatin for normal use, as we consume them immediately).**
  • Use thin tea biscuits if possible, like ulker tea biscuits etc. (I only had digestive biscuits so used them).
  • I used dream whip as I had run out of whipping cream, use fresh whipping cream if possible, whipping cream gives better taste and results.*


Do try this recipe and don't forget to share your experience/feedback with me here in the comments or feel free to send me a mail. Also, do tag me at #taystedit if you try out my recipes on Facebook, Instagram etc so that I can see when you make it. ♡♡♡♡

 Thalassery Style Kozhi Kaal


Today I introduce you to my most favorite snack from my native - "Kozhikal" or particularly in our slang the "Koyikal" literally personifies the chicken leg piece. But this particular snack does not use chicken in any form. This is purely a vegetarian delight. It is this typical 4 pm Chai time snack that you get to find on the road sides in tea stalls all over Thalassery. In short, this our street food. 

Let me tell you, I do not know exactly how to describe my love for koyikaal, it is a feeling, an emotion especially when we get to munch on these in front of the sea shore with salty winds gushing onto your face with a kozhikaal in one hand and the other the forever awesome thattukada Chai. It is something that gives me goosebumps. Literally blows me away each time I think it isn't non veg, having had a non veg name though. Thalassery being known for delicious food, this is one such revelation. I just realised, I still haven't  revealed the star ingredient of this snack... It is the very simple and humble Tapioca. 


Assuming the name comes from its shape, julienned tapioca are mixed in a spicy batter and crispy fried in the shape of a "kozhikal" (chicken leg piece), just like how we would hold a fried chicken leg piece. The batter has many variations to it, the popular one being the use of besan flour (gram flour). I completely disagree to the idea of using gram flour, well if you ask me why, gram flour does not give that crispy texture, nor does it taste like the ones you get in tea stalls. Everytime I visit my native, we have koyikal on a daily basis, until we are literaly tired of it. Another such snack is the kizhang porichat (tapioca fritters), which is also a street food. If you do not reach the tea stall in time, you might only get these tapioca fritters. Its like rush hour, when 4 strikes you gotto run for some kozhikaal. Now if you ask me why can't you just make some at home? Well, cutting tapioca in strips on a daily basis is a pain in the ass and frying these are time consuming, just being frank here, which is why it gets over in a blink of an eye. 


During my school days, my daily sights comprised of the cutting and prepping tapioca for the evening rush hour, when I walk to catch a bus to get to school. I was always amazed and awestruck at the speed at which they cut and prep the tapioca. 

Like I said earlier, since koyikal just vanishes , I remember this amazing ika (brother/uncle) Razak'ka, who sells kozhikaal next to my home. He is an old man, hilarious guy, seen me grow up, get married, and having my little one, and he still says each time he sees me and tells my husband, "I remember how she comes in school uniform right after school to buy my piping hot kozhikaal". His were the best in my town, I couldn't get enough of it. Like literally, making me homesick now..Aaah! Those were the days.

I can assure you, you can't find the same taste in the cafeterias/restaurants found in Dubai, not yet! It has been a hunt forever. Also going back to my native during this pandemic situation is not happening, I make these quite often now days to revive those memories. To experience what I have poured out above, do try making these at home and let me know how you liked it. Other than having the patience of cutting and frying these, this is such an easy snack. Here, I demonstrate to you with frozen tapioca, you may use fresh ones. Basically frozen tapioca is easier to cut, also cutting the tapioca and cleaning is a headche, and if someone has done the job for you, and made the whole process easier, why take the burden lol. Without further a-do, let's get started!


Ingredients:

  • 350 gms Tapioca (fresh/ Frozen) 
  • 2 tbsp Kashmiri Red Chilli powder 
  • 1/4 tsp Turmeric powder
  • 1/2 tsp Garlic paste
  • 2 green chillies, slit
  • 1 sprig Curry leaves, chopped
  • 3 tbsp Corn Flour 
  • 3 tbsp Maida /All purpose flour 
  • Salt as required. 

Instructions:

  1. Cut the tapioca into lengthwise strips. 
  2. If using frozen tapioca, squeeze off excess water content by pressing the sliced tapioca in between your palms gently. 
  3. In a bowl, add chilli powder, Turmeric powder, garlic paste, slit green chillies and curry leaves. 
  4. Next add Maida and corn flour, and add salt as required, combine using a whisk. 
  5. Now gradually pour in water to make a thick batter. 
  6. Sprinkle some salt on the cut tapioca and mix well. 
  7. Now dump the tapioca little by little into the batter to get a even coat. 
  8. Now grab the batter coated tapioca in between your palms and shape thin and long manner and fry in hot oil on medium heat without flipping for 5 minutes. 
  9. Flip and fry for another 2-3 minutes without browning and drain onto a paper towel. 
  10. Enjoy it hot with a hot glass of chai. 

Notes:
  • If using frozen taipoca, thaw it well and after cutting it into strips with the help of both your palm press and squeeze off the water content in it. You do not need to do this with fresh tapioca.
  • Before adding the tapioca to the batte , make sure your tapioca is dry. 
  • Make sure not to over fry or brown the koyikaal, the taste changes drastically. 
  • Ps: Yes, I took the pain to print a page of an old newspaper page to bring that naadan effect😁


Do try this recipe and don't forget to share your experience/feedback with me here in the comments or feel free to send me a mail. Also, do tag me at #taystedit if you try out my recipes on Facebook, Instagram etc so that I can see when you make it. ♡♡♡♡

Succulent Shepherd's Pie


Ever heard of food made out of waste? Yes, you read that right! I am sure most of you are aware of this delicious dish that has its origin from Britain. But have you ever thought how this delicious dish got its name?

This was a dish prepared quite often by the shepherds or their wives for dinner using leftover food, as mashed potatoes were a staple and often wasted by the husbands and children of the family, the wives came up with this solution. How wonderful of an idea to not waste it and come up with a dish that is now a favorite worldwide and loved!

Shepherd's pie as the name suggests is a pie that was invented by Shepherd's in Britain in 1700's and later it was introduced in Ireland and other countries like France and India also adopted the dish too. In short, this is a dish that is equally loved among people all over the world, in different names.

The dish consists of two layers and occasionally three layers. The pie is usually prepared in a dutch oven or an ovenproof casserole dish, with the first layer consisting of minced lamb that is cooked with chopped onion, garlic and other spices with a dash of tomato paste and the base is thickened using a sprinkle of flour to bring the meat pie together and the second layer consists of a mashed potato layer, that is baked until golden and crisp. This dish is so comforting and flavorful. It keeps you full at the same time, it is super delicious. The same dish is also called cottage pie when the minced meat is that of beef. 

There are many variations of Shepherd's pie with different flavorings to suit one's taste buds. Another variation is also made in vegetarian using lentils and other pulses along with sweet potato that I had once come across that is of Jamie Oliver's recipe.

I had Shepherd's pie from a restaurant first time in my life, and then and there I knew I had to remake this at home and Oh boy does everyone love it here? It just vanishes in no time. Whenever I prepare this, I actually feel the warmth and love that the shepherd's wives put into the making of this dish. If you ask me why I love to make this dish? I prepare the meat base in my dutch oven that is oven proof and simply add on the mashed potatoes, so easy to prepare and fewer dishes to wash, also the oven does the rest of the work for you! Shepherd's pie done, in no time at all!


It isn't necessarily the same ingredients and the same flavor, it varies from houses to houses. So like I always say, I don't follow a particular recipe and this recipe is my own with adaptations from the authentic ones that I could find. Make yourself feel good by making some for your family and let me know how you liked it! Let's move on to the ingredients:

Ingredients:


Mashed Potatoes layer:
  • 3 large potatoes
  • 2 tbsp Butter
  • 1 tbsp Fresh or thick cream
  • 1 Egg yolk
  • 1 tsp Garlic powder
  • 2 tbsp Parmesan Cheese
  • 1 tsp black pepper powder
  • Salt as required

Meat Layer:
  • 2 Tbsp Extra Virgin Olive Oil
  • 1 tbsp Butter
  • 500 gm minced meat
  • 2 medium onions, finely chopped
  • 3 garlic cloves, minced
  • 1 carrot, chopped
  • 1/2 tsp black pepper powder
  • 1 tsp Cajun spice, freshly cracked(optional)
  • 1/2 tsp dried rosemary
  • A pinch of Oregano
  • 2 tbsp Flour
  • 1 cup frozen corn niblets
  • 1 cup frozen peas
  • 3 tbsp tomato paste
  • 2 tbsp Worcestershire Scauce (optional)
  • 1 cup beef broth
  • Salt, as required

Instructions:

  1. Preheat your oven at 200 °C. 
  2. Boil evenly chopped Potatoes in salted water for 10 minutes or until knife glides in easily.
  3. In an ovenproof skillet or dutch oven pour your olive oil, and add in your butter.
  4. Next add in your finely chopped onions and minced garlic. Sautee well.
  5. Next add in your chopped carrots and cook for 2 minutes. Add your minced meat and break using a strong spatula or a wooden spoon, add salt as required. Meanwhile also keep an eye on your potatoes and strain when done. 
  6. Add your spices like black pepper powder, cajun spice, rub the dried rosemary between your fingers and ad it to the skillet, finalyy add a pinch of oregano and mix everything well.
  7. Next add your tomato paste, worcestershire sauce and Sprinkle your flour. 
  8. Combine well and add in your beef stock water. 
  9. Drop in your frozen corn niblets and frozen green Peas. 
  10. To prepare your mashed potatoes layer, mash your boiled potatoes well, add in the butter, thick cram, grated parmesan cheese and 1 egg yolk. 
  11. Also add in black pepper powder and garlic powder. 
  12. Level your meat layer and add your mashed potatoes layer above the meat year and level it using a Spatula or use a fork to make a design according to your preference. 
  13. Bake for 25 minutes or until the mashed potatoes layer turn golden. 
  14. Enjoy! 


Notes:
  • You may use beef or lamb Mince for this pie. 
  • Increase or decrease the quantity of potatoes depending on the size of your skillet or Dutch oven. 
  • Try to use fresh Mince meat for better flavor. 

Do try this recipe and don't forget to share your experience/feedback with me here in the comments or feel free to send me a mail. Also, do tag me at #taystedit if you try out my recipes on Facebook, Instagram etc so that I can see when you make it. ♡♡♡♡
Newer Posts
Older Posts

Search This Blog

My name is Hasna Haneef, a mommy to a toddler, hailing from Thalassery, Kerala. Welcome to my humble abode on the Internet; wherein I share all my recipes and experiments. I am glad to have you on board!

TRENDING POSTS

  • Emirati Chebab
  • Chicken Steak with Creamy Mushroom Sauce
  • Kerala Style Squid Roast
  • Regag - Emirati Flat bread
  • Kerala Beef Fry/ Nadan beef dry fry
  • Junglee Chicken Sandwich

About Me

May peace be with you!

Welcome to my blog.

I am delighted to have you on board. My name is Hasna Haneef, a mommy to a toddler, hailing from Thalassery, Kerala. My homeplace being Dubai, as I am born and brought up here and I am very influenced by the lifestyle and the variety of authentic cuisines I get to try from here, which has made me try anything that comes across me
, click here →

Stay Connected!

Join Our Madness!

Join with Thousands Of Subscribers ! Get Our Latest Recipes Delivered to Your email Inbox!

Powered by follow.it
  • Home
  • About Me
  • Recipes

    • Main Course
    • Desserts
    • Snacks

    Uncategorized

    • Chicken
    • Meat
    • Vegetarian
    • Rice
    • Malabar Food
    • Baking
    • Breakfasts
    • Snacks
    • Drinks
    • Pasta
    • Fish
    • Soups
    • Desserts
  • Contact Me

Featured Post

Triple Chocolate Hazelnut Skillet Cookie

Blog Archive

  • ►  2025 (4)
    • ►  April (2)
    • ►  March (1)
    • ►  February (1)
  • ►  2024 (36)
    • ►  October (4)
    • ►  September (5)
    • ►  July (1)
    • ►  June (2)
    • ►  May (4)
    • ►  April (3)
    • ►  March (10)
    • ►  January (7)
  • ►  2023 (47)
    • ►  December (3)
    • ►  September (2)
    • ►  August (6)
    • ►  July (6)
    • ►  June (9)
    • ►  May (4)
    • ►  April (5)
    • ►  March (6)
    • ►  February (3)
    • ►  January (3)
  • ►  2022 (69)
    • ►  November (4)
    • ►  October (6)
    • ►  September (7)
    • ►  August (9)
    • ►  July (12)
    • ►  June (5)
    • ►  May (5)
    • ►  April (12)
    • ►  March (4)
    • ►  February (2)
    • ►  January (3)
  • ►  2021 (24)
    • ►  November (1)
    • ►  October (2)
    • ►  July (1)
    • ►  June (4)
    • ►  May (6)
    • ►  April (4)
    • ►  February (4)
    • ►  January (2)
  • ▼  2020 (82)
    • ►  December (5)
    • ►  November (6)
    • ►  October (4)
    • ►  September (2)
    • ►  August (5)
    • ►  July (10)
    • ▼  June (10)
      • Creamy Coconut Hariyali Chicken
      • Luscious Lotus Waffles
      • Creamy Kadai Mushroom Gnocchi
      • Gulab Jamun - Fool Proof recipe
      • Kerala Style Squid Roast
      • Easy Homemade Chicken Ramen
      • Mango Mousse Float
      • Thalassery Style Kozhi kaal/ Koyikaal
      • Succulent Shepherd's Pie
      • Fantastic Lollipop - Chicken Lollipop in Szechuan ...
    • ►  May (13)
    • ►  April (12)
    • ►  March (8)
    • ►  February (4)
    • ►  January (3)
  • ►  2019 (22)
    • ►  December (1)
    • ►  November (2)
    • ►  October (6)
    • ►  September (1)
    • ►  August (1)
    • ►  February (3)
    • ►  January (8)
  • ►  2018 (15)
    • ►  December (4)
    • ►  November (6)
    • ►  October (3)
    • ►  September (2)

Subscribe Us

Labels

Bake Biscuits Breakfast Brown rice Burger Cheese Chocolate Dal Egg Emirati Fish Iftar Indonesian Japanese Jeerakashala rice Kerala Keto Kuwait food Lunch Milk Mutton Thai food UAE food afghan cuisine arabic beef biryani bread burnt cheesecake cake chicken cream dessert dinner greek healthy indo chinese lamb malabar prawns pudding puffs quick dinner ideas recipe refreshing drink rice salad sandwich stir fry vegetables vegetarian veggies yemeni

Contact Form


POPULAR POSTS AND PAGES

Emirati Chebab

Emirati Chebab

June 01, 2023
Chicken Steak with Creamy Mushroom Sauce

Chicken Steak with Creamy Mushroom Sauce

November 05, 2018
Kerala Style Squid Roast

Kerala Style Squid Roast

June 18, 2020
Regag - Emirati Flat bread

Regag - Emirati Flat bread

December 02, 2020
Kerala Beef Fry/ Nadan beef dry fry

Kerala Beef Fry/ Nadan beef dry fry

October 08, 2019

Pages

  • Home
  • About Me
  • Privacy Policy
  • Contact Me

Copywrite © 2023 TermsFeed®. All rights reserved.

Created By Sora Templates | Distributed By Gooyaabi Templates

Back to top