Search This Blog

Taystit by Hasna

Food, Recipes, and Beyond

  • Home
  • About Me
  • Recipes
    • Main Course
    • Snacks
    • Desserts
  • Uncategorized
    • Chicken
    • Meat
    • Vegetarian
    • Rice
    • Malabar Food
    • Baking
    • Breakfasts
    • Snacks
    • Fish
    • Pasta
    • Drinks
    • Soups
    • Desserts
  • Contact Me

Nutella Oreo Mousse Shots


Desserts that require fewer ingredients and minimal time for setting are the best! Isn't it? Also when the dessert calls for basic ingredients like Nutella which is basic and common in most of our homes, then making desserts are the best. These are so good that you can whip these up in less than 15 minutes and requires only half an hour of setting. It is that simple.

Also for iftar when you may crave for some dessert, this is something that is so easy to prepare that it doesn't take up some much of your time and who doesn't love desserts for iftar? I usually make the same mousse with dark chocolate instead of Nutella. But who doesn't like some change? Also since almost everyone stores Nutella in every house for instant chocolate cravings, it is definitely the best substitute for chocolate in desserts. Basically, this is a 2 ingredient dessert, but I have included a layer of crushed Oreos that are mixed with butter for extra richness and better texture so that there is a base to the mousse, you may simply use Nutella and whipped cream. Also, I love how this tastes, as it is something in between ice cream and cake. Cannot express exactly how delicious these are because who would believe its a 2 ingredient dessert. Woop Woop!

This was one of the most requested recipes when I once posted a picture of a party hosted for hubsters friends. I had got many compliments saying that those shots looked no less than what you can find in 5-star buffets. I was overwhelmed with happiness because only I knew it took me just 15 minutes to whip these up. Finally, I am sharing the recipe with you guys, I am sure you will be praised too! And if you have kids I bet they will be the happiest.

I love this mousse recipe because you don't have to worry about raw eggs in your mousse and you get to enjoy every spoon with pure joy! If you want to satisfy your sweet tooth instantly, this is the recipe for you! Now go make these and relish these yummy nutella oreo mousse shots.

Ingredients:


  • 2 pack of 4 Oreo biscuits
  • 2 tbsp butter
  • 1 cup heavy cream
  • 3 heapful tbsp of nutella
  • Melted dark chocolate for garnishing/ designing

Instructions:


  1. Crush your oreo biscuits with butter and add them to your serving shots equally. Press them down gently using a spoon. Allow it to set for 5 minutes in the freezer.
  2. In a micrwavable bowl, melt 3 heapfull tbsp of Nutella for 30 seconds.
  3. And in a separate bowl whip 1 cup of whipping cream until soft peaks and slowly fold the melted nutella into the whipped cream until combined, dont forget to fold in slow strokes.
  4. Now pipe or pour the mousse mixture onto the oreo base that has been set in the fridge.
  5. Allow to set for at least 30 minutes and decorate using melted dark chocolate and place half of the oreo biscuits as a topping.
  6. Enjoy!


Do try this recipe and don't forget to share your experience/feedback with me here in the comments or feel free to send me a mail. Also, do tag me at #taystedit if you try out my recipes on Facebook, Instagram etc so that I can see when you make it. ♡♡♡♡

 Mango Pavlova with Coconut Cream


Eid Al Adha is right around the corner, and what better way to present a show stopper on your Eid dessert table with this marshmallowy Pavlova with contrasting and tropical flavors from the coconut, mangoes and cherries. The tropical flavor from coconut, the sweetness from the mangoes and sourness from the cherries marries so well together. I am not a big fan of Mango desserts, as Mango in itself is so delicious, but this one has my heart. Just perfectly delicious.
 
Egg whites are whipped to stiff peaks with the addition of sugar, which is then folded in with some lemon juice, corn flour, and vanilla essence. Plop the meringue mix over a baking sheet with a circle marking and bake it at the lowest temperature possible (140-150 deg c). If you are planning to make the pavlova for a party, prepare the Pavlova a day ahead, so that the Pavlova easily snaps out of the baking sheet after it cools down. The main step is to allow the Pavlova to sit in the oven even after the baking is done, for at least an hour or so. So that the texture of the Pavlova is retained, with a crispy outer cover and marshmallowy insides. 

For the coconut cream, I used Coconut milk powder (as I only had the milk powder in my pantry). You may use canned coconut cream, store it in the refrigerator and use it the next day, so that it is thick. I suggest to prepare the cream ahead of time and store it in the refrigerator, so that the cream thickens before scooping it over the pavlova. There is something about fresh cream that brings the essence to a dessert. I prefer fresh cream over any other creams in desserts. 

This dessert is definetly a must try, as there is no hard rule to follow in making shapes with the meringue. Play along and enjoy making this beautiful and deliciously refreshing dessert for your dessert table.


Ingredients : 

For the Pavlova:

  • 1/2 cup/ 4 Egg whites (must not contain egg yolks)
  • 1/2 cup - Fine sugar
  • 1 tsp lemon juice  
  • 1 1/2 tsp Corn Flour
  • 1 tsp Vanilla Essence
  • A pinch of salt

For the Coconut Cream:

  • 1/4 Cup of Coconut milk powder/ store bought Coconut Cream
  • 1-2 tbsp warm water
  • 100 gms Fresh Cream
  • 2- 3 tbsp Sweetened Condensed Milk 
  • 1 tbsp Dessicated Coconut

For the topping:

  • Mango, cubed and scooped
  • Sour Cherries
  • Mint leaves, for garnishing

Instructions :

  1. Make sure to wipe the bowl clean with lemon so that no grease remains in your mixing bowl, (if grease remains, the egg whites will not get whipped with stiff peaks).
  2. Draw a cirle of 7-8 inches using a plate etc on a baking sheet and fip the baking sheet.
  3. Beat the egg whites using a whisk attachment and once it starts to look frothy, sprinkle the sugar 1 tbsp at a time and whip the egg whites to stiff peaks.


  4. Next, add in your lemon juice, corn flour, vanilla and salt and fold the ingredients gently.
  5. Transfer the prepared meringue to your baking sheet, using a spatula, carve the meringue with the cirl drawn earlier. Make a slight depression/ using the spatula, swipe the spatula upwards to make markings all over the sides to make it look like a crown.

  6. In a preheated oven, of 140 deg C, allow the Pavlova to bake for around 1 hour and 15 minutes and allow the Pavlova to sit and cool in the oven itself, for at least an hour or preferably overnight. The Pavlova will have a slight change in shade of color and the outer will feel dry and hard, while the insides remain soft.
 

To make the Coconut cream:

  1. Mix the coconut milk powder with little warm water and make a paste. 
  2. Add the fresh cream to the coconut milk paste and fold in the fresh cream.
  3. Pour the condensed milk and add the Dessicated coconut and combine.
  4. Place in refrigerator and allow to cool and thicken before filling the meringue.
  5. Fill the Pavlova wuth the coconut cream, right before serving and top with cubed mangoes and place cherries. 
  6. Garnish with mint leaves and Enjoy!

Notes:

  • I have made my coconut cream here, you may use whipped cream if you like.
  • Make sure not to peep inside the oven while the oven bakes your meringue/pavlova as the resultant temperature differences can cause the pavlova to crack and notattain the perfect texture.
  • The baked pavlova can stay in the oven preferably overnight, so that it cools down completely.
  • You may store the baked meringue in an airtight container for a few days if not using immediately. 
  • Once you add in your whipped cream you have to consume immediately. 
  • If you want to store in the fridge, you may do so, but the meringue will not remain crisp and crunchy.


Do try this recipe and don't forget to share your experience/feedback with me here in the comments or feel free to send me a mail. Also, do tag me at #taystedit if you try out my recipes on Facebook, Instagram etc so that I can see when you make it. ♡♡♡♡

Gajar Ka Halwa Lotus Trifle


Gajar Ka Halwa is one of my favorite Indian desserts.. (after Gulab jamun🙈). This is a dessert that I have been preparing since a very young age, whenever I felt like having desserts. So experimenting a dessert with my favorite gajar ka Halwa toh Banta hai! 😝

Well, lotus spread and their biscuit are now my biggest obsession.. I try adding them in everything knowingly and unknowingly.. If I say that I am going to make some dessert the hubster keeps pestering me asking if I weren't adding lotus biscuits in it! Haha
So now you know! How much I love them. Contradictory to my liking of these yum lotus biscoff, I do not like to have them plain. I specifically like to have them in dessert. Not even with tea or coffee.

Now coming back to the invention of the trifle, like I said I had been craving carrot halwa since a while, so I made it and it's been quite a while now that this recipe has been sitting in my drafts! It was high time I put to some use for our Eid dessert ideas. I am that person who lovesss cooking and experimenting, but if you ask me what are you making for Eid or any other special occasion I just go blank as if I haven't cooked my entire life. Is it just me? Or is some one able to relate? Let me know in the comments below.
So, coming back to the recipe, I wanted my dessert to be nutty (meaning with nuts and tastes like it). For that I added 1/2 tsp of Almond extract, you may add vanilla extract or completely omit the step.

This trifle is basically layers of rich carrot halwa and luscious Lotus biscoff cream piped in and the chopped almonds in the carrot halwa plays with the textures making it even more scrumptious. This recipe is so easy and so versatile. Well, one thing I can assure you is that gajar ka Halwa and biscoff flavors go hand in hand.


Basically this is a dessert that I prepared when cravinga were at its highest. And that feeling of satisfaction is heavenly. This is dedicated to all lotus biscoff lovers. Advance Eid Mubarak wishes to everyone who is reading this. May Allah accept all our Qiyaam, Siyaam, our duaas and all our good deeds. May Allah make us amongst those who witness the next holy month of Ramadan. Taqqabal Allahu minna wa minkum. 🌹🎀🌹

Ingredients :

Gajar Ka Halwa 
  • 500 gms Indian Young carrots*, grated
  • 2 tbsp pure ghee
  • 2 cups milk (or 1 cup milk and 1/2 cup condensed milk)
  • 1/2 cup sugar
  • 1 tsp cardamom powder
  • 4 tbsp chopped almonds
  • 1 tbsp ghee (optional)

Lotus Cream:
  • 1 Sachet dream whip (whipped according to package instructions)
  • 1/2 tsp vanilla/ almond extract (optional)
  • 3 tbsp lotus biscoff spread
  • 3 tbsp thick cream or fresh cream

Instructions:

  1. In a heavy bottom pan bring the milk to a boil. Keep stirring in between, be careful not to burn it.
  2. In a large skillet add 2 tbsp ghee and sautee the carrots until the color changes and water is evaporated .
  3. Next pour half the milk and cook slowly, mixing in between and add rest and aloow to combine while mixing.
  4. Now add 1/2 cup sugar and mix well and add condensed milk if adding.*
  5. Finally when little moisture is left, add your cardamom powder and garnish with chopped almonds and your gajar ka halwa is ready. 
  6. If your halwa doesn't come off your pan or you want that extra richness finish off by adding 1 tbsp ghee.
  7. Now to prepare the lotus biscoff layer, whip the dream whip sachet according to package instructions and vanilla or almond essence (optional)
  8. Add to it add melted and cooled lotus biscoff spread and add in your thick/fresh cream.
  9. Fold everything gently.
  10. Your lotus biscoff cream layer is ready!
  11. Now time to aseemble. Add a few spoons of carrot halwa at the bottom of the desset glass/jar.
  12. Next pipe the prepared lotus cream. Repeat the process until done.
  13. Garnish with almonds and/ leftover gajar ka Halwa. 
Notes: *
  • I could not get Indian carrots, but using Indian carrots is the best.
  • You may use 2 cups whole fat milk or 1 cup milk and 1/2 cup condensed milk.
  • You may sautee your almonds in ghee and add.
  • If you do not like whipped cream, you may use 200 ml thick cream/fresh cream and add 3 tbsp powdered sugar and fold in the melted lotus spread. 


Do try this recipe and don't forget to share your experience/feedback with me here in the comments or feel free to send me a mail. Also, do tag me at #taystedit if you try out my recipes on Facebook, Instagram etc so that I can see when you make it. ♡♡♡♡

 Triple Chocolate Hazelnut Skillet Cookie


Aaaaah! Winters and warm desserts are a match made in heaven. Imagine yourself digging into a skillet full of chocolatey lava goodness with a hint of Hazelnut and Nutella. Oh myyy! I am literally drooling while typing this.. It's one of those quick desserts that require less or just one bowl to mix everything and drop the batter into the greased skillet/cast iron pan and bake. As simple as that. Basically a giant monster cookie with no shaping into balls or freezing required! 😍 😋


Also if you think that you cannot try this recipe just because you don't have 3 different chocolates, I have a solution because the Triple Chocolate Hazelnut Skillet Cookie basically comprises of Dark chocolate, semi choco chips/ milk chocolate and the hidden hero.... NUTELLAAAA... Yeaaahh you guessed that right! So if you only have Nutella and any one chocolate chips you are all ready to bake! Also if you do not have a skillet, don't fret! A pizza pan or any small flat pan works just fine! 

This skillet cookie is so delicious and flavorful with a crunch of roasted Hazelnuts. Just make sure you do not overbake the cookie.* The warm gooey chocolatey cookie with ice cream is just mesmerizing.. Although you might think that skillet cookies are only good when they are warm, nope! It was so much better the next day. The flavors were so intense that tbh I loved it so much more the next day (that is if you have any left). Here it was just me and Huda to have it warm.. So there was a lot left and the next day it just vanished into thin air.

Now that I have made you drool enough let's get right into the ingredients! 😁🤤


Ingredients :

  • 100 gm softened butter
  • 1/4 cup oil 
  • 3/4 cup packed brown sugar
  • 1/4 cup granulated white sugar
  • 2 large eggs
  • 1 tbsp vanilla extract 
  • 2 cups all purpose flour/cake flour
  • 1 and 1/4 tsp baking soda
  • 1/2 cup semi sweet chocolate chips 
  • 1/2 cup dark chocolate, chopped
  • 1/2 cup Nutella (1/4+1/4 cups) 
  • 1/2 cup roasted hazelnuts
  • Salt, a pinch 

Instructions :

  1. Preheat your oven to 180°C. 
  2. Using an electric mixer or a stand mixer, combine butter, brown sugar and white granulated sugar on med-low speed. 
  3. Next add in your eggs and vanilla extract and whisk well. 
  4. Next using a sieve, drop in your bowl( that contains your creamed butter) all your dry ingredients and combine using a spatula.
  5. Next add in your chocolates, 1/4 cup of the reserved Nutella and roasted Hazelnut and combine well. 
  6. Spray your cast iron with non stick spray and dump the cookie dough mixture into the 10-12 inch cast iron skillet and even it out gently using a spatula. Finally drop in teaspoons of Nutella and using a Toothpick or a skewer make swirls. 
  7. Place in oven and bake for around 40 minutes (keep an eye after 35 minutes). 
  8. Remove from the oven and serve warm with vanilla ice cream.
  9. Bon appétit! 😋😋


Notes-
*When you touch the cookie, the edges should be cooked and hard the middle should have a sturdy surface yet a slightly Goey feel inside. 


Do try this recipe and don't forget to share your experience/feedback with me here in the comments or feel free to send me a mail. Also, do tag me at #taystedit if you try out my recipes on Facebook, Instagram etc so that I can see when you make it. ♡♡♡♡

Warm and Sticky toffee pudding


If not everyday, Ramadan is when you get to find a whole lot of dates at home. So why not utilize it? I have been wanting to share this recipe since a while now. This is bomb.com when it comes to warm desserts! Really.. I just can't get over it.

This pudding was first introduced to me when I was at an iftar party at my brother's office at world trade centre. They had showcased many dishes like the stuffed grapevine leaves, kibbeh (which I will soon share the recipe), saffron rice, arabic harees, dumplings, some crazy Flavored macarons! All so tempting 😍 Finally in the dessert section there was muhallabia , like certainly, but this sizzling, warm sticky toffe pudding caught my eyes and my taste buds. This was kind blowing, how truly delicious it TASTED. I instantly knew there was dates in it. The amalgamation of butter with dates was next level. So I had to try this from home! (If you know me, you know! 😅)

Well, prepping the 1st time for sticky toffee pudding wasn't easy, as I thought pitting dates was a pain, especially if they are quite sticky. But as you make it you realize, that's the fun part! After mixing all the ingredients, I poured the batter to a Parchment lined Loaf tray and let it do the magic while I prepared the toffee/sauce. The house was smelling so good with the butter and dates getting baked in the oven, it smelled fascinating. I was even more in joy while preparing the Toffee sauce. The Toffee sauce is what takes the pudding to a next level👌👌😋


Let me tell you, if you love dates, you are going to live this pudding. I also use this as a base for desserts, as this is super easy and flavorful. One such dessert is the Kulfi Toffee Mousse pudding that is on my YouTube. Will be posting the recipe of the mousse pudding here, in Sha Allah! As written recipe requests are coming in for the same❤️

Well, after baking them I poured the sauce over it and gave some to my mom and sister. My sister came asking me what is this heaven even? What more of a remark does one need! It truly tastes like heaven; bliss! 

Now let's get to the recipe! 

Ingredients :


For the cake/pudding:
  • 150 gms dates, pitted 
  • 1 cup hot water
  • 3/4 baking powder 
  • 3/4 baking soda
  • 1 egg
  • 3/4 Cup All purpose flour 
  • 80 gms softened butter
  • 1/4 brown sugar

For the toffee sauce:
  • 50 gms Unsalted butter
  • 1/2 cup brown sugar
  • 3/4 cup heavy cream
  • 1/2 tsp vanilla extract 

Instructions :


For pudding :
  1. Preheat your oven to 180°C. 
  2. In a heat proof bowl, add your pitted dates, baking soda and pour in the hot water. 
  3. Smash the soaked dates using a potato masher. 
  4. Next, in a separate bowl, cream butter and brown sugar using an electric mixer. 
  5. Add the egg and beat until incorporated.
  6. Add the flour and Sprinkle the baking powder and beat lightly until combined. 
  7. Next add your mashed dates to the butter-egg mix. And fold until well combined.
  8. I like to add a pinch of salt to balance the sweetness. 
  9. Pour the batter to a pre lined Loaf pan with Parchment paper. 
  10. Bake for 40-45 minutes or until skewer comes out clean. 

For Toffee sauce:
  1. In a heavy bottom sauce pan, add brown sugar, butter, heavy cream, and allow to boil. 
  2. Do not mix continuously, give a stir, or swirl the pan and let it simmer for 2 minutes, switch off the flame. And the toffee sauce is done! 

Serve the pudding warm, pour the warm Toffee sauce and enjoy! 

Notes:
  • Have it warm for extra yummy points! 
  • This recipe can be doubled to make in a cake pan, the initial recipe which I followed was that of a cake pan. I wanted to make only for two, so halved the quantities and made in a Loaf pan. 
  • You can bake in individual moulds too, just that pour 2/3 of the way up and bake for 25 minutes or until skewer comes out clean. 


Do try this recipe and don't forget to share 
your experience/feedback with me here in the comments or feel free to send me a mail. Also, do tag me at #taystedit if you try out my recipes on Facebook, Instagram etc so that I can see when you make it. ♡♡♡♡


 Deconstructed Mango Falooda with Semiya Payasam


It's the mango season and Eid Al Adha is right around the corner, what better way to celebrate it with this innovative falooda. This deconstructed mango falooda is my mastermind, as I love falooda, but mixing everything always makes a mess, that's how this deconstructed falooda was born. I was craving for semiya payasam, so thought why not have two desserts in one and oh boy! The chilled payasam and falooda was exactly what I wanted to beat the heat.

Deconstructed Mango Falooda with Semiya Payasam is a must try!! Make this, flip it and let the action unfold, your family will love this!


Ingredients: (one serving)

  • 1 tbsp Sabja seeds
  • 3 tbsp Water 
  • 2 tbsp Ghee
  • 2 tbsp Cashews 
  • 1/4 cup Pakistani Vermicelli 
  • 3/4 cup Milk
  • 1/4 Condensed Milk
  • A pinch of Cardamom powder
  • A pinch of Salt
  • Pulp of 1 Mango 
  • Condensed Milk (if required, for added sweetness) 
  • Pomegranate seeds, for garnish 
  • Ice Cream as topping


Instructions: 

  1. Soak the Sabja seeds in water and set aside. 
  2. Roast the cashews in ghee and transfer to a bowl to cool and roughly chop the roasted cashews and set aside.
  3. In the same pan with ghee, break the Pakistani vermicelli and roast them in the ghee for a minute and pour the milk and cook the vermicelli in milk. Add more milk if required. 
  4. Finish off with the condensed milk, cardamom powder and a pinch of salt. 
  5. In a glass, layer the falooda by adding the Semiya Payasam as the first layer, next add the soaked sabja seeds, mango chunks, mango pulp, and repeat the layers until the glass is full, allow the falooda to chill. 
  6. Just before serving, for ease to release the falooda, simply dip the glass in warm water.
  7. Now take a pasta bowl, invert the bowl of the glass and flip, now slowly release the glasss upward and you now have deconstructed mango falooda. 
  8. Place a scoop of ice cream on top and garnish with mango chunks, pomegranate seeds, chopped ghee roasted cashews and mint leaves (optional). 
  9. Enjoy!! 


Do try this recipe and don't forget to share your experience/feedback with me here in the comments or feel free to send me a mail. Also, do tag me at #taystedit if you try out my recipes on Facebook, Instagram etc so that I can see when you make it. ♡♡♡♡

Classic Bannoffee Pie


I made this yummilicious dessert last week to celebrate my win for a dessert competition where I attained 2nd prize from among 2000 entries and 30 contestants. Bannoffee pie is a dessert I like to make when I have some good just ripped bananas in my fruit basket. 

I always undermine the flavor of fresh banana fruit in dessert, somehow I cannot stand it. But this dessert and Magnolia Bakery's Banana Pudding are my favorites when it comes to bananas. 


The ingredients are basic and the method is simple that even kids can prepare this no Bake pie! The Toffee in Bannoffee is what gives the dessert the special flavor. The first layer consists of a crushed biscuits layer with melted butter, then a layer of dulce de Leche (cooked Condensed milk) is spread, after which sliced bananas are placed in a sequence and a layer of whipped cream is smothered, and finally garnished with grated chocolate or dusted with cocoa powder. 

This pie is done in no time as it doesn't require any cooking. My lil one and siblings always wipe the pie dish clean whenever I prepare Bannoffee pie. The more the banooffe pie sits in the fridge, the more delicious it becomes (but I never get a chance to do that). 


I am always a fan of light desserts and Bannoffee pie is one such dessert. It's a treat for everyone, even if you dislike bananas, definitely give this dessert a try, I am sure you will love it! 


Let's get started! 


Ingredients ;

1 can Condensed milk (cooked) *
2 bananas
10-12 Mcvities Digestive Biscuits, crushed
2 tbsp Butter, melted
200 ml whipped cream, unsweetened 
1 tsp Vanilla Essence/ extract
4 tbsp Icing sugar 
Chocolate, grated

Instructions:

Dulce de leche:

  1. Remove the label of the sweetened Condensed milk and place it in a pressure cooker with water that fills half the pressure cooker. Cook for 1 whistle and allow to simmer on low at least for 20 minutes. 
  2. Allow the cooker to release its pressure on its own and allow the pressure cooker and its contents to cool down at leat for 4 hours. **

Bannoffee Pie:

  1. In a food processor, crush the biscuits with melted butter or in a zip lock bag pound the biscuits using a rolling pin. 
  2. Now transfer the contents to a loose bottom pie dish and level using the back of a measuring cup. 
  3. Allow to refrigerate for at least 10 minutes. 
  4. Now whip the cream in a stand mixer or a hand held mixer, add in your vanilla essence and gradually add in your Icing sugar 1 tbsp at a time. 
  5. Allow to whip well. Do not over beat. 
  6. Now beat the dulce de Leche/Toffee in a bowl using a fork and spread the Toffee over the crushed biscuit layer. 
  7. Now layer the sliced bananas in a sequence (like in the image). 

  8. Spread the whipped cream, and level it using a spatula.

  9. Finally grate the chocolate as garnish or dust some cocoa powder. 
  10. Place in the refrigerator, allow to set. 


Notes :

  • *The steps to prepare dulce de Leche has been explained above. 
  • ** I like to prepare the dulce de Leche the night before 
  • I used a loose bottom pie pan, you may use a cheesecake pan too. 


Do try this recipe and don't forget to share your experience/feedback with me here in the comments or feel free to send me a mail. Also, do tag me at #taystedit if you try out my recipes on Facebook, Instagram etc so that I can see when you make it. ♡♡♡♡

Milky Cheese Cake


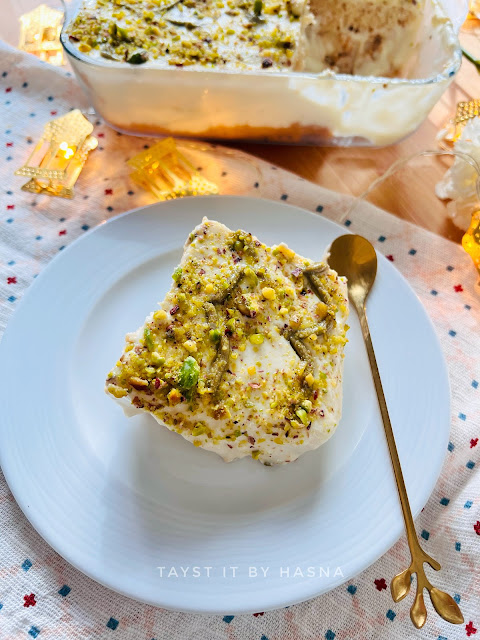
Eid Al Adha is in very few days and I came up with this milk cake and cheese cake two in one dessert! If you don’t want to make the cake from scratch you may use store bought vanilla sponge cake. If I have the time I like to make my cake from scratch or else if I am short on time, I resort to store-bought cakes for my desserts.

You may play around with the flavors! This is a basic milk cake flavor but definitely a delicious one! 

I finally garnished it with pistachios and pistachio cream. This is one very easy dessert to try. Hope you guys give this the set a drive.

Ingredients:

  • 4 eggs
  • 1 cup sugar
  • 1/2 cup water
  • 1/2 cup vegetable oil
  • 1 tsp Vanilla Essence 
  • 1 tsp baking powder 
  • 2 cups flour
  • Pistachios, for garnishing

Soaking milk:

  • 300 ml full fat milk
  • 200 ml Evaporated milk

Cheesecake layer:

  • 200 gms Cream Cheese
  • 500 ml Milk
  • 1 can condensed milk
  • 3 tbsp Corn Flour
  • 1 pack Cream

Instructions:

 
  1. To prepare the cake base:
  2. In a bowl, cracked eggs and add in sugar and beat well. Next add in the liquid ingredients like water, vegetable oil, and Vanilla essence.
  3. In another bowl, add the flour and baking powder and mix well with the help of a whisk.
  4. Now slowly little by little, add the flour to the whisked eggs, keep in mind to add flour, makes little at a time and combine the flour mix without any lumps.
  5. Preheat the oven to 180°C into a baking tray, line it with a parchment paper or a baking paper, pour the cake mix over the baking paper.
  6. Allow to bake for around 35 minute until skewer inserted in the middle comes out clean. 

  7. Allow the cake to cool on a cooling rack.
  8. Once the cake has cooled down, remove the parchment paper, and cut the cake into two layers.
  9. Into a saucepan add milk, cornflour and please on the gas stove and keep whisking and combine well without any lumps.

  10. Once the mixture starts thickening, remove the saucepan from the flame and set aside to cool.
  11. In a bowl, add cream cheese, cream and condensed milk. To this add the earlier prepared milk mixture.
  12. Please one layer of the cake slice on the pudding tray and drench the cake slice with evaporated milk or milk.
  13. Now pour the milk and cream cheese custard mix over the cake layer and sprinkle pistachios.

  14. Repeat the same for the other layer of cake and cream cheese too.
  15. Allowed to sit in the refrigerator for 3 to 4 hours.


Do try this recipe and don't forget to share your experience/feedback with me here in the comments or feel free to send me a mail. Also, do tag me at #taystedit if you try out my recipes on Facebook, Instagram etc so that I can see when you make it. ♡♡♡♡

Arrowroot Custard Milkshake


Arrowroot is a root vegetable that is known for its easy digestive properties and fully packed with protein, Fibre and healthy fats. Arrowroot does not have a distinct flavor profile, it is usually used as a thickening agent in desserts, soups, sauces, etc due to its thickening properties.

I always like to use arrowroot powder instead of corn flour slurry in most of my dishes, as arrowroot has more health benefits. So I thought of trying out a milkshake using arrowroot (koova). Arrowroot drink is usually prepared as a hot drink, here I demonstrate a Milkshake version. Arrowroot slurry is prepared and poured to boiled milk, which is constantly mixed till you get a thick consistency. Allow to cool the thick Custard which is prepared. Next blend the arrowroot Custard with chilled milk and coconut milk and set aside. Sabudana pearls are added as the first layer of the Milkshake for added texture, this step is optional. I added soaked basil seeds/ tuk malenga seeds too, as it has good health benefits, high in iron etc. 
For added flavor I used a pinch of cardamom powder. You may use vanilla essence or any other flavoring agent, as per your liking. Finally topped off with a scoop of vanilla ice cream and garnished with toasted shredded coconut.

This Custard milkshake is going to make you feel refreshed for iftar. I tell you! It had a feel of Elaaner (tender coconut) Milkshake flavor to it.. definitely a super hit here!

Let's prepare this easy and refreshing arrowroot Custard milkshake,

Ingredients:


  • 1 tbsp basil seeds, soaked in water
  • 2 tbsp Arrowroot powder, made into a slurry with some water
  • 1/2 cup milk
  • 1/2 cup coconut milk (store bought/ freshly squeezed)
  • Cardamom powder, a pinch
  • 4 - 5 tbsp Sugar
  • A scoop of Vanilla Ice cream
  • 1 tsp of toasted shredded coconut (for garnishing, optional)
  • 2 tbsp Sabudana pearls (soaked in water at least for 3-4 hours), optional 

Instructions:

  1. Boil and drain the sabudana pearls that has been soaked and set aside.
  2. Into a saucepan, add in your arrowroot slurry, milk, sugar and cardamom powder and bring to a boil, whilst stirring constantly, so that no lumps form.
  3. Set the arrowroot custard aside to cool.
  4. Blend the arrowroot Custard with coconut milk and chilled milk.
  5. Into a tall glass, drop your boiled and cooled sabudana pearls, then pour some of your arrowroot Custard milkshake, drop in some soaked basil seeds, and pour your milkshake, finally drop 1 scoop of vanilla ice cream and pour in your Custard Milkshake.
  6. Finally garnish with toasted, sweetened shredded coconut and enjoy!


Notes: 
You may add frozen milk cubes and pulse for added chillness (don’t know if there is even a word like that) 😁 

Do try this recipe and don't forget to share your experience/feedback with me here in the comments or feel free to send me a mail. Also, do tag me at #taystedit if you try out my recipes on Facebook, Instagram etc so that I can see when you make it. ♡♡♡♡

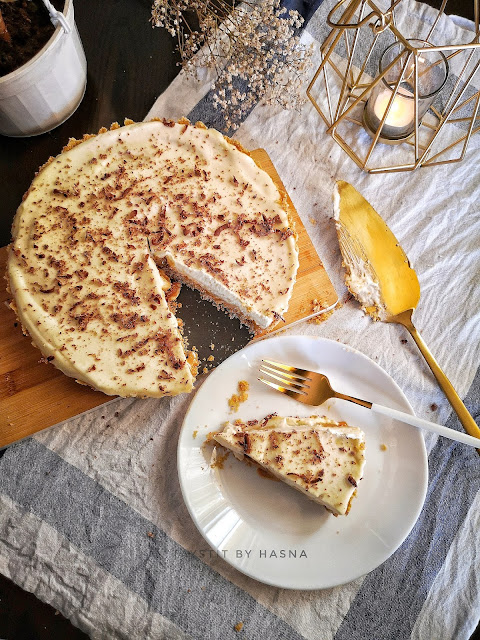
No Bake Blueberry Cheesecake


Good afternoon folks! I have been craving for cheesecakes so bad in the recent times that I just bought half a dozen tubs of cream cheese yesterday. #sorrynotsorry I just can't get over the luscious and soft texture that has to a cheesecake. My favorite has always been a no bake Blueberry cheesecake. I always felt that blueberries had no particular taste until I tried the Blueberry cheesecake. The Blueberry Compote that accompanies the creamy cheesecake is just out-of-the-world good.

No other flavors have ever made an impact as much as Blueberry has given to a no bake cheese cake. Last eid, for Eid Al Fitr, I happened to make this yummy dessert for the Eid Table, ever since I have been receiving a lot of requests on how to make Blueberry cheesecake. So I thought why not post it now as you guys could try it too, as Eid al Adha is around the corner. It is the easiest dessert you could make and it is even better than any puddings. My mom detests anything chocolate Flavored, and Blueberry cheesecake is among her most favorites. And I love it when she happily indulges when I pass a plate of this yummy goodness.


I am super excited to share my no fail - no bake Blueberry Cheesecake. Last Eid as I began the preparations for the cheesecake I realized I had no heavy cream in the refrigerator. So since I had some dream whip ( Whipping cream sachets) with me, I thought I had to give it a go. Maybe a flop or win-win. So as I began Whipping up some whipped cream in despair and hopelessness to my wonder and joy, the cheesecake turned out so good that no one would make out the difference from the real deal.

Usually commercial no bake cheesecake contain gelatin, but I detest gelatin as I have always heard that gelatin is not something that is good for the body, well, I like to indulge in my desserts without any guilt. So the next option is China grass or agar agar (it is said to be healthy and has many health benefits) . Though it doesn't come out as perfect and has a slight grainy feel to it, it does the job of setting well. I personally do not like to add any of these setting agents if I were preparing it for us. So it is upto you to decide if you want gelatin in your cheesecake or agar agar.

A no-bake Blueberry cheesecake basically consists of a base layer of crushed biscuits with butter and set in the freezer, while the cheesecake layer is prepared and poured over the biscuit layer. And set in the fridge for at least 3-4 hours or allowing it to sit to set overnight is the best. And finally a thin layer of Blueberry Compote is smothered all over the cheesecake, as easy as that. Without further a do, let's prepare this droolsome dessert.


Ingredients :


  • 10-12 Mcvities Digestive biscuits
  • 100 gms butter
  • 2 cups Whipping cream /1 dreamwhip sachet
  • 200 gms pick cream cheese
  • 10 gms China grass/ Gelatin (*optional - prepare according to package instructions) 
  • 1 cup Icing sugar /1/2 cup if using dream whip*
  • 1 tsp Vanilla Essence 

Blueberry Compote 

  • 125 gms Blueberries
  • 1/4 cup water
  • 1/4 cup Icing sugar
  • 2 tsp corn flour
  • 1 tsp Vanilla Essence 
  • A squeeze of lemon juice 

Instructions :


  1. Crush the biscuits in a food processor until you have even fine crumbs. 
  2. Next pour the melted butter and pulse until incorporated. 
  3. Next into a springform pan, dump the biscuit mixture and press down using the help a glass and make sure it firmly packed. 

  4. Place in freezer while we prepare the rest of the cheesecake. 
  5. Beat Whipping cream in a bowl* and set aside.  
  6. In another bowl combine the cream cheese, powdered sugar and vanilla essence.
  7. Combine the whipped cream and the cream cheese mixture by slowly folding in. 
  8. In a sauce pan, prepare the China grass / gelatin and when slightly cooled add to the cream cheese mixture and fold everything well *
  9. Pour the cream cheese mixture over the prepared and set crust and allow to refrigerate for 3-4 hours or overnight. 

Blueberry compote:

  • In a pan, add your blueberries, sugar, lemon juice and water and allow to come to a boil. 
  • Add in your corn flour slurry (corn flour mixed in 1 tbsp water) and combine well immediately or else it will form lumps. 
  • Switch off the flame, add vanilla essence and give a final mix. The Compote thickens as it sits. 

Finally pour in the prepared Compote right before serving/ to slightly set cheesecake. 
Enjoy your super easy and delicious comfort dessert ever! 


Notes :

  • I prepared my cheesecake using 1 cup Whipped cream, as I ran out of it. And used 1 cup Icing Sugar for sweetness in the cream cheese. You may add more or less Icing sugar.
  • If using dream whip, prepare according to package instructions.
  • Do not keep the China grass or gelatin to cool down for too long, it hardens and sets easily at room temperature. 

Do try this recipe and don't forget to share your experience/feedback with me here in the comments or feel free to send me a mail. Also, do tag me at #taystedit if you try out my recipes on Facebook, Instagram etc so that I can see when you make it. ♡♡♡♡
Older Posts

Search This Blog

My name is Hasna Haneef, a mommy to a toddler, hailing from Thalassery, Kerala. Welcome to my humble abode on the Internet; wherein I share all my recipes and experiments. I am glad to have you on board!

TRENDING POSTS

  • Kerala Style Squid Roast
  • Chicken Steak with Creamy Mushroom Sauce
  • Emirati Chebab
  • Regag - Emirati Flat bread
  • Copy Cat Caesars Mini Pizza
  • Kerala Beef Fry/ Nadan beef dry fry

About Me

May peace be with you!

Welcome to my blog.

I am delighted to have you on board. My name is Hasna Haneef, a mommy to a toddler, hailing from Thalassery, Kerala. My homeplace being Dubai, as I am born and brought up here and I am very influenced by the lifestyle and the variety of authentic cuisines I get to try from here, which has made me try anything that comes across me
, click here →

Stay Connected!

Join Our Madness!

Join with Thousands Of Subscribers ! Get Our Latest Recipes Delivered to Your email Inbox!

Powered by follow.it
  • Home
  • About Me
  • Recipes

    • Main Course
    • Desserts
    • Snacks

    Uncategorized

    • Chicken
    • Meat
    • Vegetarian
    • Rice
    • Malabar Food
    • Baking
    • Breakfasts
    • Snacks
    • Drinks
    • Pasta
    • Fish
    • Soups
    • Desserts
  • Contact Me

Featured Post

Triple Chocolate Hazelnut Skillet Cookie

Blog Archive

  • ▼  2025 (4)
    • ▼  April (2)
      • 1 minute Chocolate Mug Cake
      • Grilled Cheese California Burrito
    • ►  March (1)
    • ►  February (1)
  • ►  2024 (36)
    • ►  October (4)
    • ►  September (5)
    • ►  July (1)
    • ►  June (2)
    • ►  May (4)
    • ►  April (3)
    • ►  March (10)
    • ►  January (7)
  • ►  2023 (47)
    • ►  December (3)
    • ►  September (2)
    • ►  August (6)
    • ►  July (6)
    • ►  June (9)
    • ►  May (4)
    • ►  April (5)
    • ►  March (6)
    • ►  February (3)
    • ►  January (3)
  • ►  2022 (69)
    • ►  November (4)
    • ►  October (6)
    • ►  September (7)
    • ►  August (9)
    • ►  July (12)
    • ►  June (5)
    • ►  May (5)
    • ►  April (12)
    • ►  March (4)
    • ►  February (2)
    • ►  January (3)
  • ►  2021 (24)
    • ►  November (1)
    • ►  October (2)
    • ►  July (1)
    • ►  June (4)
    • ►  May (6)
    • ►  April (4)
    • ►  February (4)
    • ►  January (2)
  • ►  2020 (82)
    • ►  December (5)
    • ►  November (6)
    • ►  October (4)
    • ►  September (2)
    • ►  August (5)
    • ►  July (10)
    • ►  June (10)
    • ►  May (13)
    • ►  April (12)
    • ►  March (8)
    • ►  February (4)
    • ►  January (3)
  • ►  2019 (22)
    • ►  December (1)
    • ►  November (2)
    • ►  October (6)
    • ►  September (1)
    • ►  August (1)
    • ►  February (3)
    • ►  January (8)
  • ►  2018 (15)
    • ►  December (4)
    • ►  November (6)
    • ►  October (3)
    • ►  September (2)

Subscribe Us

Labels

Bake Biscuits Breakfast Brown rice Burger Cheese Chocolate Dal Egg Emirati Fish Iftar Indonesian Japanese Jeerakashala rice Kerala Keto Kuwait food Lunch Milk Mutton Thai food UAE food afghan cuisine arabic beef biryani bread burnt cheesecake cake chicken cream dessert dinner greek healthy indo chinese lamb malabar prawns pudding puffs quick dinner ideas recipe refreshing drink rice salad sandwich stir fry vegetables vegetarian veggies yemeni

Contact Form


POPULAR POSTS AND PAGES

Kerala Style Squid Roast

Kerala Style Squid Roast

June 18, 2020
Chicken Steak with Creamy Mushroom Sauce

Chicken Steak with Creamy Mushroom Sauce

November 05, 2018
Emirati Chebab

Emirati Chebab

June 01, 2023
Regag - Emirati Flat bread

Regag - Emirati Flat bread

December 02, 2020
Copy Cat Caesars Mini Pizza

Copy Cat Caesars Mini Pizza

March 12, 2024

Pages

  • Home
  • About Me
  • Privacy Policy
  • Contact Me

Copywrite © 2023 TermsFeed®. All rights reserved.

Created By Sora Templates | Distributed By Gooyaabi Templates

Back to top