Search This Blog

Taystit by Hasna

Food, Recipes, and Beyond

  • Home
  • About Me
  • Recipes
    • Main Course
    • Snacks
    • Desserts
  • Uncategorized
    • Chicken
    • Meat
    • Vegetarian
    • Rice
    • Malabar Food
    • Baking
    • Breakfasts
    • Snacks
    • Fish
    • Pasta
    • Drinks
    • Soups
    • Desserts
  • Contact Me

1 minute Chocolate Mug Cake 


Ever since I posted myself enjoying some ‘Me Time’ Mug cake, so many of you had requested the recipe for it! It’s the most decadent mug cake you’ll ever have!! So here you go..

Ingredients:


  • 1 medium Egg 
  • 1 tbsp Vegetable Oil
  • 1 tbsp Milk
  • 1/2 tsp Vanilla Extract
  • Coffee powder/ granules, a pinch
  • 3 tbsp All purpose flour, not heaped
  • 1 tbsp Cocoa powder
  • 1 tbsp Sugar
  • 1/2 tsp Baking powder
  • Chocolate chunks/ chips 

Instructions: 


Mix everything and make a homogeneous mixture and drop in your chocolate chunks and microwave on medium setting for not more than 1 minute 10 seconds.

Do try this recipe and don't forget to share your experience/feedback with me here in the comments or feel free to send me a mail. Also, do tag me at #taystedit if you try out my recipes on Facebook, Instagram etc so that I can see when you make it. ♡♡♡♡


Grilled Cheese California Burrito 


I know I haven’t been able to be active this Ramadan but now that the Eid is over, I am slowly getting back to routine, Alhamdulilah. 

The grilled cheese California Burrito is a must try! The juicy beef steaks topped with sour cream and salsa and that crispy cheesy exterior with all those flavors bursting in your mouth, it’s soo good! The salsa is made by grilling veggies like onion, tomatoes and chillies and ground to a paste, Such a flavor bomb!! 😋

The beef steaks does not have to be cooked for too long, or else you won’t get the juicy beef you are looking for..you can use any steaks of your choice,..make sure you have the burrito warm. 

Ingredients: 

  • 1 Onion 
  • 2 Tomatoes 
  • 1 Green chilli (if green chilli is very spicy)
  • Salt 
  • Pepper
  • Olive oil

Beef Marinade:

  • 3 garlic cloves
  • Handful of coriander leaves 
  • 1 tsp Soy sauce 
  • 1 tsp Worcestershire sauce (optional)
  • 1 tsp honey 
  • Hand of a lemon squeezed 
  • 1 tbsp Extra virgin olive oil 
  • 1/2 tsp Onion powder
  • 1/2 tsp Garlic powder
  • 1/2 tsp Paprika
  • 1/4 tsp Cayenne pepper (optional)

Other ingredients:

  • Avocado, ripe
  • Lemon juice 
  • Salt
  • Tortilla 
  • Mozzarella cheese, shredded 
  • Sour cream 
  • Cheese slices (or any cheese like cheddar, Parmesan, mozzarella) 

Instructions:

  1. In an oven tray, grill the veggies at 180 for 25-30 minutes or until the veggies change color and is char grilled. 

  2. Add the veggies to a food processor and blend until smooth.
  3. Next grind all the ingredients well under beef marinade and marinate the beef.

  4. In a hot cast iron skillet, drop in a piece of butter and grill the beef steaks 5 minutes on each side and not more than that. 

  5. Transfer to a chopping board and allow to rest for 5 minutes and chop ‘em up.

  6. Next, warm up a tortilla, add mashed avocados, drizzle some lemon juice and salt, next add the chopped steak, and top it with the salsa prepared earlier and sour cream cream. Finally add some shredded mozzarella / cheddar cheese and tightly fold the tortilla into a log. 

  7. Now take a pan and put a thin layer of cheese and place your burrito until the cheese grills and sticks onto the burrito for that crispy exterior. Enjoy warm! 


Do try this recipe and don't forget to share your experience/feedback with me here in the comments or feel free to send me a mail. Also, do tag me at #taystedit if you try out my recipes on Facebook, Instagram etc so that I can see when you make it. ♡♡♡♡

Korean Air Fried Chicken 
Bao Buns 


This Ramadan I am trying to go oil free and that doesn’t mean I will be harsh on myself, when situation persists, like being invited for iftar parties #iykyk😅

Bao buns or also known as “wrapped” buns are the easiest to prepare, the softest and fluffiest. There are many versions of this easy Chinese bun, where you shallow fry after steaming and variation in shapes. The most traditional shape being a spherical shape with tiny pleats on top. Also you can stuff it your choice of fillings, I like the classic Korean fried chicken, as I am going oil free this Ramadan tried air frying the chicken and it turned out good, you may also oil fry the chicken for better texture of course! 😀


Along with the Korean Fried Chicken I also added julienned veggies like cucumber, and purple cabbage, you may add julienned carrots too. 

Ingredients:

Bao bun:

  • 2 1/2 cups All purpose flour 
  • 3/4 cup Milk
  • 1 tbsp Yeast
  • 1 tbsp Sugar
  • 1 tbsp Butter / 2 tbsp Vegetable oil
  • 1 tsp Baking powder
  • Salt 

Korean Fried Chicken 

  • 200 gms Bonless Chicken
  • Salt
  • 1/2 tsp Pepper powder
  • 3/4 cup all purpose Flour
  • 2 tbsp Gochujang Korean Chilli paste *
  • 1 tsp honey
  • 1/2 tsp soy sauce
  • 1 tsp Vinegar
  • 2-3 Garlic cloves, finely chopped
  • 1 tsp Ketchup
  • Cucumber and Purple Cabbage Julienned 
  • Sesame seeds

Instructions:

  1. In a beaker, combine slightly warm milk add sugar and yeast, to which add the butter and give it a mix and set aside. 
  2. Next, in another bowl all the dry ingredients like the flour, baking powder and salt. Now pour the wet mix to the dry ingredients and combine well to form a smooth dough. Cover and set aside to rest the dough for 60-90 minutes or until doubled in size. 

  3. Scrape the dough onto your clean work surface and knead well. Make equal sized balls and flatten them into a 4 inch oval shape. Alternatively, you may flatten the whole dough and cut into equal shapes bun using a cookie cutter.
  4. Slightly brush half of the inside of the bun and fold into half. (Brushing with oil help to open the bun easily once steamed)
  5. Transfer the bun onto a square piece of baking paper and to make sure you have a smooth surface on your bun, slightly roll over the bun using a roller. And place them onto a tray and do the rest of it similarly.

  6. Place the Bao buns into your steamer and allow to steam for 12 minutes and after the 12 minutes switch off the flame and allow the bun to stay in the steamer for 5 minutes before you open the lid.

  7. Cut your boneless chicken into tiny cubes and and marinate them in salt and pepper.
  8. Next coat them in flour and then dip in cold water and again dip in flour and then place them onto your air fryer and spray oil all over. Allow to air fry at 200 for 20 minutes (flipping or shaking your airfryer in between).
  9. In a small saucepan combine the gochujang, soy sayce, honey, vinegar, garlic, and ketchup and a dash of water and bring it to an oil and set aside. 
  10. Combine the sauce with the crispy air fried chicken. 
  11. Once your Bao buns have cooled slightly, open the bun gently and spread the sauce inside the bun and place your veggies and the Korean fried chicken. 

  12. Sprinkle sesame seeds and enjoy warm! 

Notes:
* You may alternately you my homemade Szechuan sauce, but since it’s Korean fried chicken, I suggest to get gochujang itself.


Do try this recipe and don't forget to share your experience/feedback with me here in the comments or feel free to send me a mail. Also, do tag me at #taystedit if you try out my recipes on Facebook, Instagram etc so that I can see when you make it. ♡♡♡♡

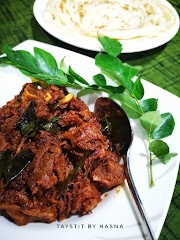
Beef Vindaloo


Beef Vindaloo is a Goan dish which is fiery, tangy and with a pinch of sweetness, slow cooked to perfection. This underrated curry is super delicious and has a very distinct flavor! Beef vindaloo goes well with paratha, naan or steamed rice. 

This curry is a gem especially on busy days or if you have guests over, you just need to give the curry a stir once in a while, so that it doesn’t stick to the bottom of the vessel and burn, it’s sooo easy to prepare once you have the masala prepared. You may prepare extra masala (by doubling the quantities) and store them in the refrigerator upto a week! Use Kashmiri chillies or else get ready to get ready to drink a gallon of water! 🥵😆 

The first time I prepared beef vindaloo, I wasn’t quite impressed, as I had used the normal dried red chillies. But this time I used dried Kashmiri Red Chillies and I was able to immerse in the flavors. Also slow cooked meat is always ‘vere level’! Using a Dutch oven helps, or any vessel that has a heavy bottom. Like a heavy bottom earthen clay pot also does the job. I’d definitely recommend to prepare beef vindaloo the slow-cook way! As it makes a lot of difference..It tastes even better the next day, when reheated, the flavors just comes along too good! 

Ingredients:

  • 1/2 kg bone-in Beef
  • 8-10 Kashmiri Red Chillies (soaked in hot water with vinegar )
  • 1/4 cup Vinegar
  • 1 tbsp Coriander seeds
  • 1 tsp Cumin seeds 
  • 1 tsp Whole Pepper 
  • 4-5 cloves of Garlic
  • 1 inch Ginger piece
  • 1 tsp Mustard seeds
  • 1 tsp coconut oil 
  • 3 Cloves
  • 1 Cinnamon stick
  • 1 tsp Jaggery powder
  • 1/4 tsp Turmeric powder
  • Salt, as required 
  • 2 tbsp Coconut oil 
  • 1 Medium Onion, finely chopped 
  • Curry leaves, optional
  • Coriander leaves, to garnish 

Instructions: 

  1. Soak the dry Kashmiri Chillies in hot water (along with vinegar, optional) for 5-10 minutes.
  2. Grind all the ingredients from the ingredients list until jaggery powder to a paste and add in coconut oil, turmeric powder, and salt as required & marinate the washed beef pieces and allow to marinate for 4 hours if possible. 

  3. In a Dutch-oven or a heavy bottom pot, pour the coconut oil and sauté the finely chopped onions until translucent and add in your curry leaves. 
  4. Add in the marinated beef and slow cook for around 60-90 minutes, giving a mix every 15 minutes so that nothing sticks on the bottom. 


  5. Once the meat is cooked tender, enjoy hot with paratha, naan or steamed rice! 

Ps: If you want it more spicy you may add more black pepper and green chillies, we like it mild here!

Do try this recipe and don't forget to share your experience/feedback with me here in the comments or feel free to send me a mail. Also, do tag me at #taystedit if you try out my recipes on Facebook, Instagram etc so that I can see when you make it. ♡♡♡♡

Butter Chicken Tikka


This super flavorful tikka recipe is a must try! I especially since the lovely winters are around the corner, this one recipe will top your list for bbq recipes. 

Usually for butter chicken, people like to smoke the chicken for that added tandoor/ coal flavor, I somehow dislike the homemade version of smoking chicken (which is by placing an aluminum sheet in the shape of a bowl and placing a small piece of hot coal) and pouring some oil/ ghee and closing the lid in the container with the marinated meat. 

So if you like this flavor, you may give it a try! Anyhow, I haven’t included it here in my recipe. The recipe is super simple! Also, this tikka is best for meal prep. I prep in the weekend and store in the freezer and use it up during busy weekdays.

Let’s see how it’s done..also..the more the masala sits, the better !! 


Ingredients:


  • 500 gms Boneless Chicken, cubed
  • 2 cloves of Garlic
  • 1 small piece of Ginger
  • 1 small Green Chilli 
  • 2 tbsp Tomato paste
  • 1 tbsp Cream
  • 3 tsp Kashmiri Chilli powder
  • 1/4 tsp Garam Masala powder
  • Dried Fenugreek leaves, a pinch 
  • 1/2 tsp Black pepper powder
  • 1 tsp Honey
  • 1 tsp Lemon juice
  • Salt, as required 
  • 1-2 tbsp Melted Butter
  • Kashmiri Chicken powder, if required 
  • Coriander leaves, chopped
  • Wooden skewer, soaked in water for 15-20 minutes

Instructions:

  1. In a small grinder, grind all the ingredients except for lemon juice, butter and coriander leaves.
  2. In a bowl, add in the cubed boneless chicken and add in the masala paste and combine with some lemon juice, melted butter and chopped coriander leaves and marinate well for 4-6 hours or overnight.


  3. Take the marinated piece of chicken and add it on to the skewer (you may add veggies of your choice in between too, like cubes of onion/ capsicum).
  4. Airfry/ Bake/ Shallow fry for 15 minutes on 200 degrees Celsius.


Do try this recipe and don't forget to share your experience/feedback with me here in the comments or feel free to send me a mail. Also, do tag me at #taystedit if you try out my recipes on Facebook, Instagram etc so that I can see when you make it. ♡♡♡♡

Almond Waffles 


Almonds being rich in protein and other nutrients is the best alternative to the staple all purpose flour, nutrition wise and taste wise too! 

Ever since I started making waffles using almond, there is no going back! The nutty flavor from the almonds and the buttery goodness with the crispy texture is the best bet you could get! 

Making waffles doesn’t involve any rocket science, that is if you follow my fool proof waffle recipes! 😉
Enjoy your waffles warm with a drizzle of honey/ maple syrup/ agave nectar or any sauce of your choice! 

Ingredients:

  • 1 egg white, large egg
  • 1/2 cup Almond Flour
  • 2 tbsp Corn Flour
  • 1/4 cup Almond milk/ Cow’s milk
  • 2 tbsp Almond Butter/ Cashew Butter
  • 2 tbsp Butter
  • 1 tsp Vanilla Essence
  • 1/2 tsp Baking powder
  • A pinch of salt
  • Honey, as required 

Instructions: 

  1. In a bowl, beat egg whites until almost stiff peaks.
  2. In another bowl, mix the dry ingredients like Almond Flour, corn flour, baking powder, salt.
  3. In a microwave safe bowl, add in the unsalted butter, Almond butter, vanilla essence and microwave for around 5-10 seconds until melted.
  4. Into the bowl with flour, add in the melted butter and the almond milk, honey and combine well. 
  5. Finally, fold in the egg whites gently. 
  6. Heat a waffle maker and spray the waffles plates with oil/ butter and pour in 1/4 cup of batter to the waffle plate and allow to cook for 10-12 minutes depending on your waffle maker. 

  7. Simply remove the crispy waffles onto a serving plate and enjoy warm with your choice of sauces and toppings! 


Ps: You can make ahead these waffles and store them in the freezer and reheat in a toaster or if in oven broil it and get back it crispy state! 
Makes a great recipe for school lunch boxes too!

Do try this recipe and don't forget to share your experience/feedback with me here in the comments or feel free to send me a mail. Also, do tag me at #taystedit if you try out my recipes on Facebook, Instagram etc so that I can see when you make it. ♡♡♡♡

Hollandaise Sauce Recipe


Hollandaise sauce needs some precision, which makes it feel like a difficult sauce to crack, but all you need is a knack for temperature control. 

I like to make my Hollandaise sauce using the double boiling method (where a pot with water is almost boiling and a bowl is placed over the pot). Add the egg yolk in the bowl and place the bowl over the pot once you see signs of water starting to boil, next add a little lemon juice, and once the egg yolk reaches a temperature of 55 deg C (if you do not have a thermometer, a visual indicator is tiny bubbles on the edges of the egg yolk). Immediately pour the melted butter, little at a time and whisk well, till you get a pale coloured sauce. 

Here, I have used Whole wheat Sourdough slices are toasted with some butter and topped with sautéed mushrooms in some butter/ olive oil along with a dash of soy sauce, salt and pepper. Topped with slices or mashed avocado and finally topped with a perfectly poached egg and served with Hollandaise sauce 🤌🏼 

Hollandaise sauce can be used as topping on poached eggs, meat, grilled veggies or chicken and fish or also for eggs Benedict! Enjoy warm and immediately!

Ingredients: 

  • 1 large egg yolk
  • 1 1/2 tsp lemon juice
  • 60 gms Butter, melted
  • Salt and pepper as seasoning 


Instructions: 

  1. Double boil your egg yolk (make sure the bowl doesn’t touch the boiling hot water) and start whisking, when you see the bubbles in the sides of the water boiling, put the heat on simmer and you will start to notice bubbles on the sides of the egg yolk, gradually add the melted butter little at a time, and allow the butter to emulsify with the egg yolk while rapidly and continuously whisking to get a pale yellow sauce (make sure to whisk rapidly, or else too much fat can cause the sauce to split) 
  2. Can use seasonings if required.

Ps: I like my Hollandaise sauce semi thick, if you want a more drippy consistency add around a total of 100 gms melted butter for 1 large egg yolk and approx 1 tbsp lemon juice. 

Hollandaise has to be served immediately but if you want to serve it later you might as well store it in a preheated vaccum thermo flask.


Do try this recipe and don't forget to share your experience/feedback with me here in the comments or feel free to send me a mail. Also, do tag me at #taystedit if you try out my recipes on Facebook, Instagram etc so that I can see when you make it. ♡♡♡♡

Butter Egg Masala 


Out of ideas for breakfast/ dinner?! Try this luscious and delicious butter egg masala and Thank me later! It’s so easy to prepare, it’s like my go to curry when I am out of ideas and other ingredients 😁 

The steps are pretty much like a rich and India’s own Butter Chicken Masala (psst, my butter chicken parcels are always a hit! Try it out, and let me know how it goes!)

What I like about this recipe is that all those veggies are just roughly chopped, as they are anyways going to be made into a paste, so not precision chopping required. It’s all so quick and easy! Once the gravy is done, and in the your cream and crack in your eggs ( or add in your hard boiled eggs, that are slightly slit on the sides and fried in some turmeric, chilli powder and salt, if that’s how you like it, I like mine just cracked into the butter masala) and voila! Your Butter Egg Masala is ready! It’s that easy! 😍😋

Pair it hot with some chappati so, poori, bhatura etc and enjoy!!

Ingredients: (makes for two)

  • 1 medium Onion, roughly chopped
  • 1 medium tomato, roughly chopped
  • 1 garlic clove
  • 1 really tiny piece of ginger (you don’t want it to overpower)
  • 1 + 1 tbsp Butter 
  • 1 green Chilli
  • 8-10 Cashews
  • 8-10 Raisins
  • Ketchup (optional, as required)
  • 1 tsp Kashmiri Chilli powder
  • Dried Fenugreek leaves, a pinch 
  • A drizzle of fresh cream (any sugarless cream will do)
  • 2-3 Eggs
  • Coriander leaves, for garnish 

Instructions: 

  1. In a pan, add in your blob of butter and sauté your chopped onions and once translucent add in your chopped tomatoes, ginger garlic, green chilli, cashews and raisins and close the lid. 
  2. Add in a tbsp of water and allow them to get mushy on low flame. 
  3. Once mushy, allow to cool a bit, once touchable, add the sautéed veggies to a blender and blend to a smooth fine paste. 
  4. Next in the same pan, add in a blob of butter and add in a teaspoon of Kashmiri chilli powder for that extra color and mix well. 
  5. Next, add in the paste to the pan and pour some water or milk to adjust the consistency and add salt and ketchup as required.
  6. And add in a pinch of dried fenugreek leaves and allow to come to a slight boil.
  7. Finally pour in the cream and crack in the eggs and cook covered until desired consistency of egg and garnish with chopped coriander leaves. 
  8. Enjoy hot with chappati, poori, bhatura etc!


Do try this recipe and don't forget to share your experience/feedback with me here in the comments or feel free to send me a mail. Also, do tag me at #taystedit if you try out my recipes on Facebook, Instagram etc so that I can see when you make it. ♡♡♡♡

Healthy Energy Bars


Lately I have been trying to eat clean, early and on time. Alhamdulilah, so far so good! I have cut sugar from my diet, and I cover it up with little bites of fruits, but suddenly out of no where, I have been craving chocolate dream cake and I just cake take my head off it! And that’s when I came up with these healthy energy bars..mind you, eating more than one bar a day May result in weight gain! So have it sparingly if you want to lose weight but craving for chocolate. Once in a while, giving up with a little keeps you sane, keep in mind not be harsh on yourself. 

These can be called Energy bars/ protein bars, instead of adding protein powder, I have replaced it with powdered flax and chia seeds. And make sure the texture is a bit more jammy than mine by adding a little bit more dates, though I have used dark chocolate and a bit of semi sweet chocolate chips, you may completely avoid it (I ran out dark chocolate) 

I have also added a tsp of coconut oil when melting the chocolate making it even more delicious, glossy and helps to harden the chocolate. Sooo Yumm!! I have been guilty of giving my little girl with grocery bought snacks in her tiffin, finally I have prepped a batch and it’s ready for the week, Alhamdulilah! (Hope it lasts that long lol) 😄

Ingredients:


  • 1 1/2 Cups Rolled Oats
  • 1 cup Dates (pitted) preferably the wet types like khalas, sukkari etc
  • 3 + 3 tbsp Chia seeds and Flax seeds (powdered)
  • 1/3 cups Almond 
  • 1/3 cups Cashew 
  • 1/3 cups Pumpkin seeds
  • 2 tbsp Peanut Butter
  • 1 tbsp Honey, optional
  • 1/2 tsp Vanilla extract
  • A pinch of salt
  • 50 gms Dark Chocolate 
  • 50 gms Semi sweet Chocolate Chips, optional 
  • 1 tsp Coconut Oil 
  • Freeze dried Strawberries, for garnish (optional)

Instructions:


  1. In a pan, slightly roast rolled oats, almond, cashew, pumpkin seeds.
  2. Next in a food processor, add your pitted dates the roasted oats and nuts, and the rest of the ingredients and pulse well until desired consistency.

  3. Next, in a tray, line it with a parchment paper and add in the oats mix and flatten using a spatula and allow to freeze for half an hour. 

  4. Whilst at that, prepare the chocolate ganache, by mixing the chocolates and coconut oil by double boiling and pour over the mix and add in the freeze dried strawberries (optional) and place in the freezer for about 5-10 minutes.


  5. Enjoy once the chocolate ganache harden and slice them into bars and wrap them up separately using the butter papers and store in the freezer for months! The energy bars stays fresh in room temperature upto 3-4 days. Enjoy! 


Do try this recipe and don't forget to share your experience/feedback with me here in the comments or feel free to send me a mail. Also, do tag me at #taystedit if you try out my recipes on Facebook, Instagram etc so that I can see when you make it. ♡♡♡♡

Malabar Moodi Pathal/ Pathiri
(Rice pancakes)


These soft, pan-poured rice pancakes is one of the most staple breakfast and dinner rice pancakes in Thalassery, and other parts of northern Kerala. Can also call it a distant cousin of dosa 😅 w/o the fermentation.

Moodi pathal, unlike the commonly known pathiri which is a flatbread made of rice flour is rice soaked for half an hour and ground into a paste along with shredded coconut and cooked rice, made into a thin batter and a ladleful of the batter is pour into a pan and swirled to get a round pancake which is immediately covered with a lid, allowing the pancake to cook from both sides simultaneously. Hence the name Moodi Pathal,  “Moodi” means covered/ lid and pathal means pancake/ flatbread. 

The addition of shredded coconut, though not necessary, but adds in a lot of flavor profile to the rice flatbread. Usually enjoyed with coconut milk and sugar, spicy malabar fish curry aka mulagittadh/Fish Varattiyadh (you can find the recipe by tapping the link), or any curry of your choice. 

Ingredients: (Makes for 2)

  • 1 cup White rice (Basmati and the likes of it also can be used)
  • 2 tbsp leftover cooked rice (ponni, kuruva, matta rices) 
  • 1/4 cup Shredded Coconut 
  • Salt 
  • 1 and 1/2 cups approx Water (can be a little less or more)
  • 1 tbsp Coconut oil
  • Ghee for smearing on the pathal

Instructions: 

  1. Rinse and soak the rice for half an hour at least or upto 2 hours and in a mixer grinder, add in the soaked rice, leftover cooked rice, shredded coconut, salt and half cup water.
  2. Transfer the batter to a bowl and add water to the required consistency (quite loose but not too watery either)

  3. Heat a well seasoned cast iron pan on high, and smear with coconut oil, once water sprinkled jumps, you may pour in a deep ladle full of batter into the pan and swirl it to get a nice round rice pancake. Cover it immediately and allow to cook on medium heat for around 2 minutes and transfer the pathal into hotpot or plate, smear ghee and cover it with a lid. 
  4. Enjoy with coconut milk and sugar or with spicy malabar fish curry (mulagittadh) or your choice of curry.

Tips: 

  1. Make sure you do not add too much of cooked rice, which can turn out to be a messy situation.
  2. Make sure the pan is on medium high flame, preferably a well seasoned cast iron pan, may feel like a crispy dosa, but once smeared with ghee and covered in and kept for couple of minutes in a hotpot or a plate, you will see how nice and soft it becomes. 
  3. Make sure the batter is quite loose, not very watery either. 
  4. The first couple of them might turn out with cracks, if the pan isn’t well heated and at the right temperature and make sure you cover the pathal immediately after pouring and swirling.
  5. Make sure to grind the rice with very little water, or else you will end up with a batter than isn’t ground properly. 

Do try this recipe and don't forget to share your experience/feedback with me here in the comments or feel free to send me a mail. Also, do tag me at #taystedit if you try out my recipes on Facebook, Instagram etc so that I can see when you make it. ♡♡♡♡

Healthy Oats Khichdi


My go to recipe when I want to cook up something quick and dump in all the veggies in my fridge! And this one tastes so comforting that you won’t even feel you are eating healthy, but if course be easy on the portion you take too. 

Usually Khichdi is made with veggies or is more of a vegetarian dish (that’s what I know) but since my family loves chicken and instead of using store bought chicken cubes, adding the boneless chicken not only oomphs up the flavor but also gives you extra protein.

Add in whatever veggies you have in your fridge, potatoes, peas, bell peppers, etc cauliflower is also a great add on! I love cauliflower in Khichdi. This is such an amazing way to get your kids veggies..I tell you..they will ask for more!! 😁

Ingredients:


  • 1 1/2 cup Whole Oats
  • 1/2 cup Moong dal
  • 1-2 tbsp Ghee
  • Hing/ Asafoetida, a pinch
  • 1 tbsp Olive oil or any neutral oil
  • 1 Onion, chopped finely 
  • 1 tbsp ginger garlic paste
  • 1 cup Button Mushrooms, sliced
  • 1 Carrot, small, chopped
  • 1 cup Broccoli, chopped roughly 
  • 1/4 cup Frozen Corn
  • 150 gms Boneless Chicken, sliced into small thin strips
  • 1 tsp Jeera/ Cumin
  • 1 Sprig Curry leaves
  • 4-5 cups Water
  • Salt, as required 
  • 1 tsp White pepper
  • 1/4 tsp Turmeric powder
  • 1/2 tsp Red Chilli powder
  • 1-2 Green Chillies, optional 
  • Coriander leaves, finely chopped for garnish 
  • Lemon slice, for garnish

Instructions:

  1. In a pressure cooker wash the moong dal and add it into the pressure cooker and add in the oats and add salt as required. Pour in around 3 cups of water and allow to cook on medium high for 2 whistles. 

  2. In a large heavy bottom pan, pour the ghee and splutter the cumin, and a pinch of hing and add in the curry leaves. 
  3. Next add in the ginger garlic paste and add in the chopped onion and sauté well. 
  4. Next add in the chicken slices and add salt and pepper as required and cook well for around 4-5 minutes.
  5. Next, pour a little olive oil and add in the veggies and cook well and finally add in your spices and the cooked mushy oats and moong dal. 


  6. Add in some more water for the desired consistency and salt as required, pepper and finally add in a squeeze of lemon and ghee (if required).


Do try this recipe and don't forget to share your experience/feedback with me here in the comments or feel free to send me a mail. Also, do tag me at #taystedit if you try out my recipes on Facebook, Instagram etc so that I can see when you make it. ♡♡♡♡
Older Posts

Search This Blog

My name is Hasna Haneef, a mommy to a toddler, hailing from Thalassery, Kerala. Welcome to my humble abode on the Internet; wherein I share all my recipes and experiments. I am glad to have you on board!

TRENDING POSTS

  • Emirati Chebab
  • Chicken Steak with Creamy Mushroom Sauce
  • Kerala Style Squid Roast
  • Regag - Emirati Flat bread
  • Kerala Beef Fry/ Nadan beef dry fry
  • Junglee Chicken Sandwich

About Me

May peace be with you!

Welcome to my blog.

I am delighted to have you on board. My name is Hasna Haneef, a mommy to a toddler, hailing from Thalassery, Kerala. My homeplace being Dubai, as I am born and brought up here and I am very influenced by the lifestyle and the variety of authentic cuisines I get to try from here, which has made me try anything that comes across me
, click here →

Stay Connected!

Join Our Madness!

Join with Thousands Of Subscribers ! Get Our Latest Recipes Delivered to Your email Inbox!

Powered by follow.it
  • Home
  • About Me
  • Recipes

    • Main Course
    • Desserts
    • Snacks

    Uncategorized

    • Chicken
    • Meat
    • Vegetarian
    • Rice
    • Malabar Food
    • Baking
    • Breakfasts
    • Snacks
    • Drinks
    • Pasta
    • Fish
    • Soups
    • Desserts
  • Contact Me

Featured Post

Triple Chocolate Hazelnut Skillet Cookie

Blog Archive

  • ▼  2025 (4)
    • ▼  April (2)
      • 1 minute Chocolate Mug Cake
      • Grilled Cheese California Burrito
    • ►  March (1)
    • ►  February (1)
  • ►  2024 (36)
    • ►  October (4)
    • ►  September (5)
    • ►  July (1)
    • ►  June (2)
    • ►  May (4)
    • ►  April (3)
    • ►  March (10)
    • ►  January (7)
  • ►  2023 (47)
    • ►  December (3)
    • ►  September (2)
    • ►  August (6)
    • ►  July (6)
    • ►  June (9)
    • ►  May (4)
    • ►  April (5)
    • ►  March (6)
    • ►  February (3)
    • ►  January (3)
  • ►  2022 (69)
    • ►  November (4)
    • ►  October (6)
    • ►  September (7)
    • ►  August (9)
    • ►  July (12)
    • ►  June (5)
    • ►  May (5)
    • ►  April (12)
    • ►  March (4)
    • ►  February (2)
    • ►  January (3)
  • ►  2021 (24)
    • ►  November (1)
    • ►  October (2)
    • ►  July (1)
    • ►  June (4)
    • ►  May (6)
    • ►  April (4)
    • ►  February (4)
    • ►  January (2)
  • ►  2020 (82)
    • ►  December (5)
    • ►  November (6)
    • ►  October (4)
    • ►  September (2)
    • ►  August (5)
    • ►  July (10)
    • ►  June (10)
    • ►  May (13)
    • ►  April (12)
    • ►  March (8)
    • ►  February (4)
    • ►  January (3)
  • ►  2019 (22)
    • ►  December (1)
    • ►  November (2)
    • ►  October (6)
    • ►  September (1)
    • ►  August (1)
    • ►  February (3)
    • ►  January (8)
  • ►  2018 (15)
    • ►  December (4)
    • ►  November (6)
    • ►  October (3)
    • ►  September (2)

Subscribe Us

Labels

Bake Biscuits Breakfast Brown rice Burger Cheese Chocolate Dal Egg Emirati Fish Iftar Indonesian Japanese Jeerakashala rice Kerala Keto Kuwait food Lunch Milk Mutton Thai food UAE food afghan cuisine arabic beef biryani bread burnt cheesecake cake chicken cream dessert dinner greek healthy indo chinese lamb malabar prawns pudding puffs quick dinner ideas recipe refreshing drink rice salad sandwich stir fry vegetables vegetarian veggies yemeni

Contact Form


POPULAR POSTS AND PAGES

Emirati Chebab

Emirati Chebab

June 01, 2023
Chicken Steak with Creamy Mushroom Sauce

Chicken Steak with Creamy Mushroom Sauce

November 05, 2018
Kerala Style Squid Roast

Kerala Style Squid Roast

June 18, 2020
Regag - Emirati Flat bread

Regag - Emirati Flat bread

December 02, 2020
Kerala Beef Fry/ Nadan beef dry fry

Kerala Beef Fry/ Nadan beef dry fry

October 08, 2019

Pages

  • Home
  • About Me
  • Privacy Policy
  • Contact Me

Copywrite © 2023 TermsFeed®. All rights reserved.

Created By Sora Templates | Distributed By Gooyaabi Templates

Back to top