Search This Blog

Taystit by Hasna

Food, Recipes, and Beyond

  • Home
  • About Me
  • Recipes
    • Main Course
    • Snacks
    • Desserts
  • Uncategorized
    • Chicken
    • Meat
    • Vegetarian
    • Rice
    • Malabar Food
    • Baking
    • Breakfasts
    • Snacks
    • Fish
    • Pasta
    • Drinks
    • Soups
    • Desserts
  • Contact Me

Mutton Makhni


And we have reached the end of the year 2020, even though it might have not been as great as we anticipated it to be, we have made it Alive! Alhamdulilah (Praise is to God) for all the blessings we still have. My heart goes out to all those who have faced calamities during this pandemic. Let us begin this new year by being grateful for all that we have.

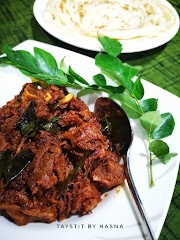
Okay, coming to the recipe of the day, it is mutton makhni, something similar to butter chicken but way easier! This recipe was an inspiration from my bhabhi (sister-in-law)'s mom. One day, when she happened to stay with us she prepared something that looked like butter chicken but without the chicken, instead, the meat was mutton. I was surprised and wondered why I never thought of this idea before. When I asked her, what the name of the dish was, she said there was no specific name. Recently, I decided to re-create the dish, from what I understood by tasting it. And to my surprise, I nailed it!

The gravy is a thick concoction of every Indian basic curry flavors, which comprises of onion, ginger-garlic, green chilies, tomatoes, turmeric powder, chili powder, and garam masala. The sauteed and pressure cooked meat is then fished out from the prepared gravy. The gravy is ground to a fine paste which goes through a mesh strainer to give you a butter-like sauce, which is why I named the dish - Mutton Makhni. The gravy is velvety smooth and the mutton (lamb meat) is so tender that I felt no other name would have matched better!


Such a royal and rich gravy that you can't get enough! Try this recipe the next time you have a party and I am sure you are bound to please your crowd! And best part is that, this gravy is super easy to prepare unlike the classic butter chicken, which involves another step of frying the chicken.


Ingredients :

  • 500 gms mutton
  • 1 large onion, sliced
  • 1 1/2 tbsp garlic paste
  • 1 tbsp ginger paste
  • 2 - 3 green chillies, slit (depending on spice level, I prefer less chillies as this dish isn't on the spicy side) 
  • 1 large tomato, chopped 
  • 1/4 tsp Turmeric powder 
  • 2 tsp Kashmiri Red chilli powder 
  • 1 tsp Garam masala powder 
  • 8-10 cashews 
  • 1 tbsp butter
  • 1 tsp Kashmiri Red Chilli powder
  • 1/2 cup milk
  • 1 tbsp Tomato ketchup
  • 1/4 tsp Garam masala
  • 1/4 tsp dried Fenugreek leaves 
  • 2 tbsp cream 
 

Instructions :

  1. In a pressure cooler, add in a tbsp of oil and Sautee your onions until translucent. 
  2. Now add in your ginger-garlic paste and green chillies. Saute for around 30 seconds. 
  3. Next add in your chopped tomatoes and cahsews, Sautee. 
  4. Add your spice powders - Turmeric powder, Kashmiri Red Chilli powder, and Garam masala. Sautee for a minute on simmer. 
  5. Add in your cleaned mutton pieces and add salt as required. (around a tsp and 1/4)
  6. Pour 1/2 cup water or until the mutton pieces are almost covered in water. 
  7. After around 5-7 whistles (depending on the maturity of the meat), switch off and allow the pressure to release on its own. 
  8. Once the pressure has released and you open the lid, fish out your mutton pieces and set aside. 
  9. After allowing your curry to cool a bit, add the contents to a mixer grinder and grind to paste. 
  10. Now into a steel skillet or casserole add in a tbsp of butter, and add in a tsp of Kashmiri Red Chilli powder for that extra deep color on the lowest heat setting. 
  11. Immediately strain the ground paste using a steel strainer into the skillet or casserole and mix well. 
  12. Pour in your milk to make your gravy thin but without losing its richness. 
  13. Finish off with your garam masala and dried Fenugreek leaves. 
  14. Add in your tomato ketchup or sugar for balancing. Check and adjust seasoning as required. 
  15. Garnish with cream and Coriander leaves. 
  16. Enjoy with ghee rice, chappathi or any rotis of your choice! 😋


Do try this recipe and don't forget to share your experience/feedback with me here in the comments or feel free to send me a mail. Also, do tag me at #taystedit if you try out my recipes on Facebook, Instagram etc so that I can see when you make it. ♡♡♡♡

Manchow Soup


Howdy folks! Manchow soup, perfect for your wintery slurpy goodness. Nothing beats a bowl of steaming hot soup on a cold winter night. Manchow soup is from indo-Chinese cuisine which has its name 'manchow' derive from the word 'manchuria'. Despite the name, it doesn't taste anything like manchurian.

I love soups during winter because they are easy to prepare, hearty, yet full of goodness. Manchow can be prepared vegetarian or non vegetarian according to our preference. It is basically a brown color soup which can accommodate all or any veggies you like, perfectly a fridge forage recipe.


I know I have been a bit quite in here. I was a bit under the weather. As much as I love winters, this is what we gotto go through every year. As soon as the cold slightly subsided, I wanted to try all sorts of my favorite food. In fact, I was tired of rice gruel and it's variants. I wanted something spicy, tangy, sweet, and Chinese. And ll I could think of was a good bowl of hot soup for my sore throat.

So I immediately starting preparing the ingredients required for the soup and since the color comes from a few sauces that is added in, to compensate that, I used arrowroot powder as my thicker to feel guilt free. You may use corn flour instead. The best part of manchow soup is the Crispy Fried noodles that are sprinkled over the soup that brings in texture and makes it stand out from other soups. Ginger is unavoidable in this recipe, and a lot of garlic which is the main essence of the soup. Aaahh... The feeling of the steam from the hot soup gushing over your face when you try and sip in, is just the best during Winters. Drooling already?

Let's get started! 🤤

Ingredients :

  • 4-5 cloves of garlic, chopped finely
  • 1 inch piece of ginger, chopped finely
  • 2 tbsp scallions, chopped
  • 1-2 green chilies, slit or finely chopped
  • 4 tbsp Cabbage, chopped
  • 2 tbsp Carrot, chopped
  • 2 tbsp Capsicum, chopped
  • 1 tbsp Coriander leaves, finely chopped
  • 5-6 White button mushrooms, chopped
  • 3 tbsp sweet corn niblets
  • 1 tbsp dark Soy sauce
  • 1 tbsp Tomato Ketchup 
  • 1 tbsp red Chilli sauce
  • 1 tsp Black Pepper Powder 
  • 1 tbsp White vinegar 
  • 1 liter hot water/ fresh veg stock
  • 2 tbsp arrowroot powder /corn flour 
  • 1/2 block hakka Noodles boiled and golden fried

Instructions :


  1. Boil your noodles, drain and fry your noodle to golden perfection. *
  2. Into a large pot, drizzle in a couple of tbsp of olive oil or any flavorless vegetable oil. 
  3. Add in your finely chopped garlic, ginger, scallions, and green chillies. Sauté for around 30 seconds. 
  4. Add in your finely chopped veggies (carrot, Cabbage, Capsicum) Sautee for a couple of minutes. 
  5. Next add in your chopped Coriander leaves and chopped Mushroom. 
  6. Season with salt and finally add in your corn niblets. Mix well. 
  7. Finally add in your sauces - soy sauce, tomato ketchup, red chilli sauce and black pepper. 
  8. Finish off with a dash of vinegar and pour in your hot water or fresh vegetable stock. 
  9. Make a slurry using the arrowroot powder and 1 tbsp water. Add in while mixing the soup vigorously. 
  10. Allow to boil and thicken. Add in a handful of Crispy Fried noodles. Check for seasoning. 
  11. Pour into a serving bowl and garnish with the Crispy Fried noodle and some chopped scallions. Enjoy! 

Notes :

*keep in mind not to brown the noodle when frying. 

Do try this recipe and don't forget to share your experience/feedback with me here in the comments or feel free to send me a mail. Also, do tag me at #taystedit if you try out my recipes on Facebook, Instagram etc so that I can see when you make it. ♡♡♡♡

Basque Burnt Cheesecake 


What a lovely day! And winter vacation is finally here.. Moms can relate to the free bird feeling at least for 2 weeks. 😁😁

Since it's the season of joy and happiness, this Basque Burnt Cheesecake also known as the San Sébastien Cheesecake is all you need to celebrate. The cheesecake is said to have originated in San Sébastien, Spain, from which the name is derived. Super easy recipe with just a few steps to keep in mind. It is basically a crustless cheesecake that is baked in a high temperature which gives you a vanilla custard like filling with a caramelized-almost-burnt exterior. The ingredients are simple, so is the process but the flavors from the baked result are so good. Even though my favorite has always been, my good ol' No Bake Blueberry Cheesecake. TAP HERE to check out the easy peesy recipe. The Basque Burnt Cheesecake is no lower, it is just a little different texture and flavor wise. 


You may use fruits, chocolate, caramel etc to top up, which helps to bring out its flavors. It is basically a blank canvas that you may enjoy as it is or add your favorite toppings to help bring out its flavors. I loved to have it with fresh berries like strawberries and Blueberries. I felt the freshness and tartness from the berries helped to bring in a different flavor dimension to the custard like rich cheese cake.

Unlike your basic cheesecake, you don't have to chill them to set. It is like a cheeecake that isn't sturdy but the outer caramelization acts as a mould for the custard like filling. The flavor and texture differed once chilled and otherwise. I like it more without chilling. It all depends on you. 😁

Also what sets this cheesecake apart is that, the bitterness of the burnt exterior and the sweetness from the creamy filling mixed together brings in magic!


The method of preparation is also quite different. As this is a crustless cheesecake, you need to make sure you use a good quality baking paper and two layers of the same, to protect the cheesecake from burning quickly and to help slide the cheesecake from the pan easily.


Coat the pan with butter and place your Parchment paper that is 2 inch more than your pan, as the cheesecake rises and puffs up a bit. Also try to use pure vanilla extract if possible for better results. 

This is a cheesecake where you can never go wrong! The worst that can happen is burn a cheesecake, well, this is a burnt cheesecake for a reason.😜 The ingredients are so simple and easily available. No water bath, just mix the ingredients, pour into a baking paper lined pan and bake. Done! Now is there an excuse to not try the easy peesy recipe? 😍


Basically this is the best cake to gift, share or celebrate any occasion if you have some cream cheese in your fridge readily available! ❤️ No frosting, no setting, only burning🤓

Let's get started! 

Ingredients :

  • 400 gms Cream Cheese, at room temperature *
  • 1/2 cup granulated sugar
  • 1 cup Whipping cream/ thick cream, cold
  • 3 eggs
  • 1 tsp Vanilla Extract 
  • A little less than 1/4 cup Patent flour /All purpose flour (around 3 tbsp) 
  • A pinch of salt to balance


Instructions:

  1. Preheat your oven to 200°C. 
  2. Grease your 7 inch cake pan with butter and line using a baking paper at least 2 inches wider than your pan size, so that your baking paper protrudes at least 2 inches outside the pan, as the cheesecake might puff up while baking. 

  3. Repeat process with a second baking paper and make sure to tuck in the baking paper properly. 
  4. Into a large bowl add in your room temperature cream cheese and beat using a stand mixer or a hand held electric mixer on medium for a minute or two until the cheese is smooth and creamy. 

  5. Next add your sugar and whisk until completely dissolved. 
  6. Now add in your eggs one at a time and scrape the sides of the bowl as you go. 

  7. Next add in your heavy cream/ Whipping cream/thick cream and vanilla extract and whisk until combined for around 30 seconds. 

  8. Slowly sift the flour into the batter and fold in gently using a spatula. Do not over mix, small lumps are totally fine. 

  9. Finally, pour your cheesecake batter to your prepared pan. 

  10. Now place your pan with cheesecake into your preheated oven and bake for around 40-45 minutes. Keep an eye after around 40 minutes, as the cheesecake happens to rise and fluff eventually. Even though there is no worries that the cake would burn, as it is meant to be burnt, but you want a slight jiggle to your cheesecake and the top has to be burnt completely. That is when you know your basque burnt cheesecake is done. 
  11. Let it cool to room temperature for about an hour and remove from the pan. Slice and enjoy with fresh fruits/whipped cream etc**
  12. Bon appétit! 


Notes:
  • If using a larger pan size, you might have to increase the cream cheese and the amount of sugar, as you don't want a flat cheesecake. 
  • *I used Pinar Cream Cheese Tub you may use puck cream cheese tub etc (basically Unsalted cream cheese) 
  • **Serving Suggestions: You may use fresh fruits, chocolate, caramel, whipped cream etc to top up which helps to bring out its flavors.
  • You may store the cheesecake in your fridge for upto 3 days.
  • I preferred it at room temperature.
Do try this recipe and don't forget to share your experience/feedback with me here in the comments or feel free to send me a mail. Also, do tag me at #taystedit if you try out my recipes on Facebook, Instagram etc so that I can see when you make it. ♡♡♡♡

Dynamite Tortilla Wraps


Good evening folks!

When breakfast can be made scrumptious in a jiffy, why skip breakfasts. A wholesome breakfast is what is required to boost your energy levels to be productive the entire day.

Just in time, few days back, a brand named 'Kawan' approached me. They sent me their sample products which included just heat chappathis, Paratha, protein Paratha, tortillas, Puff pastry etc. Their Tortillas fascinated me, coz I haven't seen frozen tortillas before.

The idea of having Tortilla wraps for breakfast is my favorite, as they are simple to prepare right in the morning, when you have less time but you need to eat like a king. These tortilla wraps are super easy to make. The fillings can be customized, but here I demonstrate using Mexican flavors. And being a lover of any food spicy, I added. A packet of crushed Oman chips which added to the flavor and texture. You may play around with the fillings as you like. You may also use leftover chicken.

The sauce that is used in this recipe plays a major role in bringing out the flavors of this wrap. I use Mayo, tomato ketchup, tobasco, Sriracha and smoked paprika and a squeeze of lemon juice. Basically a DYNAMITE Tortilla wrap. My initial thoughts were to experiment something with authentic Mexican flavors. So here I combined it with everyone's favorite Dynamite sauce.

It is so filling and the flavors are just next level. 🔥 The Crunch from the Oman chips is the Icing on the cake. This is completely an experimental Tortilla wrap that turned out super yum! Not to forget to mention the Kawan Tortilla wraps were super soft, even after toasting on the pan, which gave a Crispy texture outside though super soft inside. This cheesy Tortilla wraps with a fiery sauce is just too good. Do try and let me know your feedback..

Ingredients :
  • Frozen Kawan Tortilla Wraps
  • 2 Omega eggs
  • 1 tbsp finely chopped onion
  • 1 tbsp finely chopped capsicum
  • 1 tsp smoked paprika powder
  • Salt as required
  • 1 tbsp olive oil
  • 2 tbsp Corn niblets
  • 1 tbsp Sliced Black Olives 
  • 1 tsp Chopped Jalapeños 
  • Handful of Shredded Mozzarella Cheese
  • 1 packet Oman Chips
  • Chopped Coriander leaves. 

Dynamite sauce:
  • 2 - 3 tbsp Mayonaise
  • 2 tsp Tomato Ketchup
  • 2 tsp Sriracha sauce/ hot sauce
  • 1 tsp Tobasco sauce
  • A squeeze of lemon juice
  • 1/2 tsp Black Pepper Powder
  • 1 tsp Smoked Paprika


Instructions :
  1. In a bowl, prepare the sauce by mixing the ingredients mentioned below Dynamite sauce and set aside. 
  2. Make an Omlette using chopped onions, capsicum, smoked paprika powder, and salt as required.
  3. Place 1 Kawan Tortilla wrap right away and allow the Omlette to cook for around 2 minutes.
  4. Now flip, and add in your defrosted corn niblets, sliced black olives, chopped jalapeños, shredded Mozzarella cheese, slightly crushed Oman chips and drizzle in your prepared sauce and finally garnish with chopped Coriander leaves.
  5. Now carefully, roll the Tortilla wrap from one side to the other and press down so that the melted cheese allows the wrap to bind together.
  6. Trasfer to a serving plate.
  7. Cut into half and serve hot alongside your favorite sauce or the Dynamite sauce.


Notes:
You may use leftover shredded chicken


Do try this recipe and don't forget to share your experience/feedback with me here in the comments or feel free to send me a mail. Also, do tag me at #taystedit if you try out my recipes on Facebook, Instagram etc so that I can see when you make it. ♡♡♡♡

Regag - Emirati Flat bread 


Being born and bought up here in Dubai, UAE, I have always felt blessed. This country has been in my ups and downs. UAE has never missed an opportunity to make us proud! My grandparents, who along with their children lived in this beautiful has given the privilege and opportunity to my late grandmother to showcase her creativity! Her art work, which is a dancing ornament that the Arabs used to wear is still on display in the DUBAI MUSEUM.

Talking about heritage, I am here to share about one of my favorite Emirati dishes. The regag. We can find them easily in the heritage villages here in Dubai and other parts of the Emirates. The moment a plate of regag comes in front of us, it just vanishes in a couple of seconds. Not even kidding! The extremely thin bread is Crispy with an egg and cheese filling, which can be customized to our liking, be it, Nutella, cheese and honey, cheese and Oman chips etc. The options are endless! I cannot stress enough how good these are! As these are flat breads that are like insanely thin and Crispy, you feel like you haven't had enough. It's so good! I am telling you, you are missing out if you haven't tried it yet. And it is so easy to prepare, that's the best part! And there is this other delicious dish called the luqaimat, another one that I would die for. Will be sharing my recipe soon! So watch out for the recipe 😍❤️


I cannot stress enough how much I value this country and its traditions! UAE in itself is a world. There are all sort of people from different nations and that is what makes UAE stand out. And to be raised here is a blessing and a privilege that I, as a foodie consider. From my birth until now, I might have seen, tried and tasted different types of dishes from different cuisines which has helped me to mould the blog that you read now. UAE has now given me a career in the food blogging world, which I am sure I would have been if I were raised elsewhere. Alhamdulilah for all the blessings. And special mention to my grandparents and parents who have stayed strong and raised all of us here in all sorts of situations.


Coming back to regag, like I said, it is devoured either savory or sweet so here I am presenting a sweet version featuring Nutella and fresh fruits and the other, the traditional one, with egg, cheese and a drizzle of honey. Works best as a breakfast or a snack. Without further a do, presenting to you my National day special! 🇦🇪 ❤️ 


Ingredients : (makes for 2 ppl, 2 servings each) 

  • 1 cup All purpose flour
  • 1 tsp yeast
  • 1 1/4 cup warm water
  • 2 tsp sugar
  • 1/4 tsp salt
  • A cassette cover (to spread, optional) 
  • 1 egg
  • 2 tbsp cream cheese (salted) 
  • Nutella
  • Fresh fruits 
  • Honey

Instructions :

  1. In a large bowl, mix warm water with yeast and sugar, allow to dissolve for 2 minutes*.
  2. Then add in all your ingredients, give a good mix and allow to rise for one hour. 
  3. After one hour, onto a lightly oiled cast iron tawa drop in a handful of the dough and spread using your hands, or use an old cassette cover or a dough scrapper if you are a beginner. Allow to cook on the top, spread in half of your whisked egg, allow to cook. 
  4. Next spread your cream cheese or any filling that you like and flip into half. Again flip it into half to get a triangle kind of shape. 
  5. Drizzle with your desired sauce, honey or melted Nutella. 
  6. Enjoy! 😋
  7. If making the sweet version just use Nutella to spread. And top or fill in with fresh fruits. And a drizzle of melted Nutella. 

Notes:

Make sure not to use hot water*

Do try this recipe and don't forget to share your experience/feedback with me here in the comments or feel free to send me a mail. Also, do tag me at #taystedit if you try out my recipes on Facebook, Instagram etc so that I can see when you make it. ♡♡♡♡

Mexican Pizza Bites with Guacamole 


When you are a person who gets this instant cravings of pizza and you are in a mood to spice things up, then here I am to introduce you to this super easy Mexican Pizza.

Here I have used bread slices as the base. You may use Tortilla too. The only problem with the recipe is that, you need to consume it as soon as possible as the color may change the more it stays out. So, it is best served as a starter or a snack. 

If I had a few sliced black olives, I would use it to top up the snack bites, but since I ran out of it, I couldn't not get the disired color contrast in the final product. This is one of my experimental inventions that happened to be a part of my Ramadan snack ideas, as innovative food is what I love to do. All this while, it remained in my drafts, was contemplating whether to share or not, as my hubb is not a fan of guacamole. But I tell you, it's the best bite sized pizzas ever. The rest of the fam was raving about it. And then a few blogger friends invited to do a collaboration on Instagram on the theme Fusion Food! That is when I realized the time has come to reveal these yummy bites. I loved it and is such an easy recipe to nail. I would suggest not prepare a large quantity of guacamole as discoloration might occur. This is one easy recipe that I make when the hubster is not at home and there are avos smiling at me. 😀

When I thought about Italian cuisine and Mexican cuisine, the first things that popped in my mind was the Italian Pizza and Mexican Guacamole, So I immediately started creating the recipe plan! Guacamole, a Mexican invention, is an avocado dip, or spread that is now found in American cuisine as a condiment too. Avocado pieces are mashed using a mortar and pestle and fresh ingredients like onion, tomato and cilantro (Coriander leaves) takes it to a next level. As avocado is quite bland, this method definetly brings out the flavors of the avocado and it is sooo good and the final squeeze of lemon brings out the freshness in the dip which is the Icing on the cake! 😋👌

And the magic that stands out from normal guacamole is the maggi cube crumbs, which is completely optional. 

Definitely do give it a try and let me know your thoughts too❤️

Lets get started!


Ingredients :

  • 250 gms tender Chicken Breast, sliced
  • 2-3 tbsp olive oil
  • 1 tsp Garlic paste
  • 1 tsp paprika powder
  • 1/4 tsp Turmeric powder
  • 3/4 tsp Kashmiri Red chilli powder
  • Salt as required

For the base:

  • 4 Slices White Bread
  • 2 tbsp Salted butter
  • 1/2 tsp Garlic paste
  • 1/2 tsp Oregano
  • 1/4 tsp Red Chilli Flakes

Guacamole:

  • 1/2 avocado, sliced into cubes
  • 1/2 tsp Garlic paste
  • 2 tsp Coriander leaves
  • 2 tbsp Onion, finely chopped
  • A good squeeze of lemon 
  • 2 tbsp Tomato, finely chopped
  • Crumbs of Maggi Chicken Cube

Instructions :

  1. Slice the tender chicken breasts and marinate using the spices mentioned. 
  2. Fry in a couple of tbsps of olive oil and set aside. 
  3. Prepare the guacamole by mixing all the ingredients mentioned under guacamole using a mortan and pestle if possible. This method helps to bring out its flavor better. 
  4. Don't forget to squeeze the lemon juice and consume the guacamole immediately. *
  5. Now make a spread that consists of butter, garlic paste, oregano and red chilli flakes. Spread on each bread slice and toast to golden perfection. 


Notes:

  • Use the guacamole as soon as possible, as the color of the avocado changed the more it sits out. Lemon juice helps to retain the color to an extent.
  • If you'd like, you may use ketchup too. But the guacamole has enough strong flavors😊


Do try this recipe and don't forget to share your experience/feedback with me here in the comments or feel free to send me a mail. Also, do tag me at #taystedit if you try out my recipes on Facebook, Instagram etc so that I can see when you make it. ♡♡♡♡

Lebanese Casserole


And it's that time of the year again. It's winter here in Dubai! 😍 And that calls for a hot and soupy casserole for dinner. This is perfect coz the recipe only calls for basic ingredients that are almost always available in the kitchen.

Anything soupy, warm and hearty is what one needs during winter nights! 😍 I happened to come across this recipe on a keto page called thatketoyum, since the Mister is no more on keto and feeding the family with fat and proteins only isn't practical, I decided we wanted some carbs here. I used potatoes for carbs, you may use cooked rice instead too. This dish is kind of a combination between a stew and a casserole. The next time I make this, I might prepare using vermicelli for the carbs instead of potatoes. I am sure, vermicelli would make a great substitute too. 

All you need to do is boil and shredd chicken breasts in salt and pepper. And if using vermicelli, cook according to package instructions and set aside. I roasted my potatoes in salt, pepper, olive oil and garlic powder. Next, in a pan add you chopped onion, minced garlic, spices, tomato puree and veggies as per your choice. I used chopped carrots, Capsicum, sweet corn niblets and frozen Peas. Finish off with a couple of teaspoons of tomato paste and season with salt as required. 
Into a casserole dish or a baking dish, layer the prepared ingredients. The first layer being the shredded chicken, next add in some black olives and layer with the prepared tomato gravy. Finally pour in your chicken stock, milk or cooking cream, roasted potatoes, labneh (optional) and Mozzarella cheese and allow to bake for around 20 minutes or until the cheese melts well. As simple as that, and it is a whole meal in itself! What better excuse to prepare this yummy dish. Yallah! Let's move on to the ingredients. 


Ingredients : (makes for 3)

  • 250 gms Chicken Breast, boiled and shredded 
  • 1 cup chicken stock, reserve from the cooked chicken breast/ use maggi chicken cubes. 
  • 1 potato mashed or roasted * (check notes) 
  • 2 tbsp olive oil
  • 1 medium Onion, chopped finely
  • 3 cloves garlic, minced
  • Salt and pepper as required 
  • 1 tsp paprika powder
  • 1 tsp Kashmiri Red Chilli powder
  • 1 tomato, pureed
  • 1 small carrot, chopped 
  • 1/2 Capsicum, chopped
  • 1/4 cup frozen Peas (optional) 
  • 1/4 frozen corn niblets (optional) 
  • 2 tbsp tomato paste 
  • 1/4 cup sliced black olives
  • 1/2 cup milk/ cooking cream
  • Few labneh balls (optional) 
  • 1/2 cup shredded Mozzarella Cheese
  • Coriander leaves, chopped, to garnish

Instructions :

  1. Roast/ Mash potatoes and set aside. (Instructions under Notes) 

  2. Boil the chicken breast pieces in salt and pepper water, shred lightly and set aside. 
  3. In a skillet, pour the olive oil and add in your chopped onions and minced garlic. Sauté well, until raw smell disappears. 
  4. Next add in your seasonings and spices like salt, pepper, paprika, and Chilli powder, sauté for a minute on low. 
  5. Add in your pureed tomato and allow to cook for a couple of minutes. 
  6. Next add in your chopped veggies and frozen veggies (optional). 
  7. Finally add in your tomato paste and check if more seasoning required. 

  8. In a baking dish or a casserole, pat in your layer of shredded chicken and then Sprinkle your sliced black olives. 

  9. Now layer up your tomato gravy prepared earlier. Level the layer using a spatula. 
  10. Pour in your chicken stock and milk/cooking cream. 
  11. Finally, place the roasted/mashed potatoes as the final layer. Add in some labneh balls and or some thick cream if you have and generosly Sprinkle in your shredded Mozzarella cheese. 

  12. Place in a preheated oven 200°C for around 20 minutes or until the cheese has melted well. 
  13. Finally garnish with chopped Coriander leaves and voila! Labanese comfort food done. Lazeez! 


Note:
  • To roast the potatoes, marinate the potatoes with salt, pepper, garlic powder and drizzle olive oil. Place in the oven at 200°C and allow to roast for around 25 minutes.*
  • The labneh balls are totally optional. I used it here as I had them in stock. Not quite necessary. 
  • You may use mashed potatoes instead of roasting the potatoes. You may also use cooked vermicelli. 


Do try this recipe and don't forget to share your experience/feedback with me here in the comments or feel free to send me a mail. Also, do tag me at #taystedit if you try out my recipes on Facebook, Instagram etc so that I can see when you make it. ♡♡♡♡

Cinnabon inspired Cinnamon pancakes with Cream Cheese Icing


Good evening ya'll!

I can't wait for the winter vacation. Like literally! This e-learning experience is the worst. Sometimes gets on my nerves, especially if you have a child doing their kindergarten. So exhausting! And every day in the morning I just sit so blank as I have no time to prepare anything fancy. The breakfast or lunch here since distance learning started has been so boring which otherwise never happens here.


I kept scrolling my phone whilst I got some time to chill once my LO's break time happened, just looking for inspiration 😉
But my my even 5 minutes in break time is precious. But I was wanting to cook something exciting. And not the every day stuff. So all that came to my mind was pancakes! And I was sick of all the basic combinations like maple syrup, honey, Lotus biscoff, bananas, blueberries and other berries etc. Suddenly I had this craving for Cinnabon rolls. So I asked the Mister if he was okay with cinnamon flavor for pancakes. He nodded and then and there I knew I had to do this! 😍 And the Cinnabon inspired cinnamon pancakes with cream cheese frosting was born. 😋😋

Even though the flavors were the same, the textures made a slight difference and I loved it! The pancakes and the frosting was ready in less than half an hour and the perfect solution on a weekday breakfast for busy momma's like me. This was an instant idea and added in ingredients as though a recipe book was open in front of me. But honestly, it was indeed the best pancake flavor 🤤🤤

Though the pictures did not turn out like that I had in my mind as the Mister was in such a hurry, I urge you must try! Super easy and delicious, kids are going to love this😋👌 Well, my LO approved! 😁😍

*LO - Little one🤭


For pancakes:

  • 1 and 1/2 cup All purpose flour
  • 1 egg preferably omega
  • 3/4 tsp baking powder
  • 1/2 tsp baking soda
  • 1 cup milk
  • 1/4 cup melted butter
  • 1 1/2 tsp cinnamon powder
  • 3 tbsp honey
  • Salt, a pinch


For icing:

  • 100 gms cream cheese, softened
  • 1 tsp Vanilla Essence
  • 1/4 cup butter, softened
  • 4 tbsp heaped sugar
  • 2 tsps and more of milk/cream /Whipping cream.
  • A pinch of salt

Instructions :

  1. In a large bowl add in your your dry ingredients and give a mix using a whisk.
  2. Next make a well in the middle and add in your wet ingredients one by one and combine well using a whisk.
  3. Cook the pancakes on a heavy cast iron pan or a pancake pan.
  4. Place a small piece of butter and smear the pan.
  5. Next pour in 2-3 ladlefuls of pancake batter in equal proportions and flip when you notice bubbles forming on the top.
  6. Cook for 2-3 minutes and transfer to a small plate and stack them up until you finish the process.
  7. The cream cheese Icing is prepared by combing all the ingredients mentioned under the ingredients of Icing. If at all yih come across lumps, use a electric whisk and combine well.
  8. Finally pour this luscious and delicious cream cheese frosting over the pancakes and enjoy! 😍


Notes :
Try to use unsalted cream cheese. If not possible, use a brand that has less salt content. You don't want your Icing to be too salty. 


Do try this recipe and don't forget to share your experience/feedback with me here in the comments or feel free to send me a mail. Also, do tag me at #taystedit if you try out my recipes on Facebook, Instagram etc so that I can see when you make it. ♡♡♡♡

Garlic Butter Prawns


Hello TIBH fam! 

I am so excited for when winter approaches. It's time to grill anything and everything. And when you get your hands on fresh prawns that are in abundance, you want to try all thase dishes that has been always tempting you, isn't it?! Well, basically this recipe requires minimal effort and minimal ingredients yet, the flavors are intense! 😍

The prawns are grilled and slathered with garlic butter which intensifies the flavors of the dish. Cooking time of prawns is so less when compared to other proteins, so keep in mind not to over cook which would spoil the texture and juiciness of the prawns. 

Not only is this yummy, it is also keto friendly. Garlic-butter-prawns are a match made in heaven. The prawns are threaded onto skewers that are soaked in water at least for half an hour if grilling over coal so that the skewers doesn't burn. The skewers start from the tail and are pushed upwards.. You may also grill in a grill pan. And a squeeze of lemon juice gives that tangy finish to the final product. Pair it with a nice crusty bread and you are good to go! 

Without further ado, let's get started! 

Ingredients : (makes for 2 people) 

  • 15 - 20 fresh big prawns/shrimps, cleaned and deviened 
  • 4 tbsp butter
  • 5-6 garlic cloves, finely chopped 
  • 1/4 tsp Black Pepper Powder 
  • 1 tbsp lemon juice 
  • 1 tbsp fresh parsley , chopped


Instructions:

  1. In a small skillet/pan, allow the butter to melt, drop your finely chopped garlic and sauté until fragrant, make sure it doesn't burn. 
  2. The prawns are marinated in salt and pepper, and threaded onto the skewers and brushed with the garlic butter. 
  3. Grill for 3 minutes each side. 
  4. Once the prawns are cooked and removed to a plate. Pour the rest of the garlic-butter mixture with the dash of lemon juice over the cooked prawns. 
  5. Garnish with lemon and parsley. Enjoy hot! 😋

Notes :

  • Don't cook the prawns for too long. 
  • Keep the tail on for presentation purpose. 


Do try this recipe and don't forget to share your experience/feedback with me here in the comments or feel free to send me a mail. Also, do tag me at #taystedit if you try out my recipes on Facebook, Instagram etc so that I can see when you make it. ♡♡♡♡
Newer Posts
Older Posts

Search This Blog

My name is Hasna Haneef, a mommy to a toddler, hailing from Thalassery, Kerala. Welcome to my humble abode on the Internet; wherein I share all my recipes and experiments. I am glad to have you on board!

TRENDING POSTS

  • Emirati Chebab
  • Chicken Steak with Creamy Mushroom Sauce
  • Kerala Style Squid Roast
  • Regag - Emirati Flat bread
  • Kerala Beef Fry/ Nadan beef dry fry
  • Junglee Chicken Sandwich

About Me

May peace be with you!

Welcome to my blog.

I am delighted to have you on board. My name is Hasna Haneef, a mommy to a toddler, hailing from Thalassery, Kerala. My homeplace being Dubai, as I am born and brought up here and I am very influenced by the lifestyle and the variety of authentic cuisines I get to try from here, which has made me try anything that comes across me
, click here →

Stay Connected!

Join Our Madness!

Join with Thousands Of Subscribers ! Get Our Latest Recipes Delivered to Your email Inbox!

Powered by follow.it
  • Home
  • About Me
  • Recipes

    • Main Course
    • Desserts
    • Snacks

    Uncategorized

    • Chicken
    • Meat
    • Vegetarian
    • Rice
    • Malabar Food
    • Baking
    • Breakfasts
    • Snacks
    • Drinks
    • Pasta
    • Fish
    • Soups
    • Desserts
  • Contact Me

Featured Post

Triple Chocolate Hazelnut Skillet Cookie

Blog Archive

  • ►  2025 (4)
    • ►  April (2)
    • ►  March (1)
    • ►  February (1)
  • ►  2024 (36)
    • ►  October (4)
    • ►  September (5)
    • ►  July (1)
    • ►  June (2)
    • ►  May (4)
    • ►  April (3)
    • ►  March (10)
    • ►  January (7)
  • ►  2023 (47)
    • ►  December (3)
    • ►  September (2)
    • ►  August (6)
    • ►  July (6)
    • ►  June (9)
    • ►  May (4)
    • ►  April (5)
    • ►  March (6)
    • ►  February (3)
    • ►  January (3)
  • ►  2022 (69)
    • ►  November (4)
    • ►  October (6)
    • ►  September (7)
    • ►  August (9)
    • ►  July (12)
    • ►  June (5)
    • ►  May (5)
    • ►  April (12)
    • ►  March (4)
    • ►  February (2)
    • ►  January (3)
  • ►  2021 (24)
    • ►  November (1)
    • ►  October (2)
    • ►  July (1)
    • ►  June (4)
    • ►  May (6)
    • ►  April (4)
    • ►  February (4)
    • ►  January (2)
  • ▼  2020 (82)
    • ▼  December (5)
      • Mutton Makhni
      • Manchow Soup
      • Basque Burnt Cheesecake
      • Dynamite Tortilla Wraps
      • Regag - Emirati Flat bread
    • ►  November (6)
      • Mexican Pizza Bites with Guacamole
      • Lebanese Casserole
      • Cinnabon inspired Cinnamon Pancakes with Cream Che...
      • Garlic Butter Prawns
    • ►  October (4)
    • ►  September (2)
    • ►  August (5)
    • ►  July (10)
    • ►  June (10)
    • ►  May (13)
    • ►  April (12)
    • ►  March (8)
    • ►  February (4)
    • ►  January (3)
  • ►  2019 (22)
    • ►  December (1)
    • ►  November (2)
    • ►  October (6)
    • ►  September (1)
    • ►  August (1)
    • ►  February (3)
    • ►  January (8)
  • ►  2018 (15)
    • ►  December (4)
    • ►  November (6)
    • ►  October (3)
    • ►  September (2)

Subscribe Us

Labels

Bake Biscuits Breakfast Brown rice Burger Cheese Chocolate Dal Egg Emirati Fish Iftar Indonesian Japanese Jeerakashala rice Kerala Keto Kuwait food Lunch Milk Mutton Thai food UAE food afghan cuisine arabic beef biryani bread burnt cheesecake cake chicken cream dessert dinner greek healthy indo chinese lamb malabar prawns pudding puffs quick dinner ideas recipe refreshing drink rice salad sandwich stir fry vegetables vegetarian veggies yemeni

Contact Form


POPULAR POSTS AND PAGES

Emirati Chebab

Emirati Chebab

June 01, 2023
Chicken Steak with Creamy Mushroom Sauce

Chicken Steak with Creamy Mushroom Sauce

November 05, 2018
Kerala Style Squid Roast

Kerala Style Squid Roast

June 18, 2020
Regag - Emirati Flat bread

Regag - Emirati Flat bread

December 02, 2020
Kerala Beef Fry/ Nadan beef dry fry

Kerala Beef Fry/ Nadan beef dry fry

October 08, 2019

Pages

  • Home
  • About Me
  • Privacy Policy
  • Contact Me

Copywrite © 2023 TermsFeed®. All rights reserved.

Created By Sora Templates | Distributed By Gooyaabi Templates

Back to top