Search This Blog

Taystit by Hasna

Food, Recipes, and Beyond

  • Home
  • About Me
  • Recipes
    • Main Course
    • Snacks
    • Desserts
  • Uncategorized
    • Chicken
    • Meat
    • Vegetarian
    • Rice
    • Malabar Food
    • Baking
    • Breakfasts
    • Snacks
    • Fish
    • Pasta
    • Drinks
    • Soups
    • Desserts
  • Contact Me

 Mumbai Street Food Style Chicken Frankie


Chicken Frankie is a wrap that consists of an omlette like layer inside the wrap, with a chicken filling inside which is finished off with a dash of pickled onion and green chilli and a sprinkle of Frankie masala powder, unlike other wraps, this one is chatpatta which means it is spicy and tangy.

Frankie is usually made with a roti made from maida dough, I have used here tortilla wraps as it was more accessible to me. I have used tender chicken breasts, you may use boneless chicken thighs, as there is no risk of over cooking chicken thighs. On the other hand, if you overcook breast pieces, it may result in a dry texture, if overcooked.

Preferably prepare the filling a day ahead, as it helps in the flavors of the masala to steep in the chicken pieces and store in the refrigerator overnight. Chicken frankie is very filling and with the omlette inside, makes it a complete meal. So you may have it as a snack or as a meal. I am sure you will fall in love with the flavors.

Ingredients: (makes 3)

  • 4 tbsp White Vinegar
  • 1/2 an Onion, thinly sliced 
  • 2 Green  Chillies
  • Salt, as required
  • 250 gms Boneless chicken, cubed
  • 2 tbsp Vegetable Oil
  • 2 medium Onions, chopped finely
  • Salt, as required
  • 1 tsp Garlic paste
  • 1 tsp Ginger paste 
  • 1/4 Turmeric powder
  • 2 tsp Kashmir Red Chilli powder
  • 1 tsp Coriander powder
  • 1 tsp Cumin Powder
  • 2-3 tbsp Tomato Paste
  • 1/4 cup Water  
  • 2-3 Large Eggs
  • Ready made/ Homemade roti or paratha
  • 2 tbsp Butter 
  • 2 tbsp Frankie masala powder **
  • Butter paper for wrapping the frankie

Instructions:

  1. In a small bowl, add in the sliced onions, chopped green chillies, white vinegar and salt. Mix and set aside.
  2. In a large pan/wok, pour vegetable oil and add in the chopped onions, add salt as required and allow the onions to become translucent.
  3. Next add in the ginger and garlic paste, Sautee until raw aroma disappears.
  4. Next add in the spices and mix well. Add the tomato paste and the chicken cubes,our in a splash of water and allow the chicken to cook well. After 7 minutes, switch off the flame.

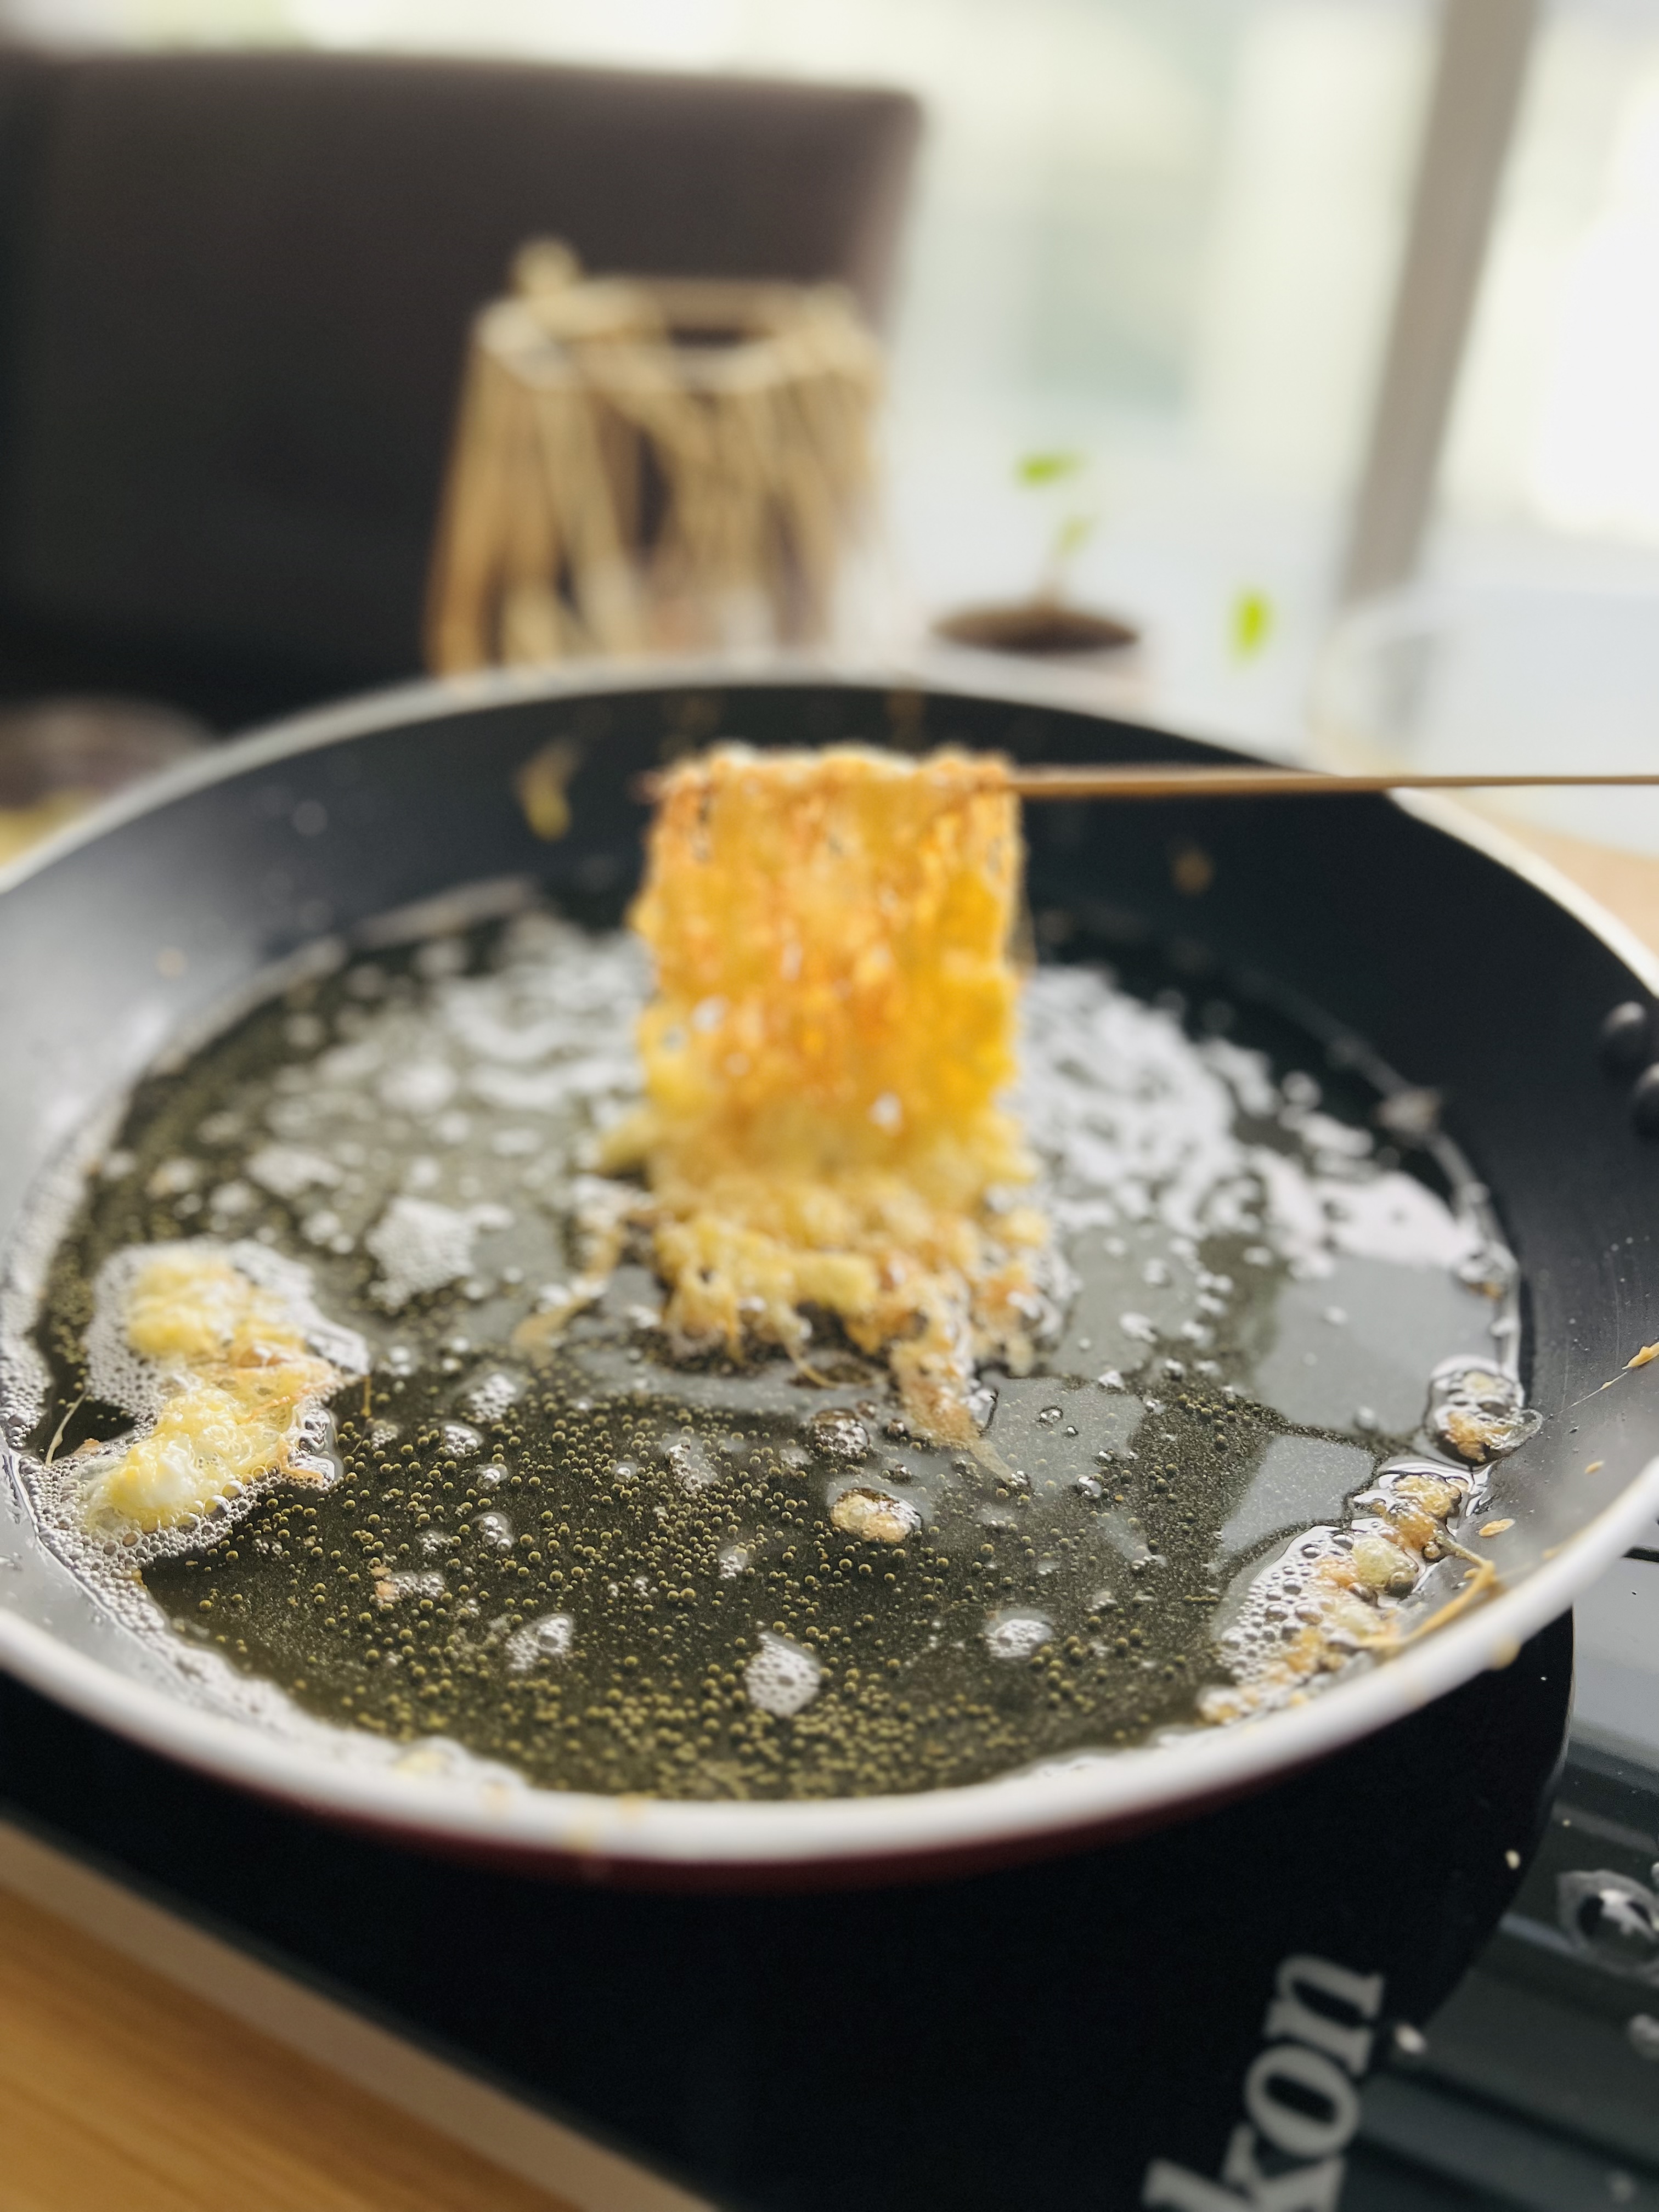
  5. In another small bowl, beat an egg with some salt and in a pan, pour vegetable oil, allow to come to a heat, then pour the beaten egg in the pan, once half cooked place in your prepared roti before the egg cooks completely, as the uncooked egg helps to stick onto the paratha/ roti.
  6. Smear the roti with butter, flip and allow to cook. Immediately transfer to a board or a plate and stack the earlier prepared chicken filling to a side of the omlette-roti and add in the pickled onion and green chillies over the chicken filling and sprinkle the frankie masala powder as required. Now slowly roll the frankie from the side and halfway through, roll one of the long ends inward and roll the frankie wrap, now using a butter paper wrap the chicken frankie. 


  7. Serve hot and enjoy with pickled veggies.


**Homemade Frankie Masala powder:
  • 2 tbsp Red Chilli Powder
  • 1 tbsp Coriander Powder
  • 2 tbsp Dry mango powder
  • 1 tbsp Cumin powder
  • 1 tsp Garam Masala powder
  • 1/2 tsp Turmeric powder
  • 1 tbsp Black Salt/ Normal Salt
Mix all spices and store in an air tight container.


Do try this recipe and don't forget to share your experience/feedback with me here in the comments or feel free to send me a mail. Also, do tag me at #taystedit if you try out my recipes on Facebook, Instagram etc so that I can see when you make it. ♡♡♡♡

Healthy Oats Pancake 
with Caramelized Cinnamon flavored Banana Slices


Anything healthy and delicious is game for me. I love how easy and versatile this Oats Pancake recipe is. With a handful of basic ingredients found at home, you can easily make these pancakes at home. My favorite add ons are fresh fruits, especially blueberries, strawberries, kiwi and honey while for my girl it's always her favorite chocolate chips with chocolate sauce.

Like I said that these Pancakes are versatile, I added my own touch by caramelizing just ripen robust bananas in a caramel sauce, ohh boyy they are sooo good!! This was completely spontaneous, I usually don't do these extra sauces, unless it's for some special occasion. But this one is such a keeper! I know the pictures don't look that tempting, but the truth is they dont do justice to how yum the sauce is that goes so well with theseoat pancakes.

These pancakes make a great lunchbox idea for kids, they are yummy and healthy too. I was first treated to these yummy goodies when  my friend cum relative invited me to her home for breakfast and I was wowed by how easy yet yummy they were and I couldn't clearly make out that it was prepared using something like oats that is fibrous yet very difficult to convince the kids to eat. Such a great idea! Thanks Buraida for introducing Oats Pancakes to me. <3

If you are in a hurry these pancakes are the best as they can be completely made directly in a blender or made using a hand held blender like I did. So much less dishes to wash and directly pour the batter to the butter greased pan and voila! So easy peesy! Let's see how it's made...


Ingredients :

  • 1 medium ripe or over ripe Robust Banana
  • 1 Egg
  • 1/4 cup Water/ Milk (adjust if more required)
  • 1 tsp Vanilla Essence 
  • 1 1/2 cups Old Fashioned Oats
  • 1/4 tsp Baking powder
  • 1/4 tsp Baking Soda
  • 1 Tbsp Yogurt
  • Salt, a pinch
  • 2 tbsp Unsalted Butter
  • Blueberries, to top
 

For Caramelized Banana Slices

  • 1/2 just ripened Banana slices
  • 2-3 tbsp Honey
  • Cinnamon powder, a pinch
  • Agave Syrup/ Honey

Instructions:

  1. In a bowl add all your Pancake ingredients except for bluberries and blend well using a hand blender or a machine blender.
  2. In a butter greased pan, pour 1/4 cup full of the batter to the pan, making 2-3 pancakes at a time (depending on the size of your pan). Drop a few Blueberries over the pancake and flip. Allow to cook well on both sides.
  3. Place the pamcake on a serving plate.
  4. To the same pan, add butter and drop in your sliced bananas, honey, Cinnamon powder and toss for a few seconds.
  5. Now slide the Caramelized bananas directly over the cooked pancakes and enjoy warm with a glass of fresh juice for a refreshing and delightful day ahead!
 

Do try this recipe and don't forget to share your experience/feedback with me here in the comments or feel free to send me a mail. Also, do tag me at #taystedit if you try out my recipes on Facebook, Instagram etc so that I can see when you make it. ♡♡♡♡

North Indian Style Dal Tadka


I am all about easy recipes that are EASY at the same time COMFORTING. For me, a plate of perfectly cooked rice, dal tadka, and chicken or any seafood fry is something very much that tells me home cooked meal. In North India, this is combination is very popular and is called Dal-Chawal (lentil-rice), a favorite among many.

Dal tadka is something I prepare once a week, it's wholesome, filling and keeps one content. This recipe is so easy and gets done in a jiffy! For lentils, I have used toor dal here. You may use red lentils, masoor dal, a mix or a combination of the lentils. There is no sautéing involved, only a tadka / tempering is prepared to give the dal its oomph!

You can have DAL TADKA with chappati, roti, rice or as a side curry. It will definitely be your family's favorite.

Ingredients :

  • 1/2 cup Toor Dal
  • 1/2 Onion, sliced
  • 1/2 Tomato, chopped
  • 1-2 Green chillies, slit
  • 1/4 tsp Turmeric powder
  • Salt, as required 
  • 3/4 cup Water
  • Coriander leaves, chopped 

Tadka:

  • 2 tbsp Butter
  • 1/2 tsp Cumin seeds
  • 1 tsp Ginger Garlic paste
  • 2 sprig Curry leaves
  • 1 tsp Kashmiri Red Chilli Powder
  • A squeeze of Lemon juice
  • Coriander leaves, chopped 

Instructions:

  1. Wash toor dal well and add to a pressure cooker. 


  2. Pressure cook all the ingredients except for the ingredients under tadka for 1 whistle. Allow the pressure to release naturally.
  3. In a small tadka pan, add in butter, allow to melt. 
  4. Splutter the cumin seeds, add ginger garlic paste, curry leaves, chopped coriander leaves and sauté well. 
  5. Pour the cooked dal, add in the Kashmiri Red Chilli powder, and adjust seasoning if required.
  6. Allow to simmer well. Finally squeeze lemon juice, garnish with chopped coriander leaves and add in a blob of butter.
  7. Enjoy with cooked rice, and your favorite sides like chicken or fried seafood!


Do try this recipe and don't forget to share your experience/feedback with me here in the comments or feel free to send me a mail. Also, do tag me at #taystedit if you try out my recipes on Facebook, Instagram etc so that I can see when you make it. ♡♡♡♡

 Mac n Paneer


Well, Paneer is a form of cheese , isn't it? This is the Indian version of Mac n Cheese :D

I had some Paneer laying in fridge to be used, and I had to quickly whip up something before my girl returns from school. That's when I thought of preparing the Indian Mac n Cheese also known as Mac n Paneer. You can always play with the flavors according your preference, like add other veggies or spices of your choice. 

There is no chopping involved in this recipe. The capsicum is also chopped by pulsing in the mixer jar along with tomato paste and other spices. I have not used green chillies or chilli flakes as my girl does not like her food spicy, you may add as per your choice.

This Fusion version is definitely a must try and loved by all Paneer lovers!

Ingredients :

  • 1 cup Macaroni
  • Boiling water, to cook the pasta
  • Salt, as required
  • A dash of Olive oil
  • 1 Garlic clove, sliced
  • 1 tbsp Olive oil
  • 1 tbsp Butter
  • 3 tbsp Tomato paste
  • 1 tsp Onion Powder
  • 1 tsp Kashmiri Chilli Powder
  • 1/4 Turmeric powder
  • 1/2 tsp Cumin powder
  • 1/4 piece of a large green Capsicum
  • 1/4 tsp Oregano
  • 1/2 cup Paneer cubes
  • Salt, as required 
  • 2 tsp Arrowroot powder
  • 1/2 cup Milk
  • 1/4 Cup Mozzarella Cheese
  • Cheddar Cheese, optional

Instructions:

  1. In a pot, boil the macaroni with salt, and olive oil until al dente.
  2. In a small grinder jar, pulse tomato paste, spices like Onion powder, Kashmiri Chilli powder, turmeric powder, Cumin powder and chopped capsicum.
  3. In a large pan, pour the olive oil and the butter, add the sliced garlic and Sautee for a couple of seconds.
  4. To this, add the pulsed tomato-capsicum paste, a little pasta water, sprinkle oregano and add in the washed Paneer cubes an add salt as required.
  5. Once the Paneer comes to a boil, add the arrowroot powder/ flour, mix and pour the milk.
  6. Check seasoning and add salt if required. Add a generous amount of Mozzarella cheese, close lid and allow cheese to melt.
  7. Finally sprinkle with chopped coriander leaves. Enjoy!


Do try this recipe and don't forget to share your experience/feedback with me here in the comments or feel free to send me a mail. Also, do tag me at #taystedit if you try out my recipes on Facebook, Instagram etc so that I can see when you make it. ♡♡♡♡


Abresham Kabob/ Silk Kabab


I happened to stumble on this recipe I found in a book in the Dubai Library. Abresham Kabob aka Silk Kabab is a delicacy originated in Afghanistan, where eggs strands are fried in oil and pulled using a stick and shaped like a kabab, which is then poured with sugar syrup or dusted with powdered sugar and finished off with a sprinkle of crushed pistachios which is mixed with a small amount pf cardamom powder. I felt that the recipe had similarity with our muttamaala (egg garlands), where the egg strands are cooked in sugar syrup and as for the silk kabab the egg strands are fried in oil.

In this version, I have used powdered sugar to dust the kabab for the sweetness. Alternatively, sugar syrup can be used for adding sweetness to the dish. I prefer the sugar syrup, but I happened to film the one with  powdered sugar. Some people like it with powdered sugar, so it is all about one's preference.

I love how easy this dish is to prepare, and not to mention how fun too! Usually different methods are used for achieving thin strands of the egg mixture, like a new steel scrubber, etc, here I have used my clean hands, the traditional way.

Ingredients: (makes 7-8 pieces)

  • 2 large Eggs
  • A pinch of salt
  • 1 cup Vegetable oil
  • 1/4 cup pre prepared sugar syrup* / powdered sugar
  • 3 tbsp Pistachios, crushed
  • 1/4 tsp Cardamom powder


Instructions:

  1. In a bowl, slowly beat the eggs using a fork, lightly, do not beat and make the eggs foamy.
  2. Add a pinch of salt to the eggs and mix.
  3. In a pan, pour oil and allow to heat well. 
  4. Now using a new steel scrubber or your clean hands, dip your hand in the egg mixture and fold your fingers inwards, and bring your hand over the hot oil and swiftly swing your hand with the egg mixture over the hot oil and keep doing this until you get a two inch thick egg strands layer.
  5. Fry just until it starts looking crisp in the middle. Using a skewer, lift the egg strands from the middle upwards and allow both the sides to fry well, by placing each side in the oil.


  6. Slowly place the kabab on a baking paper and fold the egg strand like a folded letter and pull off the skewer.
  7. Make the whole batch the same way.

  8. Now crush the pistachios and mix a dash of cardamom powder to it.
  9. Pour the sugar syrup/ powdered sugar over the silk kabab and spoon over them a tsp of the pistachio/ cardamom mix and enjoy immediately! 
  10. Your super easy sweet/ dessert is ready!

Ps: The recipe says that you can store in an air tight container for a couple of days, but pour the sugar syrup only before consuming it.
I preferred the sugar syrup version than the powdered sugar.


Do try this recipe and don't forget to share your experience/feedback with me here in the comments or feel free to send me a mail. Also, do tag me at #taystedit if you try out my recipes on Facebook, Instagram etc so that I can see when you make it. ♡♡♡♡

 Skillet Granola


I love days when my day starts with a bowl of Granola, it is light on the tummy, super Nutritious and delicous. Granola once prepared, can be stored in an air tight container and can be used upto a couple of months. The case here is that, Granola always vanishes to thin air, and mostly I will have to hid the jar, or else the next morning the jar gets empty. I love how the sweet crunchy oats marries well with the beaten yogurt and fresh fruits and berries.

Such an underrated breakfast I must say. I feel so pumped up in the morning whenever I eat granola. The perfect breakfast when you have little to no time to prepare food for yourself. The skillet granola is such a good hack, when you want to make granola and you don't have access to oven. While making on a skillet, make sure you keep stirring the granola, so that the rolled oats does not get burnt, especially once you add honey, the chances of burning are high. But making granola on a skillet is much easier, as you can make sure, nothing gets burnt and the granola gets crispy pretty quickly. Do try this super easy breakfast and I am sure you will love it!


Ingredients :

  • 1 1/2 - 2 cups whole Rolled Oats
  • 1/4 cup Coconut oil
  • 5-6 tbsp Honey/ maple syrup
  • 1 tsp Vanilla Essence 
  • Salt, a pinch
  • 1/4 cup Healthy Nut Mix
  • 1/2 cup Yogurt
  • 1/4 cup berries
  • Fresh fruits of your choice
  • 1 tsp Chia seeds

Instructions:

  1. In a pan, pour coconut oil and add in your rolled oats, keep tossing until crisp.
  2. Once you feel the oats are crisp, add in your sweetener, honey. Combine well.
  3. Next add Vanilla Essence, salt, and health nuts mix and toss again.

  4. Whilst hot, transfer the granola to a baking paper and allow to cool.

  5. You may tap and shape into a rectangle, either way, allow to cool and crisp. Once cooled, break the granola pieces between your fingers/ palms so that the granola is not joined into a bar.
  6. In a bowl, whisk yogurt well, and add the crisp granola as topping along with fresh fruits and berrie and a teaspoon of chia seeds. 

Do try this recipe and don't forget to share your experience/feedback with me here in the comments or feel free to send me a mail. Also, do tag me at #taystedit if you try out my recipes on Facebook, Instagram etc so that I can see when you make it. ♡♡♡♡


 Yemeni Mutton Haneeth


Yemeni Mutton Haneeth is a popular dish where lamb meat, preferably ribs cut/ shoulder cut is marinated in a blend of spices with butter and slow roasted until the meat is so tender that it falls off the bone. So the meat is usually cooked for many hours until tender. Since, we live a fast life, it's preferable to cook the meat using the pressure cooking method. But if you have the time, I would suggest to prepare the Haneeth using the slow cook method. The meat becomes so tender either way, that it just melts in the mouth. To give it extra texture, the cooked meat is then roasted in the oven, for the skin to develop a juicy crust.

Since the meat is rubbed with spice rub, you do not want the spice rub to come off completely whilst the meat cooks, so I use a rack/ trivet that helps the meat not to be completely in direct touch with the water, hence the masala stays intact and the meat gets cooked well and also the juices from the meat drops in the water which is used to cook the rice, this helps to make the rice extra flavorful.

Mutton Haneeth is something that I can't have enough of, my husband says that I have an extra tummy when we go and eat haneeth/ mandi from restaurants! xD I am that much of a fan of the flavorful Yemeni dish. I used Basmati Sella rice here, you may use the usual basmati rice too, but I fee texture and flavorwise, sella rice stands out in Haneeth. Let's make this scrumptious main course right away! Or at least it's Fridayyy tomorrow :D Without further ado, let's get started!


 Ingredients :

  • 1 kg Mutton ribs/ shoulder *
  • 50 gms Butter
  • 1 tsp Garlic powder
  • 2 tsp Paprika powder
  • 1 tsp Freshly crushed Black pepper
  • 1 tsp Cumin powder
  • 1/4 tsp Turmeric Powder
  • 2 tsp Arabic Spice powder (store bought), optional
  • 1 tsp Rock salt
  • 1 MAGGI Chicken cube (less salt)
  • 2 tbsp warm Water
  • 1 cup Water

For Rice:

  • 1/2 cup oil 
  • 2 tbsp Cashews
  • 2 tsp Raisins
  • 2 Onion, 1 sliced and 1 chopped
  • 3 cups Sella Basmati Rice
  • 2 tsp Cumin seeds
  • 1 tsp Coriander Seeds
  • 2-3 Bay leaves
  • 2 Cinnamon sticks
  • 3-4 Cardamom pods
  • 4-5 Garlic, slightly pound  
  • 1 tsp Whole Peppercorns
  • 1 Dry Lemon
  • 1 Chicken Cube
  • 1/2 Capsicum, sliced
  • 4 1/2 Boiling water
  • 1/2 cup mutton broth 
  • Salt, as required
  • 3 whole Green Chillies, Large
  • A pinch of Saffron strands, soaked in warm water

Instructions:

  1. In a blender, blend all the spices, rock salt, chicken cube along with room temperature butter and warm water.

  2. Poke the mutton ribs using fork and rub the marinade well onto the ribs.
  3. In a pressure cooker, place a trivet or a stand that helps elevate the meat from the water.
  4. Place the marianted meat over the trivet and pour water and allow to pressure cook for 7-10 whistles depending on how tender the meat is, allow the pressure to release naturally.
  5. To make the rice, fry the sliced onions in the oil until golden and crisp, drain and set aside. 
  6. To the same oil, add in your cashews and raisins, drain and set aside.
  7. Now add the whole spices to the oil, along with lightly pound garlic, dry lemon, Maggi chicken cube and capsicum. Mix everything well and now add in the washed and drained rice.

  8. Check the mutton ribs, once the pressure is released naturalluy, set aside the broth water and roast the ribs in oven at 180 Deg C for around 10 minutes, or until the skin is golden and crisp.
  9. Pour water and the mutton broth water. Place lid and allow the water to evaporate.
  10. Open the lid, give the rice a good mix, place whole green chillies and pour the saffron soaked water. Close the lid and allow the rice to cook well on simmer for 20-25 minutes. *

  11. Check tenderness of the rice and transfer to a large platter and place the oven roasted mutton ribs and sprinkle the crispy Fried onion, raisins and cashews.
  12. Serve Haneeth piping hot, super tender ribs with Shatta** (tomato chutney).


** Shatta recipe - Blend tomato, green chilli, salt, paprika powder and set aside. 
Prepare the Shatta early, as the blending makes teh tomato chutney frothy, so when done eariler, helps the bubbles and foam to settle on its own. 
 

Notes:

  • You may soak the sella basmati rice, but it is not necessary .
  • Rock salt is preferred to use when marinating in the spice rub, as rock salt helps to marinate the meat thoroughly, (I did not keep the marinated meat overnight or even a few hours, yet the meat was perfectly marinated)
  • Do not open lid in between the cooking process, allow the heat to cook the rice really well. 
  • *I used mutton racks in this, you may choose any cut that is tender. 
  • Please note that different brand rice require differ amounts of water, but to stay on the safer side I take the ratio 1: 1 1/2 ratio for rice and water respectively and add an extra 1/2 cup water, and the additional broth water makes it perfect.
  • You may smoke the rice by adding a hot piece of charcoal and pouring oil over it in a small disposable aluminum/ steel container and closing the lid. But I prefer otherwise, without doing this step, as I feel the flavors feel very artificial whenever I smoke the rice and gives me a very bad headache, so you may do it if you like smoking the rice 👍🏼

Ps: This may not be the authentic recipe, but it definitely is the best!


Do try this recipe and don't forget to share your experience/feedback with me here in the comments or feel free to send me a mail. Also, do tag me at #taystedit if you try out my recipes on Facebook, Instagram etc so that I can see when you make it. ♡♡♡♡

 Crispy Fried Calamari


One of the easiest appetizers to make are these Crispy Fried Calamari. If you have cleaned squid, this snack/ appetizer takes only a minute to fry. Not kidding, calamari takes only a minute to cook, well, if you fry it anywhere around 5 minutes or more, the texture then turns rubbery. 

Calamari are simply a type of squid that are smaller in size. Squid does not have too much cooking time, but if you plan to cook it really well, you might use the pressure cooker, as the pressure cooker method makes the squid less rubbery. To know the exact cooking time for squids, there is no cooking time that is 'in between'. It is either cooked for a minute on high flame or cooked for a long time, preferably in pressure cookers.

I wanted to be innovative with this recipe, but for some recipes, the simplicity is what brings out the flavors of the calamari. The recipe is super easy with very few ingredients and does not use egg too, it's that easy and mess free!

Ingredients :

  • 500 gms Squid, skin peeled and cleaned 
  • Salt, as required
  • 1/2 tsp Black Pepper, crushed
  • 1/2 cup All Purpose Flour
  • 1/4 cup Corn Flour
  • 1 tsp dried Parsley, optional
  • Vegetable Oil

Mayo Sauce:

  • 1 tiny Garlic Clove
  • 3 tbsp Mayo

Instructions :

  1. Cut the cleaned squid into thin rings and add salt and pepper to it. Mix well and set aside.


  2. In a bowl, add all purpose flour, corn flour and the dried parsley, mix well using a whisk.
  3. Now drop the marinated squid rings to the flour mix and coat well.
  4. In a deep pan, pour vegetable oil and allow to heat well, once heated, add in the squid rings one at a time, on medium high flame.

  5. Fry for 30 seconds, and flip and fry for another 30 seconds and you are done!
  6. Mix the minced garlic and mayo and enjoy the fried crispy calamari as it is or with the dip!
 

Do try this recipe and don't forget to share your experience/feedback with me here in the comments or feel free to send me a mail. Also, do tag me at #taystedit if you try out my recipes on Facebook, Instagram etc so that I can see when you make it. ♡♡♡♡

 Najaf Style Chicken 65


A very fond memory of Dubai, has to be the Chicken 65 from Najaf Restaurant, Deira, for so many of us expats. It is slightly tangy, sweet, spicy, vibrant and a firework of flavors! Once you have had Chicken65 from Najaf, you can never see Chicken 65 as a dry fry, like how it's usually served in restaurants. This recipe, has a story behind it, its not completely mine, it's a compilation of 3 different recipes, which includes mine. 

The story begins like this - My mom in her young days, used to love experimenting with food. One fine day, she happened to smell the beautiful aroma of curry leaves sautéed in butter coming in from the flat underneath, the aroma just held the air still. Then a few days later, when she had the Najaf 65, she immediately remensced the aroma of the curry leaves sautéed in butter. So she started experimenting on her own - she knew there was yogurt in it, and the spices she played with and almost got hold of it. This recipe was developed years ago, where marinated chicken is cooked in the marinated yogurt masala itself and the rest of the steps are similar to mine, but mom doesn't add ginger garlic paste. 

Recently I saw a recipe of a fellow blogger (sweetandsavoryfood.com) frying the chicken pieces, so I tried this and felt that the sauce held onto the chicken much better when fried and her recipe so much like mine and my moms.

I have used butter to splutter the curry leaves and the mild green chillies, you may use ghee too, but I felt butter gives that intense flavor. What I love about the recipe is that, with very few ingredients you can make a curry that is delicious and finger licking good. I did not use any form of food color in the recipe, so you can be sure that you can serve your kids happily too and they will love it, in Sha Allah! 


Ingredients :

  • 500 gms Chicken, curry cut
  • 1/4 tsp Turmeric powder
  • 2 tsp Kashmiri Chilli powder
  • Salt, as required

For the gravy:

  • 2 large Green chillies, mild, chopped (more if you like it spicy)
  • 2 sprigs Curry leaves, chopped
  • 1/2 of a peeled onion, chopped roughly
  • 1/4 inch ginger piece
  • 3 cloves of Garlic
  • 1/2 cup Yogurt 
  • 2 tbsp Tomato paste
  • 1 tsp Kashmiri Chilli powder
  • 1/2 tsp Coriander powder
  • 1 tbsp Tomato Ketchup
  • 1/2 cup water 
  • 1 large knob of butter 
  • Salt,as required 
  • Pinch of sugar 
 

Instructions :

  1. Marinate the chicken with Kashmiri Chilli powder, Turmeric Chilli powder, and salt as required.
  2. Fry the marinated chicken pieces in vegetable oil and do not over crowd the pan while frying, for around 10-12 minutes .
  3. Chop the green chillies and curry leaves and set aside.
  4. In a mixer jar, add in the chopped onions, ginger pieces, garlic, yogurt, tomato paste, tomato ketchup, red chilli powder and coriander powder. Blend well to a fine paste.
  5. In another pan, add a knob of butter and add a couple of tablespoons of the fried oil to the butter (so that the butter does not burn).
  6. Now add in the chopped curry leaves and chopped green chillies, saute for a couple of minutes.
  7. Add in the prepared yogurt-tomato paste. Mix well and allow the gravy to cook well.

  8. Next add in the fried chicken pieces and pour water and allow to come to a boil, add salt, as required. And a pinch of sugar.
  9. Let the gravy reduce and come to a boil and when the color of the gravy changes to a bright red and the oil separates from the gravy, you know your curry is done!

  10. Enjoy with a hot flakey porotta! Yummmm...
 

Do try this recipe and don't forget to share your experience/feedback with me here in the comments or feel free to send me a mail. Also, do tag me at #taystedit if you try out my recipes on Facebook, Instagram etc so that I can see when you make it. ♡♡♡♡

 Puzhungapathil/ Meen vecha pathil (Steamed Rice Pancakes stuffed with Fish Masala)


Here I am sharing the recipe of puzhungapathil, something I despised until few years ago. Never did I imagine Iwould actually be posting the recipe of puzhungapathil, or aka meen vecha pathil, it's more like a Kerala version of stuffed pizza, at least that's how it is popularly known among kids. :D

This pathil is one of the most popular dinner dishes originating from Thalassery, where a dough is made of rice flour and spread with a layer of fish masala made using ground coconut, over which fried fish is placed and finally a similar layer of rice flour dough is smeared with the fish masala and placed over the fried fish layer, the masala smeared side facing downwards. The sides of the pathil are pressed slightly to close the edges which might leave finger impression son the edges.

The process might seem tedious and may look like huge task, but when the work is divided, and done in advance, it's easier to assemble and prepare the final product. The rice need to be soaked and ground and made into a dough adding roce flour and set aside. Prepare the fish masala and fish fry and set aside and assemble them and steam them, when required for around 20 minutes each. The name puzhungapathil comes as the pathil (roti) is made using the steaming method (puzhungal) so we call it puzhungapathil, puzhungalarotti, meen vecha pathil, etc. The same pathil is made into a crescent shape and stuffed with the masala and fried fish and is called Meen ada. Some people like to make the masala like dry fry, I prefer the more moist version, and also in some versions, the fried fish is pulled apart and the flesh is added to the masala. No matter what fish you choose for the masala, adding prawns always takes the flavor of the masala to a next level. Puzhungapathil with a glass of Sulaimani (black tea) is a must. It always tastes the best the next morning..mmmm.. Yummmm!!

Here I have used kingfish and prawns. I am sure you will love this TRADITIONAL Malabar dinner! Without further a do, let's see how it's done!


Ingredients : (makes around 7-8 medium pathils)

For Pathil:

  • 3 cups ready made rice powder/ 2 cups Puzhungalari (par boiled rice) soaked in medium hot water for 4-5 hours
  • 1/2 box Shredded Coconut
  • 1 tsp Fennel seeds
  • 1/2 tsp Garam masala powder
  • 1/2 Onion, roughly chopped
  • Salt, as required

For Frying fish:

  • 100 gms Prawns, cleaned and deviened (marinated in turmeric, chilli powder and salt)
  • 250 gms King Fish slices (marinated in turmeric, chilli powder and salt)
  • Coconut oil, for frying
  • 2 sprigs curry leaves

For the masala/ filling:

  • 1/2 + 3 tbsp box Shredded coconut
  • 1 tsp Fennel seeds
  • 1/2 cup warm water
  • 1 1/2 Onions, sliced
  • 1 tbsp ginger garlic, freshly pound 
  • 2 sprigs Curry leaves
  • 1 Tomato, chopped 
  • 1/4 tsp Turmeric powder
  • 2 tsp Kashmir red chilli powder
  • 1 tsp Coriander powder
  • 3 Green chillies, slit
  • Salt, as required

Instructions :

  1. You may prepare the pathil using two method - either by soaking the Puzhungalari in warm water for 4-5 hours and tightening the dough using rice powder or only using rice powder and adding water according to package and adding a mixture of ground paste that consists of coconut, fennel seeds, garam masala powder and onion and preparing a rice dough. Cover the bowl and set aside.
  2. To prepare the filling, first fry the king fish and prawns in coconut oil with curry leaves (3-4 minutes) and set aside.
  3. In an earthern pot or any pot of your choice, pour the residual coconut oil that was used for frying the fish.
  4. Add the sliced onion, curry leaves and add salt and saute until translucent .
  5. Next add in the pound ginger garlic paste, saute until raw smell disappears.
  6. Add in the chopped tomatoes, mix and place lid and allow to cook for 1-2 mins, until mushy.
  7. Next, add in the spices like turmeric powder, red chilli powder, and coriander powder, sauté well.
  8. Add salt, if required and allow the ingredients to combine, you can know this when the oil starts separating from the masala.
  9. Now, add in the slit green chillies and mix.
  10. In a mixer grinder, add in the coconut and fennel seeds and grind to a coarse paste.
  11. Add water and salt as required, allow to come to a boil.
  12. Now add the fried fishes and allow to simmer on low for 2-3 minutes. Allow the masala to cool before filling the pathil.

  13. The dough that has been resting has to be made into balls of same quantity.
  14. On a banana leaf/ Aluminum foil sheet, rub a good amount of coconut oil and place a ball and spread the rice dough ball using your fingers or using the back of a flat lid. (oiled) and flatten well, not as thin thin as a roti 

  15. Onto the flattened rice dough, spread the masala and place the fried fish (kigh fish and 3-4 prawns) and similarly repeat the process for another piece of dough ball, but this time only spread the filling and don't place the fried fish.

  16. Now flip the flattened pathil with only the masala filling and slowly hovering it above the pathil with fried fish with the masala side facing down, slowly place one end of the pathil one the oathil with the fish and slowly slide the banana leaf off, and seal the edges using your finger impressions .

  17. Now to a pre boiling steamer, place the prepared pathil and allow to steam for 20- 25 minutes depending upon the size of the pathil.

  18. Once taken out, allow to cool, slice to desired sizes, and enjoy with a hot cup of sulamani (black tea).


Notes:

Make sure the filling isn't too dry or too watery.
The rice dough should be too hard, if it's hard, the dough will have cracks and if the dough is too loose, it will not hold its shape.
Prepare the filling in advance, so that the preparation becomes easier.


Do try this recipe and don't forget to share your experience/feedback with me here in the comments or feel free to send me a mail. Also, do tag me at #taystedit if you try out my recipes on Facebook, Instagram etc so that I can see when you make it. ♡♡♡♡

    Pulivaaral/ Tamarind shaped Snack


Chai time means snack time. I am usually not too fond of sweet snacks when having tea. But this one is an exception. ( I just decrease the amount of sugar in my tea, as anyways I wouldn’t be able to make out the difference; if the chai has sugar or not, when having sweet snack with chai. Pulivaaral; Puli means tamarind and vaaral means to pull, so basically it is a fried dough, more like Kerala Churros, well that's what my sister likes to call it! :D Though the snack has nothing to do with Puli (tamrind), the shape demonstrates otherwise. They are traditionally made with mysore banana or any ripened cheru pazham (small banana), but I have used robust variety here, as in the gulf, the robust ones are easily available , yet the final product tastes the same, anyhow.

Traditionally my grandmother and my hub's grandmother, they squeeze the dough through their hands and pull into long strips, and fried until brown. It is not easy to get it right with bare hands, you need practice. So most of the new generation use piping bags to easily squeeze the dough to the hot oil. Hub's grandmother is an expert in making them, this may not be anywhere close to hers, and this is my version, more on the crisper side, as I like it that way. The ripe bananas are Mashed and sugar is added as a sweetener, and flours like whole wheat flour and roce flour are added too. 

Rice flour gives the pulivaaral the extra crisp, so make sure you don't add it too much. I have demonstrated here a small batch with just one banana, you may prepare a large batch. I like to fry my pulivaaral in coconut oil, which adds an extra flavor to it. Though they do not look quite appealing, everyone, including kids will love it and you get to save an over ripe banana, so it's a win-win situation!


Ingredients:

  • 1 Large ripe Robust Banana/any small banana like mysore banana (8-9 pieces)*
  • 1/4 Cup Sugar
  • 1/4 Cup Wheat Flour
  • 2 tbsp Rice Flour
  • Cardamom powder, a pinch
  • Salt, as required
  • Coconut oil, to fry

Instructions :

  1. Mash the ripe banana and make to a paste.
  2. Add sugar, wheat flour, rice flour, a pinch of cardamom powder and salt.

  3. Now incorporate all ingredients well and form a semi loose dough.
  4. Now using a piping bag, fill the contents into it.
  5. In a large flat base pan, pour coconut oil and pipe into long stick shapes directly over hot oil, be careful while doing this. 

  6. Fry until brown and store in casserole for retaining heat. Enjoy with a cup of chai.

Notes: 

*If using 8-9 small bananas, use 1/2 cup wheat flour and around 4 tbsp rice flour.

If you feel the batter is a bit too loose you may add some more wheat flour.


Do try this recipe and don't forget to share your experience/feedback with me here in the comments or feel free to send me a mail. Also, do tag me at #taystedit if you try out my recipes on Facebook, Instagram etc so that I can see when you make it. ♡♡♡♡

Newer Posts
Older Posts

Search This Blog

My name is Hasna Haneef, a mommy to a toddler, hailing from Thalassery, Kerala. Welcome to my humble abode on the Internet; wherein I share all my recipes and experiments. I am glad to have you on board!

TRENDING POSTS

  • Emirati Chebab
  • Chicken Steak with Creamy Mushroom Sauce
  • Kerala Style Squid Roast
  • Regag - Emirati Flat bread
  • Kerala Beef Fry/ Nadan beef dry fry
  • Junglee Chicken Sandwich

About Me

May peace be with you!

Welcome to my blog.

I am delighted to have you on board. My name is Hasna Haneef, a mommy to a toddler, hailing from Thalassery, Kerala. My homeplace being Dubai, as I am born and brought up here and I am very influenced by the lifestyle and the variety of authentic cuisines I get to try from here, which has made me try anything that comes across me
, click here →

Stay Connected!

Join Our Madness!

Join with Thousands Of Subscribers ! Get Our Latest Recipes Delivered to Your email Inbox!

Powered by follow.it
  • Home
  • About Me
  • Recipes

    • Main Course
    • Desserts
    • Snacks

    Uncategorized

    • Chicken
    • Meat
    • Vegetarian
    • Rice
    • Malabar Food
    • Baking
    • Breakfasts
    • Snacks
    • Drinks
    • Pasta
    • Fish
    • Soups
    • Desserts
  • Contact Me

Featured Post

Triple Chocolate Hazelnut Skillet Cookie

Blog Archive

  • ►  2025 (4)
    • ►  April (2)
    • ►  March (1)
    • ►  February (1)
  • ►  2024 (36)
    • ►  October (4)
    • ►  September (5)
    • ►  July (1)
    • ►  June (2)
    • ►  May (4)
    • ►  April (3)
    • ►  March (10)
    • ►  January (7)
  • ►  2023 (47)
    • ►  December (3)
    • ►  September (2)
    • ►  August (6)
    • ►  July (6)
    • ►  June (9)
    • ►  May (4)
    • ►  April (5)
    • ►  March (6)
    • ►  February (3)
    • ►  January (3)
  • ▼  2022 (69)
    • ▼  November (4)
      • Mumbai Street Food Style Chicken Frankie
      • Healthy Oats Pancake with Caramelized Cinnamon fla...
      • North Indian Style Dal Tadka
      • Mac n Paneer
    • ►  October (6)
      • Abresham Kabob/ Silk Kabab
      • Skillet Granola
      • Yemeni Mutton Haneeth
      • Crispy Fried Calamari
      • Najaf Style Chicken 65
      • Puzhungapathil/ Meen vecha pathil (Steamed Rice Pa...
    • ►  September (7)
      • Pulivaaral/ Tamarind shaped snack
    • ►  August (9)
    • ►  July (12)
    • ►  June (5)
    • ►  May (5)
    • ►  April (12)
    • ►  March (4)
    • ►  February (2)
    • ►  January (3)
  • ►  2021 (24)
    • ►  November (1)
    • ►  October (2)
    • ►  July (1)
    • ►  June (4)
    • ►  May (6)
    • ►  April (4)
    • ►  February (4)
    • ►  January (2)
  • ►  2020 (82)
    • ►  December (5)
    • ►  November (6)
    • ►  October (4)
    • ►  September (2)
    • ►  August (5)
    • ►  July (10)
    • ►  June (10)
    • ►  May (13)
    • ►  April (12)
    • ►  March (8)
    • ►  February (4)
    • ►  January (3)
  • ►  2019 (22)
    • ►  December (1)
    • ►  November (2)
    • ►  October (6)
    • ►  September (1)
    • ►  August (1)
    • ►  February (3)
    • ►  January (8)
  • ►  2018 (15)
    • ►  December (4)
    • ►  November (6)
    • ►  October (3)
    • ►  September (2)

Subscribe Us

Labels

Bake Biscuits Breakfast Brown rice Burger Cheese Chocolate Dal Egg Emirati Fish Iftar Indonesian Japanese Jeerakashala rice Kerala Keto Kuwait food Lunch Milk Mutton Thai food UAE food afghan cuisine arabic beef biryani bread burnt cheesecake cake chicken cream dessert dinner greek healthy indo chinese lamb malabar prawns pudding puffs quick dinner ideas recipe refreshing drink rice salad sandwich stir fry vegetables vegetarian veggies yemeni

Contact Form


POPULAR POSTS AND PAGES

Emirati Chebab

Emirati Chebab

June 01, 2023
Chicken Steak with Creamy Mushroom Sauce

Chicken Steak with Creamy Mushroom Sauce

November 05, 2018
Kerala Style Squid Roast

Kerala Style Squid Roast

June 18, 2020
Regag - Emirati Flat bread

Regag - Emirati Flat bread

December 02, 2020
Kerala Beef Fry/ Nadan beef dry fry

Kerala Beef Fry/ Nadan beef dry fry

October 08, 2019

Pages

  • Home
  • About Me
  • Privacy Policy
  • Contact Me

Copywrite © 2023 TermsFeed®. All rights reserved.

Created By Sora Templates | Distributed By Gooyaabi Templates

Back to top