Search This Blog

Taystit by Hasna

Food, Recipes, and Beyond

  • Home
  • About Me
  • Recipes
    • Main Course
    • Snacks
    • Desserts
  • Uncategorized
    • Chicken
    • Meat
    • Vegetarian
    • Rice
    • Malabar Food
    • Baking
    • Breakfasts
    • Snacks
    • Fish
    • Pasta
    • Drinks
    • Soups
    • Desserts
  • Contact Me

Goan Chicken Fry


Goan cuisine is simply delectable, and my favorites are their lollipops and racheado fish fry (one of the most popular recipes) on my blog! 

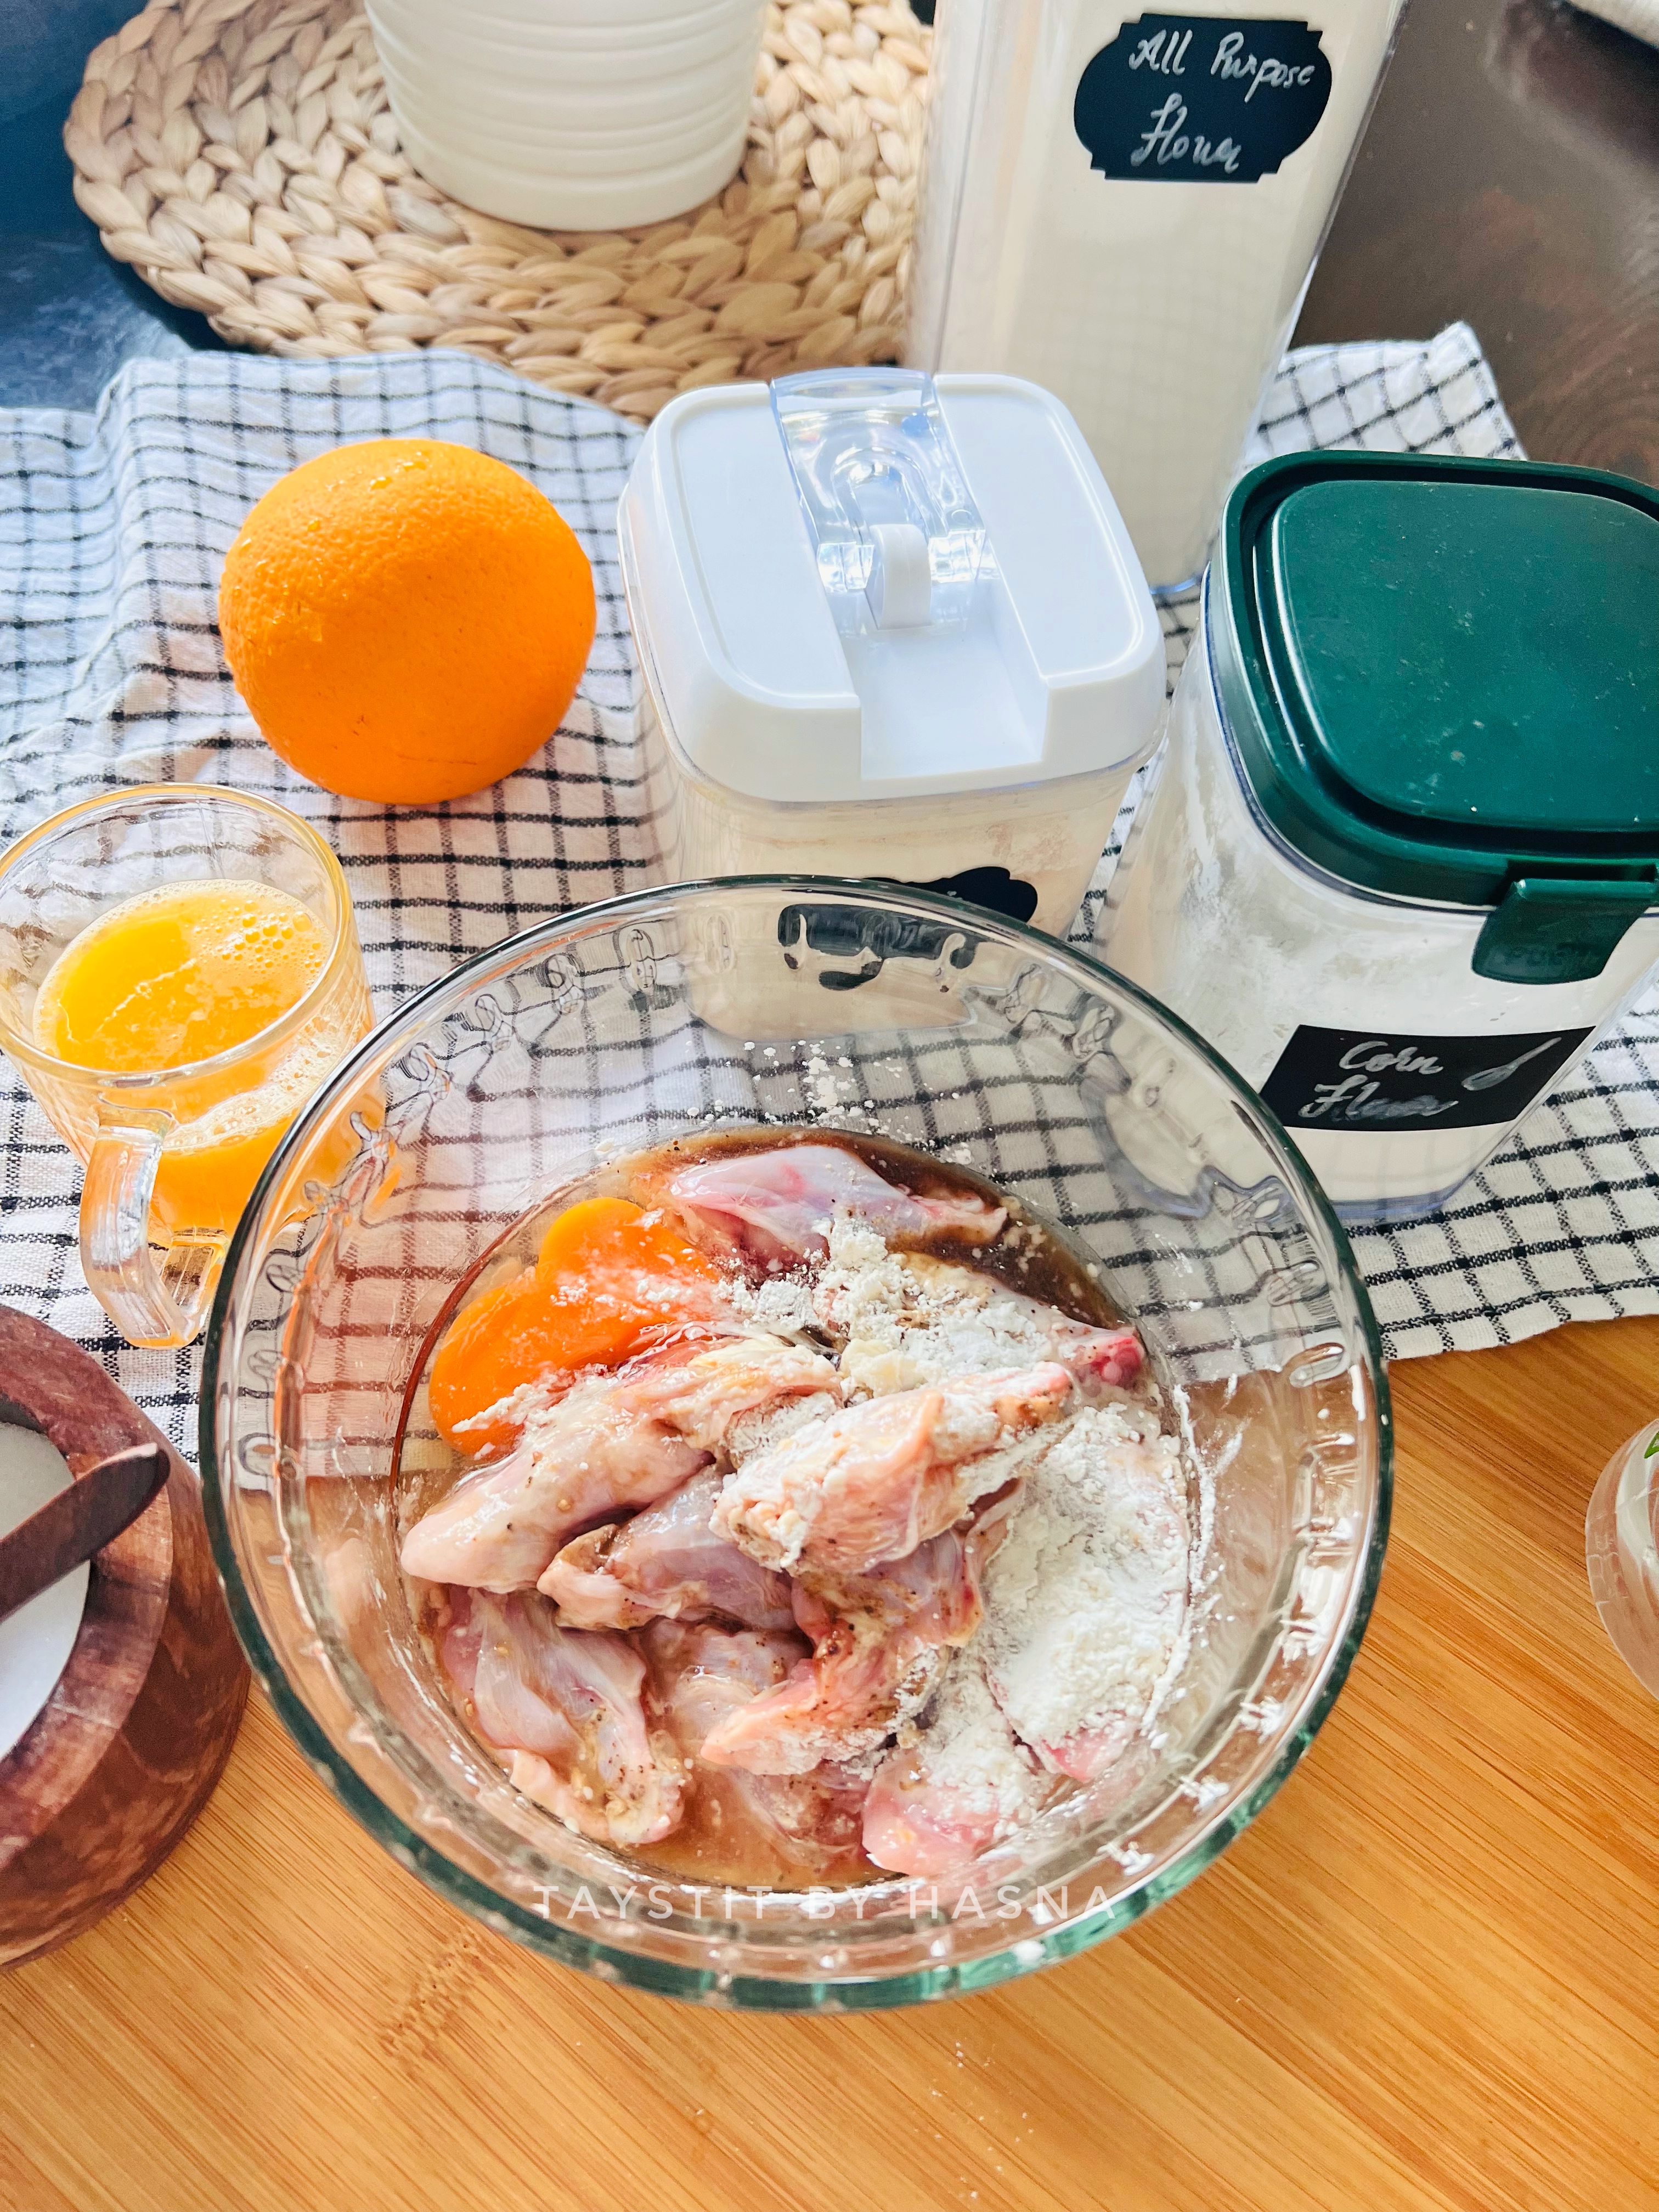
This chicken fry is no less delicious! The crispness from the gram flour, and corn flour, with the slight crunchy Kashmiri Chillis, make this chicken fry a lot more delicious unlike the usual chicken fry. 

Try to marinate overnight for better results or at least for half an hour. Fry the marinated chicken right before serving.

Ingredients: 

  • 500 gms Chicken pieces with bone
  • 1 tsp Ginger Garlic paste
  • 6-8 Kashmiri Dry Red Chillies
  • 1 tbsp White Vinegar 
  • 1/4 tsp Turmeric powder 
  • 2 tsp Kashmiri Chilli powder
  • 1 tsp Coriander powder
  • 1/2 tsp Garam masala powder
  • 1 tbsp Gram Flour 
  • 2 tbsp Corn Flour 
  • 1 tsp Rock Salt* 
  • 1 tbsp Lemon Juice 
  • Coconut oil, for frying
  • Curry leaves, for garnishing 

Instructions: 

  1. Soak the dry red Kashmiri Chillies in hot water for 10-15 minutes.
  2. Next, grind them with Vinegar and make them to a coarse paste.
  3. To the cleaned chicken, add ginger garlic paste, spice powders like turmeric powder, Kashmiri Chilli powder, Coriander powder, and Garam masala powder. 
  4. Next add in your corn flour and gram flour, rock salt and lemon juice and combine everything well. 
  5. Marinate at least for half an hour or overnight if possible. 
  6. Deep fry the chicken pieces in coconut oil, make sure to add them when the oil is hot, on medium flame. 
  7. Fry the chicken pieces for 15-20 minutes until all sides are fried well and crispy. 


  8. Add in curry leaves, and fry them and drain them and add to the fried chicken. 
  9. Serve them hot. 
*Note : Using Rock Salt helps the salt to penetrate to the bones, making your chicken even more flavorful.
Make sure not to flip them quickly, as the coating will come off, allow one side to fry on medium low and then only flip.

Do try this recipe and don't forget to share your experience/feedback with me here in the comments or feel free to send me a mail. Also, do tag me at #taystedit if you try out my recipes on Facebook, Instagram etc so that I can see when you make it. ♡♡♡♡

Orange Chicken Wings


I am all in for anything sweet, spicy and tangy..and this orange chicken wings sums up the whole concept! This American-Chinese dish is super easy to prepare, and makes the perfect side dish to go with fried rice, stir fried noodles etc.

Chicken wings are marinated and deep fried and tossed into a sweet, spicy and tangy orange sauce. The OJ might be very tangy at times, if this is the case, adding a dash of honey helps to level it out and bring out the flavors .To retain the crispness, make sure to toss the crispy fried chicken with the orange sauce just prior to serving! 

Ingredients: 

  • 300 gms Chicken Wings
  • Salt, as required 
  • 1/2 tsp Black pepper
  • 1/2 tsp Garlic powder 
  • 1 tbsp Soy sauce
  • 1 Egg
  • 2 tbsp Corn Flour 
  • 1 tbsp All purpose flour/ maida
  • 1 tbsp White Vinegar
  • Vegetable oil, for frying 

For the Orange Sauce:

  • 1 tbsp Butter 
  • 1- 2 Garlic, minced 
  • 1/2 tsp Red Chilli Flakes 
  • 1 tbsp Soy sauce
  • 1 glass freshly squeezed OJ (Orange Juice)
  • Red Pepper, sliced (optional)
  • Orange Zest, a pinch 
  • I tsp Corn Flour mixed in 2 tbsp water
  • Salt, if required 
  • 1 tsp Honey
  • Spring onion, to garnish 
  • Sesame Seeds, to garnish 

Instructions:

  1. Marinate the chicken wings by adding salt, pepper, garlic powder, soy sauce, egg, corn Flour, all purpose Flour, and white vinegar. 


  2. Allow to marinate at least for half an hour.
  3. Fry the chicken wings, in the vegetable oil until golden for about 10-12 minutes in total (make sure not to flip the frying chicken wings immediately after you add them to the oil to fry, after around 4 minutes on. Medium low flame, check the side slowly and flip) 

  4. To prepare the sauce, in a pan, add butter, and immediately add minced garlic, add soy sauce, red chilli flakes, OJ, sliced red pepper, orange zest and allow to come to a boil, now lower the flame and add in the corn flour slurry, mixing continuously, as you pour the slurry.
  5. Finally, adjust seasonings as required and finally add in honey to balance out the flavors. 

  6. Once the chicken has cooled slightly, re fry the chicken for 2-3 minutes to make it super crispy. 
  7. When serving, toss the crispy fried chicken wings in the sauce and serve. Garnish with sesame seeds and spring onions. 
  8. Enjoy hot with a plate of delicious fried rice ! 

Note:

You may prepare the same using boneless chicken pieces as well! 

Do try this recipe and don't forget to share your experience/feedback with me here in the comments or feel free to send me a mail. Also, do tag me at #taystedit if you try out my recipes on Facebook, Instagram etc so that I can see when you make it. ♡♡♡♡

Malabar Prawns Kakka roti / Kunjipathil

(Rice Dumplings in Coconut Gravy)


One dish that we Malabaris love (tastes the best the next day) is this delicious Kakkaroti specifically known as so in Thalassery. These are dumplings of rice, ground with coconut and other spices, that is shaped to tiny balls with a slight dent, steamed and added to meat gravy with coconut paste/milk. 😋
. 
Whenever I sit to make these dumplings I always think of the person who might have come up with the idea. The whole family comes and joins to prepare them, it is so much fun with all the giggles and jokes around. But doing it all alone is tiresome. Though the task of preparing those dumplings are a tedious job, it is definitely a lobor of love. These are also called kunjipathil/ kunji pathiri.
.
Kakkaroti is popularly made with beef, chicken and mutton too! Prawns Kakkaroti tastes similar to puzhungapathil. This dish is especially made during thakkaram/ salkaram (special occasions). I shall mention below how to prepare the beef, chicken and mutton versions as well! I shall demonstrate using ari podi/ rice flour and the traditional soaking rice method too.


Ingredients: (makes for 2)

  • 1 cup Puzhungalari/ Par boiled rice, (soaked in steaming hot water for at least 4-5 hours) *
  • Ari podi (like amis) / Rice flour, as required **
  • 1/4 cup shredded Coconut 
  • 1/2 of an Onion, chopped roughly 
  • 1/2 tsp Fennel Seeds
  • 1/4 tsp Garam Masala powder*
  • 1 cup If using ari podi 
  • Salt, as required 
  • 250 gms Prawns, cleaned and deveined 
  • 1/4 tsp Turmeric powder
  • 1 tsp Kashmiri Chilli powder
  • 1 small Garlic, minced
  • 1 tbsp Coconut oil
  • Curry leaves 
  • 1 medium Onion, sliced finely 

Coconut Gravy

  • 3/4 cup shredded coconut 
  • 4-5 Shallots 
  • 1/2 tsp Fennel seeds 
  • 1 tsp Ginger garlic paste 
  • 3 Green Chillies
  • 1 tomato, chopped
  • 1/4 tsp Turmeric powder 
  • 2 tsp Kashmiri Chilli powder
  • 1 tsp Coriander powder 
  • 1 tsp Garam masala powder

Garnish

  • 2 tbsp Ghee 
  • Curry leaves 
  • 2-3 Shallots, finely sliced

Instructions: 

  1. In a mixer grinder, add the washed and soaked par boiled rice, coconut, onion, fennel seeds and garam masala, add a little amount of water to grind to paste.
  2. Transfer the content to a bowl and add in rice flour as required to make it tight. (Enough to make balls and make dumplings)

  3. Next, grease your hands with oil, take a small portion of the rice dough, as make tiny balls on the palm of your hand, roll it to make a small ball, and press gently in the middle to form a slight dent, similarly do all of the rice dough. ( ask someone to join along, as it’s fun and easier when someone tags along to make the tiny rotis)


  4. You can either drop these little dumplings onto a foil sheet or a banana leaf.
  5. Keep a steamer pot with water on the stove, once steam starts coming, place the foil or banana leaf with the dumplings.
  6. Allow to steam cook for at least 20-25 minutes. 
  7. Once cooked, transfer the dumplings to a heat proof bowl and sprinkle water, this helps the dumplings to separate from each other.
  8. For the prawns version, marinate the prawns using minced garlic, turmeric powder, Kashmiri Chilli powder, and coconut oil. 


  9. Fry them lightly in coconut oil and set aside.
  10. Next sauté sliced onion in coconut oil and add salt as required. 

  11. Add ginger garlic paste, once aromatic add in the green Chillies, chopped tomato, cover and allow to cook well until mushy. 
  12. Next add in the spice powders , sauté for a couple of seconds.
  13. Grind a paste that consists of shredded coconut, shallots and fennel seeds with little water. 

  14. Add in the ground coconut paste and a little extra water***

  15. Next add in the steamed rice dumplings, mix well. 


  16. Add the fried prawns that was kept aside. 
  17. Adjust water and salt as per needs. 
  18. Finally garnish with a tadka from ghee, sliced shallots and curry leaves. Enjoy with a nice glass of black tea!


Notes:

  • If preparing beef, chicken or mutton, prepare the curry by pressure cooking onion, tomato, green Chilli, spices powders (for chicken and meat, make the coriander powder 3-4 tsp), salt as required and add little water and pressure cook ( make sure you don’t add too much water)
  • Add the ground coconut paste and add in the tadka.
  • *You may use whole spices too
  • ** If using only ari podi (pathiri podi like Amis brand), 1 cup ari podi will yield quantity for 2 people. Add water as required, to make a soft (not too tight nor too loose) dough, that can be easily made into tiny balls.
  • *** Don’t worry if the gravy looks very loose, as the Kakkaroti sits, the rice dumplings act as a gravy mopping agent, making the gravy thicker as it sits.

Do try this recipe and don't forget to share your experience/feedback with me here in the comments or feel free to send me a mail. Also, do tag me at #taystedit if you try out my recipes on Facebook, Instagram etc so that I can see when you make it. ♡♡♡♡

Rose Baklava with Rabri 


Few months back I had gone for a food hunt with my friends and that’s where I had this amazing combination of Jelebi and rabri. Never did I imagine it taste soo good, as both are sweets, I wondered what would be so great about it?! 

When I tried the combination from a restaurant called Chatori Gali in Dubai, I have been craving them ever since! Couple of nights back, I was trying to get some sleep when, the thought of a fusion of the Arabic dessert baklava and the Indian dessert Rabri striked my mind. I immediately jotted my idea (coz I know once I wake up, I won’t remember a thing! Haha, yeah I am crazy like that!) and had to give it a try next morning itself! I was so happy with the outcome! 

This dessert is not only easy to prepare, and requires less time and minimal ingredients. Anything with that combo, I am in! 😍 To be honest, the flavors are like umm ali..but with the rose twist ! 😅 If you were to serve this for a party, I am sure everyone will love it! Just make sure you don’t pour the rabri on the baklava and keep on the serving table, pour in the rabri when serving only. 


Ingredients:

  • Phyllo sheets/ Baklava sheets 
  • 4-5 tbsp melted Butter

Sugar Syrup: (for 6-8 roses)

  • 1/2 cup Sugar 
  • A little more than 1/2 cup water
  • 1 tbsp Lemon juice 

Rabri:

  • 500 ml Full fat Milk
  • 100 gm Paneer, preferably Malai Paneer
  • 2-3 tbsp Almonds, Cashew and Pistachio Nuts crushed coarsely 
  • 1/4 tsp Cardamom 
  • 1 tbsp Rose Water 
  • 3 tbsp Sugar

Instructions:

  1. Cut the baklava sheet into half, smear the melted butter on one side, and crinkle the dough to form a thin crinkled sheet, now starting with the edge, begin rolling onwards till it forms the shape of a flower. Now place the baklava roses into the melted butter greased cupcake tin, smear the roses with melted butter using a pastry brush.

2. Preheat oven to 180 deg C, bake for 10 minutes on lower rack and another 10-15 mins on the second rack or until golden.

3. Make the Sugar Syrup by adding sugar, water and lemon juice to a sauce pan, bring it to a boil and simmer it for 7 minutes.
4. Switch the flame off and allow to cool.
5. Once the baklava are done, pour in the sugar syrup to hear a slight sizzle.

6. Then, prepare the instant rabri by taking a heavy bottom shallow pan, rinse the pan with water and without wiping the bottom, pour in the milk and bring to a boil and simmer for 15 minutes and stir in intervals, so nothing gets stuck to the bottom of the pan. 
7. Scoop the milk fat to the sides of the pan, finally scrape off the milk fat to the reduced milk which is now 1/3rd of the 500 ml milk.
8. Grate the paneer using a grater and add it to the reduced milk, the ground nuts, the cardamom powder, and rose water and Sugar. Cook the rabri for around 5 more minutes, while stirring often. **


Notes:

**If you want, you may add extra sugar, but once the milk is reduced, and sits, it thickens, so adding more sugar might make the rabri super sweet and heavy! 
Also note, not to be tempted to cook the rabri till very thick, even if it’s watery consistency, it will thicken when it sits. 
If possible, chill the rabri before serving. 


Do try this recipe and don't forget to share your experience/feedback with me here in the comments or feel free to send me a mail. Also, do tag me at #taystedit if you try out my recipes on Facebook, Instagram etc so that I can see when you make it. ♡♡♡♡

Chicken Reshmi Kabab 2.0


These are one of the best kabab recipes I have ever tried, and everytime I made this my husband raves about how good it is, and better than the ones we get from restaurants..little does he know that it’s super easy to make them too! This recipe has been on my blog since 2018, I thought it needed a revamp (coz it’s soo good!) and made a reel too..finally! Haha, do checkout the recipe reel on my Instagram. By the way, I haven’t deleted or changed the old post, as it shows my growth (in photography etc), and I wouldn’t trade it for anything 😉🫶🏼

Coming back to the recipe, if you love kebabs and BBQ you are gonna love the fact you found this recipe. I personally think this is the best kebab recipe I came across. So succulent and juicy that these hot kebabs are going to get over in a blink of an eye. So watch out! hahaha (Keep some for yourself, or else you will regret it later, I did!) 🙍 


Hard and dry Kebabs are my pet peeves! I found this recipe from a group of sisters and it was the trending dish, so I knew I had to make it! I would have regretted if I hadn't tried it. You just can't enjoy your kebabs if they aren't tender and juicy. Kebabs are like the staple food in middle eastern cuisine and the origin is also stated to be from the middle east. Yet they are relished, cooked and enjoyed all over the world. There are many variants and styles kebabs are prepared in. For me it’s always sheesh kebab. I just love them. I am sure you will love them too.


Kebabs are so delicious yet the easiest to prepare; it isn't deep fried and so doesn't require a lot of oil. I have used a grill pan here, you may use a non-stick fry pan. I love those stripes on my kebabs and grilling on a grill pan makes it even more succulent. The coconut powder and cream are the secrets to a successful tummy-kush kebab. The tender Chicken breasts is a game changer, you get them in supermarkets, it plays a big role to make the chicken even juicier. If you can't find them, you may brine them for half an hour to 45 minutes. You can do this by soaking the chicken in a solution of 4 cups of warm water and 1/4 cup of salt and a couple of tablespoon of sugar and 2 tablespoons of olive oil. This step isn't necessary but will help you attain juicy kebabs, you can totally omit it, it doesn't matter, it's just a tip of mine. I have been wanting to share this recipe since so long now. And finally, it is time to reveal the RECIPE OF THE JUCIEST KEBABS you are ever going to make!
Let's get started...

INGREDIENTS

  • 700 gm Tender Chicken Breasts
  • Salt (As Needed)
  • 4 Green Chilies
  • 1 Onion (Finely Chopped)
  • 5 gm Green Coriander leaves 
  • 35 gm Butter
  • 2 Garlic Cloves
  • 1 small piece Ginger (Chopped)
  • 2 tsp Coriander Powder
  • 1 tsp Cumin Powder
  • 1 tsp Garam Masala Powder
  • 1 tsp Black Pepper Powder
  • 1 tsp white pepper Powder
  • ¼ tsp Red Chilli Flakes
  • 2 tbsp Coconut Powder
  • 1 2 tsp Cream
  • Cooking Oil (As Needed)

Instructions:

  1. First of all, take a Blender, add chicken (after removing excessive water with paper towels), Butter, White Pepper Powder, Salt, Black Pepper Powder, Green Coriander, Onion, Coconut Powder, Cream, Red Chilli Flakes, Coriander Crushed, Garam Masala Powder, Cumin Powder, Ginger, Garlic, Green Chili. Now Blend these all ingredients with chicken. And Keep it in the fridge for 30 Minutes.


  2. Apply the oil at the hands, make kababs from the marinated chicken
  3. Take a pan, add oil and fry the kababs lightly
  4. Take oven tray and keep these kababs in this tray now oven bake for 10 minutes at 180 °C or grill them on a grill pan for 6 minutes on one side and flip and let it get done for 4 minutes on a medium-low flame. Serve Hot with creamy hummus and khubz.


Recipe Adapted from sooperchef.

Do try this recipe and don't forget to share your experience/feedback with me here in the comments or feel free to send me a mail. Also, do tag me at #taystedit if you try out my recipes on Facebook, Instagram etc so that I can see when you make it. ♡♡♡♡

19B Soup


What an interesting name for a soup yeah?! I was surprised too! Haha.. A Chinese chef developed the recipe of this soup whilst traveling on a train, and when he reached his destination, he prepared the soup and named the soup as per his seat number on the train. Also I read an article that the chef was one of the best in Pakistan and hence it is a pak-Chinese influence soup. Not sure about the authenticity of this part of the story, but still thought to put it here ☺️

The soup is more like hot and sour soup but with the addition of prawns, the soup has a very delicious flavor full of umami. This soup is perfect for the winters, when you want to gulp on some warm liquids. So satisfying! 

The soup is very easy to prepare too. The soup uses a whole egg without separating the yolks from the whites. And also remember to quickly stir when pouring the corn flour slurry, or else you will end up with a lumpy mess. And once prepared do try to have it immediately, reheating may not give the desired taste. 


Ingredients: (makes for 3)


  • 3-4 Mushrooms*, sliced
  • 1 egg
  • 3 1/2 tsp Corn Flour (mixed with 3 tbsp water)
  • 1/2 cup Carrot, chopped finely 
  • 1/4 cup Spring onion, chopped finely 
  • 150 gms Boneless Chicken, chopped finely 
  • 8-10 pcs Prawns, peeled and deveined (chop few of them)
  • 2 Garlic, freshly minced 
  • Small piece Ginger, freshly minced 
  • 2-3 tbsp Vegetable Oil
  • 1 Chicken Cube / 1 cup Chicken broth
  • 1-2 tbsp Soy Sauce 
  • 1-2 tbsp Red Chilli Sauce
  • 1 tsp White Pepper Powder
  • 1 tsp Black Pepper, crushed 
  • 1 tbsp Oyster Sauce, optional
  • 3 1/2 - 4 cups Water 
  • Salt, as required 
  • Spring onion, chopped (to garnish)

Instructions:

  1. In a heavy bottom pot, pour in the vegetable oil and add in the chicken pieces and the minced ginger and garlic and toss well until almost cooked. 
  2. Next, add in the chopped prawns and whole prawns.
  3. Add in your veggies like sliced mushrooms, finely chopped carrots.
  4. After a couple of minutes of sautéing, add in the chicken cube and add in the sauces like soy sauce, red Chilli sauce and oyster sauce and spices like white pepper, black pepper. 

  5. Pour in the water, close lid and allow to boil, once boiled, if froth is visible, skim it using a ladle.
  6. Pour in the corn flour slurry, while stirring continuously. 
  7. Add salt, if required, and sauces if necessary.
  8. Finally pour in the beaten egg like a thin string and swirl while doing it, mix gently.
  9. Garnish with the chopped spring onion and your 19B soup is ready to enjoy!

Note:

It is recommended to use shiitake mushrooms if they are accessible to you, if not normal button mushrooms works fine as well! *

Do try this recipe and don't forget to share your experience/feedback with me here in the comments or feel free to send me a mail. Also, do tag me at #taystedit if you try out my recipes on Facebook, Instagram etc so that I can see when you make it. ♡♡♡♡

Pastel de nata
(pastéis de nata)


My first post for the new year, let’s start the year with this famous portugal dessert called pastel de nata. It’s crunchy, goey, yet not very sweet but satisfies your sweet tooth. The crunchiness from the puff pastry and the cooked milk custard is the main highlight of this dish where two different textures marry each other! 

Pastel de nata is popular all around the world. I tried it couple of years back and immediately knew it was easy to make at home. The caramelized custard and the flaky puff pastry is a match made made in heaven. 

You will have to bake these custard tarts at the highest temperature setting on your oven. I used store-bought whole wheat puff pastry, you may use the normal puff pastry sheets (or if you have the time and willing to take that extra effort, can make the puff pastry sheets at home) why take the hassle when you get ready made puff pastry sheets?! 😉

These cute little caramelized custard tart babies will make a beautiful addition to your dessert table too, don’t forget to impress your guests with these delicious pastel de nata !😍


Ingredients:

  • 20 gms All purpose Flour
  • 3 Eggs (separate the yolks from the whites)
  • 25 ml Whole Milk 
  • 1 tsp Vanilla Extract 
  • 1/4 tsp Cinnamon powder 
  • Salt, a pinch
  • 125 ml whole Milk
  • Puff pastry Sheets

Sugar syrup:

  • 85 ml Water
  • 120 gm Sugar

Instructions:

  1. Measure the flour and set aside. 
  2. Depart the egg yolks from the whites and set aside. 
  3. In a saucepan, pour in the 125 ml milk and add in the vanilla extract and allow to heat, until almost boiling.
  4. In a bowl, add in the measured flour, cinnamon powder, and salt, mix using a whisk. Now gradually add in the 25 ml milk and combine without any lumps. 
  5. Next add in the egg yolks and mix well.
  6. In another saucepan, add the sugar and water and allow to come to a boil or until the sugar melts into the water and forms sugar syrup.
  7. To the flour and milk slurry, add in the warm milk, whilst rigorously whisking (or else the eggs will get get lumpy and cooked).
  8. Similarly add in the sugar syrup and whisk continuously while pouring the hot syrup. 
  9. Preheat oven at 290 deg C or the highest temperature setting on your oven.
  10. In a muffin pan, press the puff pastry sheets into the cavities without tearing them. Cut off the excess dough using an offset spatula.


  11. Dip your fingers in cold water and press the inner sides of the tarts to keep the tarts cool when pouring the custard.
  12. Fill the tart cups halfway through and bake them for around 10-12 minutes or until the top of the tarts get caramelized.

  13. Enjoy warm with a cup of coffee! ☕️ 


(recipe adapted from @bakingnicky)

Ps: *Try not make ahead, it’s best enjoyed right out of the oven or the same day itself.
*Pastel de nata can be frozen, make them and place the muffin pan in Tupperware containers or ziplock bags and freeze. Thaw and use them as and when required. (But know that they won’t taste the same and freshly made)
*It is best to bake them in a convection oven (if you have then please use the convection oven)
*I used whole wheat puff pastry sheets, you may use the regular (but good quality) ones too.
* I enjoyed having them slightly warm!


Do try this recipe and don't forget to share your experience/feedback with me here in the comments or feel free to send me a mail. Also, do tag me at #taystedit if you try out my recipes on Facebook, Instagram etc so that I can see when you make it. ♡♡♡♡
Newer Posts
Older Posts

Search This Blog

My name is Hasna Haneef, a mommy to a toddler, hailing from Thalassery, Kerala. Welcome to my humble abode on the Internet; wherein I share all my recipes and experiments. I am glad to have you on board!

TRENDING POSTS

  • Emirati Chebab
  • Chicken Steak with Creamy Mushroom Sauce
  • Kerala Style Squid Roast
  • Regag - Emirati Flat bread
  • Kerala Beef Fry/ Nadan beef dry fry
  • Junglee Chicken Sandwich

About Me

May peace be with you!

Welcome to my blog.

I am delighted to have you on board. My name is Hasna Haneef, a mommy to a toddler, hailing from Thalassery, Kerala. My homeplace being Dubai, as I am born and brought up here and I am very influenced by the lifestyle and the variety of authentic cuisines I get to try from here, which has made me try anything that comes across me
, click here →

Stay Connected!

Join Our Madness!

Join with Thousands Of Subscribers ! Get Our Latest Recipes Delivered to Your email Inbox!

Powered by follow.it
  • Home
  • About Me
  • Recipes

    • Main Course
    • Desserts
    • Snacks

    Uncategorized

    • Chicken
    • Meat
    • Vegetarian
    • Rice
    • Malabar Food
    • Baking
    • Breakfasts
    • Snacks
    • Drinks
    • Pasta
    • Fish
    • Soups
    • Desserts
  • Contact Me

Featured Post

Triple Chocolate Hazelnut Skillet Cookie

Blog Archive

  • ►  2025 (4)
    • ►  April (2)
    • ►  March (1)
    • ►  February (1)
  • ▼  2024 (36)
    • ►  October (4)
    • ►  September (5)
    • ►  July (1)
    • ►  June (2)
    • ►  May (4)
    • ►  April (3)
    • ►  March (10)
    • ▼  January (7)
      • Goan Chicken Fry
      • Orange Chicken Wings
      • Malabar Prawns Kakka roti/ Kunjipathil (Rice Dumpl...
      • Rose Baklava with Rabri
      • Chicken Reshmi Kabab 2.0
      • 19B Soup
      • Pastel de nata (pastéis de nata)
  • ►  2023 (47)
    • ►  December (3)
    • ►  September (2)
    • ►  August (6)
    • ►  July (6)
    • ►  June (9)
    • ►  May (4)
    • ►  April (5)
    • ►  March (6)
    • ►  February (3)
    • ►  January (3)
  • ►  2022 (69)
    • ►  November (4)
    • ►  October (6)
    • ►  September (7)
    • ►  August (9)
    • ►  July (12)
    • ►  June (5)
    • ►  May (5)
    • ►  April (12)
    • ►  March (4)
    • ►  February (2)
    • ►  January (3)
  • ►  2021 (24)
    • ►  November (1)
    • ►  October (2)
    • ►  July (1)
    • ►  June (4)
    • ►  May (6)
    • ►  April (4)
    • ►  February (4)
    • ►  January (2)
  • ►  2020 (82)
    • ►  December (5)
    • ►  November (6)
    • ►  October (4)
    • ►  September (2)
    • ►  August (5)
    • ►  July (10)
    • ►  June (10)
    • ►  May (13)
    • ►  April (12)
    • ►  March (8)
    • ►  February (4)
    • ►  January (3)
  • ►  2019 (22)
    • ►  December (1)
    • ►  November (2)
    • ►  October (6)
    • ►  September (1)
    • ►  August (1)
    • ►  February (3)
    • ►  January (8)
  • ►  2018 (15)
    • ►  December (4)
    • ►  November (6)
    • ►  October (3)
    • ►  September (2)

Subscribe Us

Labels

Bake Biscuits Breakfast Brown rice Burger Cheese Chocolate Dal Egg Emirati Fish Iftar Indonesian Japanese Jeerakashala rice Kerala Keto Kuwait food Lunch Milk Mutton Thai food UAE food afghan cuisine arabic beef biryani bread burnt cheesecake cake chicken cream dessert dinner greek healthy indo chinese lamb malabar prawns pudding puffs quick dinner ideas recipe refreshing drink rice salad sandwich stir fry vegetables vegetarian veggies yemeni

Contact Form


POPULAR POSTS AND PAGES

Emirati Chebab

Emirati Chebab

June 01, 2023
Chicken Steak with Creamy Mushroom Sauce

Chicken Steak with Creamy Mushroom Sauce

November 05, 2018
Kerala Style Squid Roast

Kerala Style Squid Roast

June 18, 2020
Regag - Emirati Flat bread

Regag - Emirati Flat bread

December 02, 2020
Kerala Beef Fry/ Nadan beef dry fry

Kerala Beef Fry/ Nadan beef dry fry

October 08, 2019

Pages

  • Home
  • About Me
  • Privacy Policy
  • Contact Me

Copywrite © 2023 TermsFeed®. All rights reserved.

Created By Sora Templates | Distributed By Gooyaabi Templates

Back to top