Homemade Pav
kheema masala
kheema Pav
kheema Pav wreath
Mutton
Mutton mince
North Indian
Kheema Pav Wreath
Kheema Pav Wreath
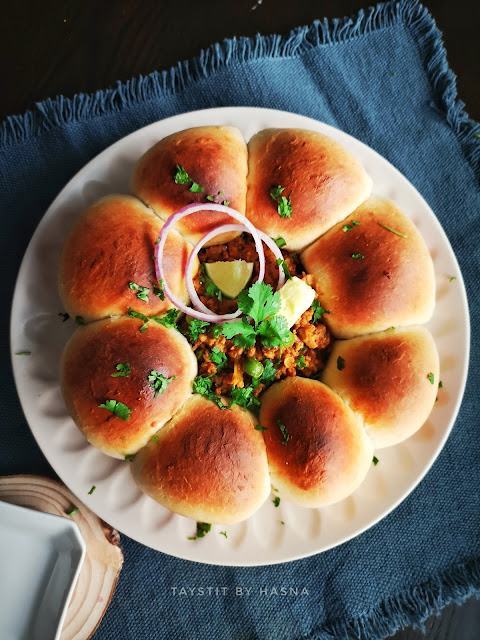
Howdy folks?! Like promised I am going to try and share more innovative recipes to you guys.. And this is one among my innovations.. How pretty does this look for a ladies Night or a game night.. What say eh?
When the westerners does their pull apart bread with cheese, bolognese sauce etc, I thought why not Indian food? And Mutton Kheema masala is what popped right in my head.
When basic ingredients that can found home can make a difference, I thought to myself, why not be the difference. The Mutton mince /kheema is cooked for 15- 20 minutes in Indian spices and Masalas that gives in its beautiful aroma.
I have noticed that what I hate in Kheema is that when it's dry and the mince doesn't feel succulent in the mouth. Ever since, I have been adding a dash of milk or cream to my kheema that not only makes my kheema masala succulent and Juicy, but also makes it fit for a king! Psst psst.. Let me tell you, not only was it delicious, it is also very filling. I usually don't like mattar/ green Peas in my kheema. But I like the vibrancy from the green color that it gives to the dish.
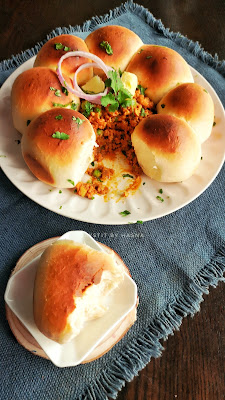
My initial plan was to fill the kheema inside the Pav. But I wanted the kheema to get kore exposure, that's when the wreath idea came into existence. I am sure this will be a hit for a party table too!
Soft, buttery and pillowy Pav buns is what the wreath is made of. The combination is so rewarding to the palate. I have always been fond of bread baking and let this be a beginning to it.
Ingredients :
- 800 gms/ 3 1/2 cups of bread flour/ all purpose flour
- 4 tbsp milk powder
- 2 tsp instant yeast
- 2 tsp sugar
- 1 1/2 - 2 cups water **
- Salt, as required
Kheema Masala:
- 500 gms minced Mutton
- 3 tbsp oil
- 1 tsp Gheem clarified butter
- 2 medium onions, chopped
- 3 green chillies, chopped
- Salt, as required
- 1 tbsp ginger garlic paste
- 1/4 tsp Turmeric powder
- 1 tsp Chilli powder
- 1 tsp Coriander Powder
- 1 tsp Garam Masala
- 1/2 tsp Cumin powder
- 2 tomato, ground to paste
- 1/4 frozen green peas
- 1/2 cup milk + 3 tbsp for brushing
Instructions:
- In a bowl or on a clean counter top, add your flour and other dry ingredients like yeast, milk powder, sugar and salt.
- Mix the dry ingredients with hand gently, now slowly add in your water gradually.
- Allow the gluten to work so that you get a stretchy dough. *
- Allow to rise in a dry and warm place with a kitchen towel over the dough for at least 1/2 and to 1 hour.
- To prepare the kheema masala, take a pan and add oil and ghee/clarified butter.
- Add in your chopped onions, green chillies and Sautee well.
- Next add in your ginger garlic paste and saute until the raw smell disappears.
- Next add in your masala powders and saute for around 30 seconds.
- Next add in your freshly ground tomato paste and mix until combined and allow to cook well for 5 minutes.
- Now add in your minced meat and season with salt and mix well using a spatula or a wooden spoon.
- Add in your green peas in the last 5 minutes of cooking meat.
- Cook the minced meat with masalas for around 20 minutes until cooked well.
- Finally drop in a piece of butter and set aside.
- Now the dough would have doubled the size, using a bench scrapper cut the dough into 8 equal parts and tuck them into a ball shape, roll well and place them in a springfoam pan, placing a dessert ring in the middle, place the shaped balls around the ring in the shape of a wreath with an inch gap in between for the Pav hub's to rise while baking.
- Brush milk over the buns and allow to bake for 30-35 minutes in a preheated oven at 180 degrees C.
- Remove from oven and immediately brush butter oven the hot baked bread 😍
- Allow to cool for 5 minutes and remove the ring and fill the ring with the prepared Kheema masala and garnish with onion rings, lemon wedges and chopped Coriander leaves.
Notes :
** water quantity depends on how sticky or dry your dough is. You need a dough that is sticky, stretchy and that does does break when you pull or stretch. When you touch the dough with a dry finger, the dough shouldnt stick to your finger. If your water content is less, chances are your dough will break.
*If you plan to keep your baked Pav buns out, transfer to plate/bowl and cover with kitchen towel trapping the warmth inside and hence will keep your Pav buns soft and warm


0 Comments