Search This Blog

Taystit by Hasna

Food, Recipes, and Beyond

  • Home
  • About Me
  • Recipes
    • Main Course
    • Snacks
    • Desserts
  • Uncategorized
    • Chicken
    • Meat
    • Vegetarian
    • Rice
    • Malabar Food
    • Baking
    • Breakfasts
    • Snacks
    • Fish
    • Pasta
    • Drinks
    • Soups
    • Desserts
  • Contact Me

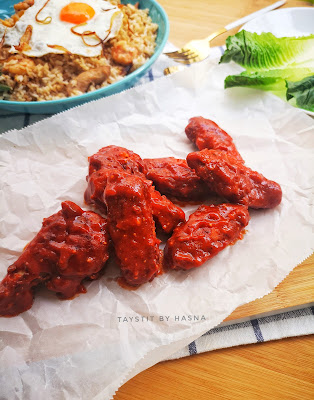
Orange Chicken Wings


I am all in for anything sweet, spicy and tangy..and this orange chicken wings sums up the whole concept! This American-Chinese dish is super easy to prepare, and makes the perfect side dish to go with fried rice, stir fried noodles etc.

Chicken wings are marinated and deep fried and tossed into a sweet, spicy and tangy orange sauce. The OJ might be very tangy at times, if this is the case, adding a dash of honey helps to level it out and bring out the flavors .To retain the crispness, make sure to toss the crispy fried chicken with the orange sauce just prior to serving! 

Ingredients: 

  • 300 gms Chicken Wings
  • Salt, as required 
  • 1/2 tsp Black pepper
  • 1/2 tsp Garlic powder 
  • 1 tbsp Soy sauce
  • 1 Egg
  • 2 tbsp Corn Flour 
  • 1 tbsp All purpose flour/ maida
  • 1 tbsp White Vinegar
  • Vegetable oil, for frying 

For the Orange Sauce:

  • 1 tbsp Butter 
  • 1- 2 Garlic, minced 
  • 1/2 tsp Red Chilli Flakes 
  • 1 tbsp Soy sauce
  • 1 glass freshly squeezed OJ (Orange Juice)
  • Red Pepper, sliced (optional)
  • Orange Zest, a pinch 
  • I tsp Corn Flour mixed in 2 tbsp water
  • Salt, if required 
  • 1 tsp Honey
  • Spring onion, to garnish 
  • Sesame Seeds, to garnish 

Instructions:

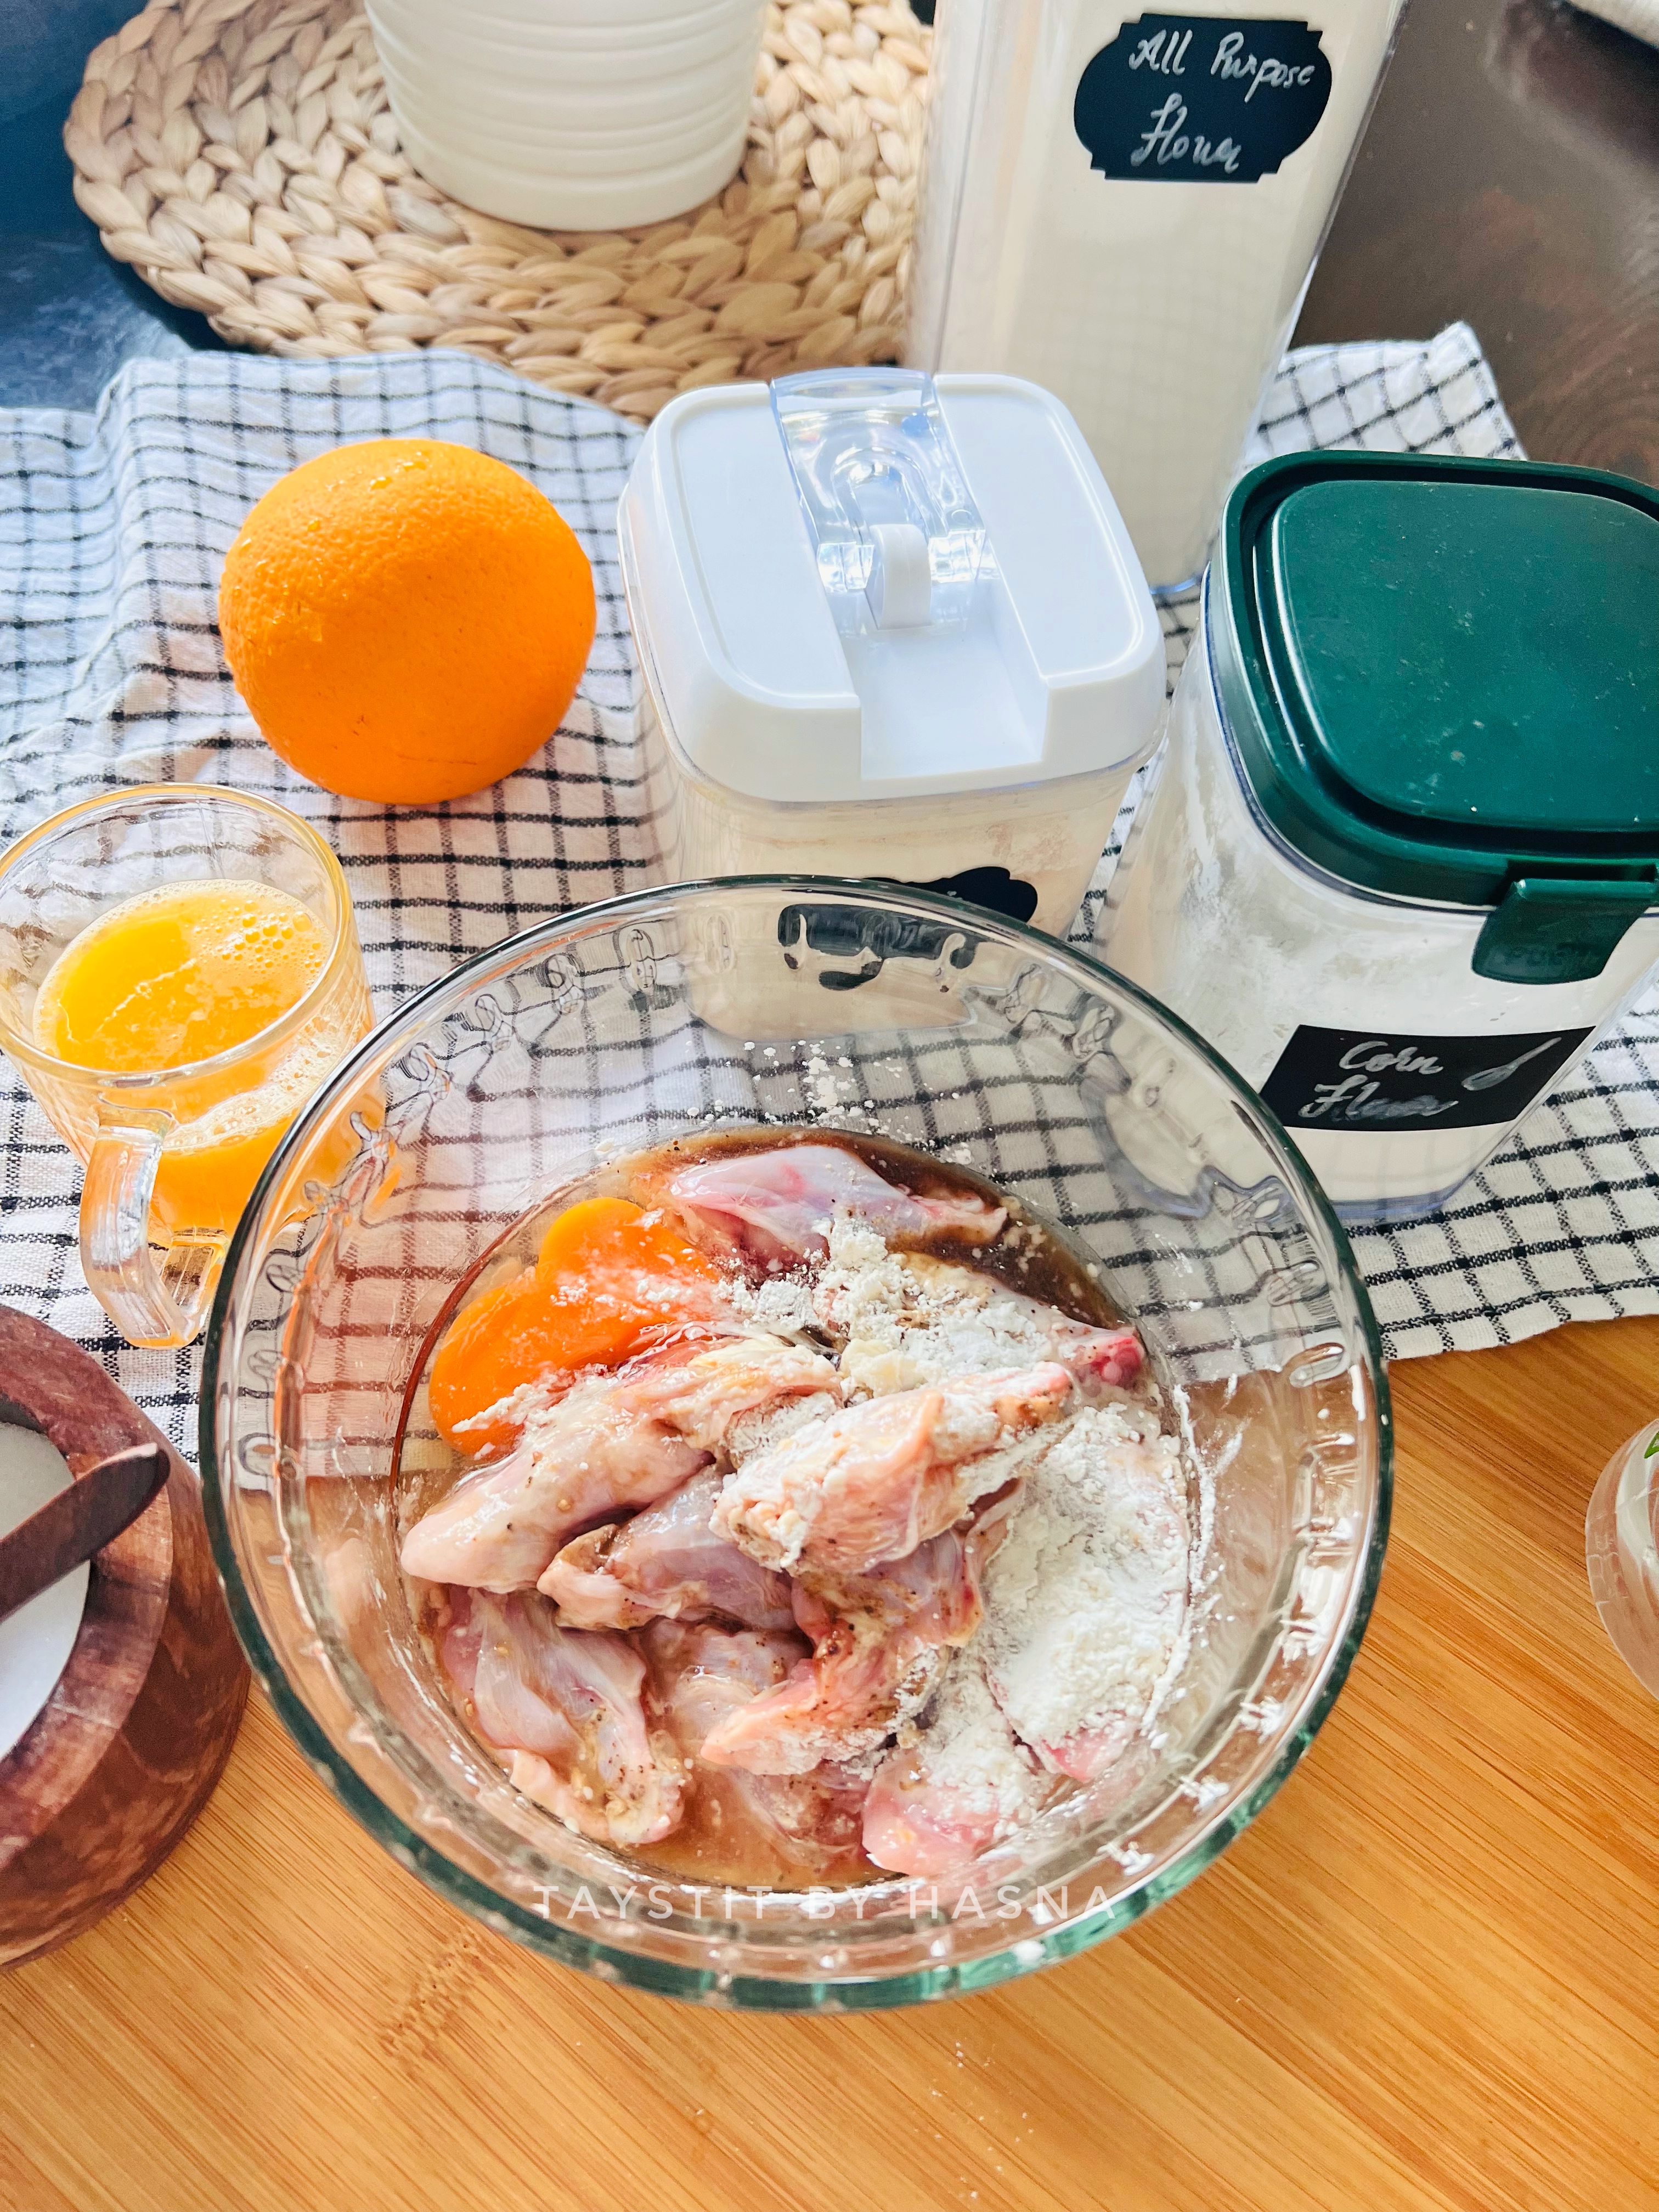
  1. Marinate the chicken wings by adding salt, pepper, garlic powder, soy sauce, egg, corn Flour, all purpose Flour, and white vinegar. 


  2. Allow to marinate at least for half an hour.
  3. Fry the chicken wings, in the vegetable oil until golden for about 10-12 minutes in total (make sure not to flip the frying chicken wings immediately after you add them to the oil to fry, after around 4 minutes on. Medium low flame, check the side slowly and flip) 

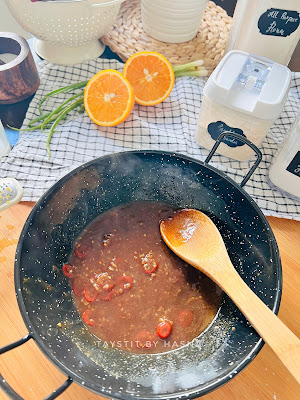
  4. To prepare the sauce, in a pan, add butter, and immediately add minced garlic, add soy sauce, red chilli flakes, OJ, sliced red pepper, orange zest and allow to come to a boil, now lower the flame and add in the corn flour slurry, mixing continuously, as you pour the slurry.
  5. Finally, adjust seasonings as required and finally add in honey to balance out the flavors. 

  6. Once the chicken has cooled slightly, re fry the chicken for 2-3 minutes to make it super crispy. 
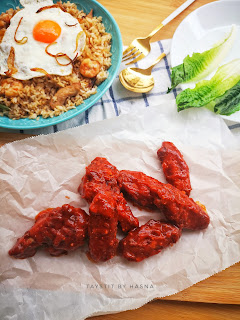
  7. When serving, toss the crispy fried chicken wings in the sauce and serve. Garnish with sesame seeds and spring onions. 
  8. Enjoy hot with a plate of delicious fried rice ! 

Note:

You may prepare the same using boneless chicken pieces as well! 

Do try this recipe and don't forget to share your experience/feedback with me here in the comments or feel free to send me a mail. Also, do tag me at #taystedit if you try out my recipes on Facebook, Instagram etc so that I can see when you make it. ♡♡♡♡

Moutabel


Moutabel is one my most favorite dips of all times. The flavor of the charred eggplant dip is just out of the world! I love the intense tones from the charred eggplant. This recipe is a bit different from the authentic Moutabel, as I use yogurt to de intensify the strong flavor of tahini. I want the flavor of the charred eggplant to stand out than the flavor of tahini when it comes to baba ganoush or more aptly called Moutabel.

This is just my take on Moutabel which is also called baba ganoush in many Arabic restaurants/ communities, this one being one of my favorite dips of all times! 😍

Baba Ganoush is technically the same as Moutabel but the former doesn’t have tahini instead onion, tomato and other veggies are added. 
. 
Story time: I happened to visit an Arabic restaurant and they told me this was called baba ganoush, until then, that which I called Moutabel, but later I came to know that in some parts of the Arab world they are interchangeably called so! So next time someone says this is Baba ganoush or vice versa, just say Habibi, even the Arabs are confused! 🙊😂
.
Anywhoo, what matters is the taste, the charred flavors of the eggplant is just sooo good!! Moutabel or Baba Ganoush, this recipe is my go to! 👌🏼

The secret to the best Moutabel is grilling the eggplant over direct fire for at least around 20 minutes, turning all around until you are sure that the eggplant has charred completely. An easy way to test is this by touching with a spoon or a fork and the eggplant should deflate like a balloon. Once the eggplant has cooked/ charred on all sides, remove the skin of the eggplant. Some residual charred skin is totally fine, this only adds flavor to the Moutabel/ baba ganoush. I do not like lemon juice in my Moutabel, you may add it, if you like.

Ingredients:

  • 1 Eggplant 
  • 1 tbsp Hung/ Greek Yogurt
  • 1 tsp Tahini
  • 1 small Garlic clove, mined
  • Salt, as required 
  • Crushed Black Pepper
  • 1-2 tbsp Olive oil
  • Lemon juice (if required)
  • Sumac, for garnish

Instructions:

  1. Grill the eggplant for around 20 minutes or until you make sure, the inner core has cooked evenly as much as the outer has charred.
  2. In a bowl, whisk together the yogurt, tahini, minced garlic clove, salt and pepper.
  3. Remove the charred eggplant using thongs, and cut open the eggplant using a knife.
  4. Scoop out all the flesh and pull out the charred skin. (A little bit charred skin, here and there is totally ok, it only adds added charred flavor)
  5. On a cutting board, chop up the flesh of the eggplant, finely.
  6. Add the chopped eggplant to the tahini mix and pour extra Virgin olive oil.
  7. Garnish with Sumac and enjoy with your favorite grilled meats or as a side or dips for your favorite appetizer.


Do try this recipe and don't forget to share your experience/feedback with me here in the comments or feel free to send me a mail. Also, do tag me at #taystedit if you try out my recipes on Facebook, Instagram etc so that I can see when you make it. ♡♡♡♡

 Crispy Fried Calamari


One of the easiest appetizers to make are these Crispy Fried Calamari. If you have cleaned squid, this snack/ appetizer takes only a minute to fry. Not kidding, calamari takes only a minute to cook, well, if you fry it anywhere around 5 minutes or more, the texture then turns rubbery. 

Calamari are simply a type of squid that are smaller in size. Squid does not have too much cooking time, but if you plan to cook it really well, you might use the pressure cooker, as the pressure cooker method makes the squid less rubbery. To know the exact cooking time for squids, there is no cooking time that is 'in between'. It is either cooked for a minute on high flame or cooked for a long time, preferably in pressure cookers.

I wanted to be innovative with this recipe, but for some recipes, the simplicity is what brings out the flavors of the calamari. The recipe is super easy with very few ingredients and does not use egg too, it's that easy and mess free!

Ingredients :

  • 500 gms Squid, skin peeled and cleaned 
  • Salt, as required
  • 1/2 tsp Black Pepper, crushed
  • 1/2 cup All Purpose Flour
  • 1/4 cup Corn Flour
  • 1 tsp dried Parsley, optional
  • Vegetable Oil

Mayo Sauce:

  • 1 tiny Garlic Clove
  • 3 tbsp Mayo

Instructions :

  1. Cut the cleaned squid into thin rings and add salt and pepper to it. Mix well and set aside.


  2. In a bowl, add all purpose flour, corn flour and the dried parsley, mix well using a whisk.
  3. Now drop the marinated squid rings to the flour mix and coat well.
  4. In a deep pan, pour vegetable oil and allow to heat well, once heated, add in the squid rings one at a time, on medium high flame.

  5. Fry for 30 seconds, and flip and fry for another 30 seconds and you are done!
  6. Mix the minced garlic and mayo and enjoy the fried crispy calamari as it is or with the dip!
 

Do try this recipe and don't forget to share your experience/feedback with me here in the comments or feel free to send me a mail. Also, do tag me at #taystedit if you try out my recipes on Facebook, Instagram etc so that I can see when you make it. ♡♡♡♡


Fiery Buffalo wings


I always fancy anything glazed. And these fiery Buffalo wings explode in the mouth with tanginess and all things spice. 

Chicken wings for starters are always the best I.e perfectly fried  and coated in the amazing tangy buttery sauce is just aahhhmaaayyzing! 

Ever since I heard the name Buffalo wings, I was always perplexed to think how can one associate a chicken wing and Buffalo. Later to my surprise, when researched., though the name does bemuse and makes one think that Buffalo has something to do with "Buffalo Wings", it is completely unrelated to the name. It's origin is from a place called Buffalo in NY. It was invented when a mother, Co owner of a bar, made a late night snack of Buffalo wings for her son and friends by deep frying chicken wings and then coating them in a butter based cayenne pepper sauce. 


The first time I tried Buffalo wings, I didn't quite like them as it was not quite as I expected it to be, as it was inauthentic. But later on when I tried the real deal, my thoughts on Buffalo wings changed, ever since! I have always wanted to replicate them at home, with available resources at home. I have used Sriracha sauce to make the sauce for coating the deep fried chicken wings. 

So, here I am! Demonstrating Buffalo wings for you guys.. An amazing appetizer, that I am sure everyone is going to ask for a second helping! 

So without further a do, let's get started! 

Ingredients :

  • 500 gms Chicken wings
  • 1/2 tsp crushed black pepper 
  • Salt, as required 
  • 1 tsp Paprika powder 
  • 3/4 cup All Purpose Flour 
  • 1 tbsp Butter
  • 200 ml Sriracha Sauce/ any favorite spicy sauce
  • 1 tsp sugar
  • 1/2 tsp pepper powder
  • 1 tsp Paprika
  • 1 garlic clove/ 1/2 tsp Garlic Powder 
  • 1 tbsp corn flour 
  • Oil for deep frying 

Instructions :

  1. Marinate the chicken wings using salt, pepper and paprika powder.

  2. Next coat the chicken wings in all purpose flour and deep fry until golden and crisp for around 6 minutes. 
  3. Now, to prepare the sauce, in a saucepan, drop a tablespoon of butter and then pour in your Sriracha Sauce. 
  4. Next add in your seasonings, paprika, black pepper powder, salt and sugar for balancing. 
  5. Finally add in freshly minced garlic clove or garlic powder. 
  6. Next, before the sauce starts to boil, add in your corn flour as slurry as thickening agent. Combine well. 
  7. Allow to boil for a minute on medium low flame and your Buffalo sauce is ready! 

  8. Finally, coat the fried chicken wings in your buffallo sauce and enjoy hot! 😋


Do try this recipe and don't forget to share your experience/feedback with me here in the comments or feel free to send me a mail. Also, do tag me at #taystedit if you try out my recipes on Facebook, Instagram etc so that I can see when you make it. ♡♡♡♡

Mexican Pizza Bites with Guacamole 


When you are a person who gets this instant cravings of pizza and you are in a mood to spice things up, then here I am to introduce you to this super easy Mexican Pizza.

Here I have used bread slices as the base. You may use Tortilla too. The only problem with the recipe is that, you need to consume it as soon as possible as the color may change the more it stays out. So, it is best served as a starter or a snack. 

If I had a few sliced black olives, I would use it to top up the snack bites, but since I ran out of it, I couldn't not get the disired color contrast in the final product. This is one of my experimental inventions that happened to be a part of my Ramadan snack ideas, as innovative food is what I love to do. All this while, it remained in my drafts, was contemplating whether to share or not, as my hubb is not a fan of guacamole. But I tell you, it's the best bite sized pizzas ever. The rest of the fam was raving about it. And then a few blogger friends invited to do a collaboration on Instagram on the theme Fusion Food! That is when I realized the time has come to reveal these yummy bites. I loved it and is such an easy recipe to nail. I would suggest not prepare a large quantity of guacamole as discoloration might occur. This is one easy recipe that I make when the hubster is not at home and there are avos smiling at me. 😀

When I thought about Italian cuisine and Mexican cuisine, the first things that popped in my mind was the Italian Pizza and Mexican Guacamole, So I immediately started creating the recipe plan! Guacamole, a Mexican invention, is an avocado dip, or spread that is now found in American cuisine as a condiment too. Avocado pieces are mashed using a mortar and pestle and fresh ingredients like onion, tomato and cilantro (Coriander leaves) takes it to a next level. As avocado is quite bland, this method definetly brings out the flavors of the avocado and it is sooo good and the final squeeze of lemon brings out the freshness in the dip which is the Icing on the cake! 😋👌

And the magic that stands out from normal guacamole is the maggi cube crumbs, which is completely optional. 

Definitely do give it a try and let me know your thoughts too❤️

Lets get started!


Ingredients :

  • 250 gms tender Chicken Breast, sliced
  • 2-3 tbsp olive oil
  • 1 tsp Garlic paste
  • 1 tsp paprika powder
  • 1/4 tsp Turmeric powder
  • 3/4 tsp Kashmiri Red chilli powder
  • Salt as required

For the base:

  • 4 Slices White Bread
  • 2 tbsp Salted butter
  • 1/2 tsp Garlic paste
  • 1/2 tsp Oregano
  • 1/4 tsp Red Chilli Flakes

Guacamole:

  • 1/2 avocado, sliced into cubes
  • 1/2 tsp Garlic paste
  • 2 tsp Coriander leaves
  • 2 tbsp Onion, finely chopped
  • A good squeeze of lemon 
  • 2 tbsp Tomato, finely chopped
  • Crumbs of Maggi Chicken Cube

Instructions :

  1. Slice the tender chicken breasts and marinate using the spices mentioned. 
  2. Fry in a couple of tbsps of olive oil and set aside. 
  3. Prepare the guacamole by mixing all the ingredients mentioned under guacamole using a mortan and pestle if possible. This method helps to bring out its flavor better. 
  4. Don't forget to squeeze the lemon juice and consume the guacamole immediately. *
  5. Now make a spread that consists of butter, garlic paste, oregano and red chilli flakes. Spread on each bread slice and toast to golden perfection. 


Notes:

  • Use the guacamole as soon as possible, as the color of the avocado changed the more it sits out. Lemon juice helps to retain the color to an extent.
  • If you'd like, you may use ketchup too. But the guacamole has enough strong flavors😊


Do try this recipe and don't forget to share your experience/feedback with me here in the comments or feel free to send me a mail. Also, do tag me at #taystedit if you try out my recipes on Facebook, Instagram etc so that I can see when you make it. ♡♡♡♡

Garlic Butter Prawns


Hello TIBH fam! 

I am so excited for when winter approaches. It's time to grill anything and everything. And when you get your hands on fresh prawns that are in abundance, you want to try all thase dishes that has been always tempting you, isn't it?! Well, basically this recipe requires minimal effort and minimal ingredients yet, the flavors are intense! 😍

The prawns are grilled and slathered with garlic butter which intensifies the flavors of the dish. Cooking time of prawns is so less when compared to other proteins, so keep in mind not to over cook which would spoil the texture and juiciness of the prawns. 

Not only is this yummy, it is also keto friendly. Garlic-butter-prawns are a match made in heaven. The prawns are threaded onto skewers that are soaked in water at least for half an hour if grilling over coal so that the skewers doesn't burn. The skewers start from the tail and are pushed upwards.. You may also grill in a grill pan. And a squeeze of lemon juice gives that tangy finish to the final product. Pair it with a nice crusty bread and you are good to go! 

Without further ado, let's get started! 

Ingredients : (makes for 2 people) 

  • 15 - 20 fresh big prawns/shrimps, cleaned and deviened 
  • 4 tbsp butter
  • 5-6 garlic cloves, finely chopped 
  • 1/4 tsp Black Pepper Powder 
  • 1 tbsp lemon juice 
  • 1 tbsp fresh parsley , chopped


Instructions:

  1. In a small skillet/pan, allow the butter to melt, drop your finely chopped garlic and sauté until fragrant, make sure it doesn't burn. 
  2. The prawns are marinated in salt and pepper, and threaded onto the skewers and brushed with the garlic butter. 
  3. Grill for 3 minutes each side. 
  4. Once the prawns are cooked and removed to a plate. Pour the rest of the garlic-butter mixture with the dash of lemon juice over the cooked prawns. 
  5. Garnish with lemon and parsley. Enjoy hot! 😋

Notes :

  • Don't cook the prawns for too long. 
  • Keep the tail on for presentation purpose. 


Do try this recipe and don't forget to share your experience/feedback with me here in the comments or feel free to send me a mail. Also, do tag me at #taystedit if you try out my recipes on Facebook, Instagram etc so that I can see when you make it. ♡♡♡♡
Older Posts

Search This Blog

My name is Hasna Haneef, a mommy to a toddler, hailing from Thalassery, Kerala. Welcome to my humble abode on the Internet; wherein I share all my recipes and experiments. I am glad to have you on board!

TRENDING POSTS

  • Kerala Style Squid Roast
  • Chicken Steak with Creamy Mushroom Sauce
  • Emirati Chebab
  • Regag - Emirati Flat bread
  • Copy Cat Caesars Mini Pizza
  • Kerala Beef Fry/ Nadan beef dry fry

About Me

May peace be with you!

Welcome to my blog.

I am delighted to have you on board. My name is Hasna Haneef, a mommy to a toddler, hailing from Thalassery, Kerala. My homeplace being Dubai, as I am born and brought up here and I am very influenced by the lifestyle and the variety of authentic cuisines I get to try from here, which has made me try anything that comes across me
, click here →

Stay Connected!

Join Our Madness!

Join with Thousands Of Subscribers ! Get Our Latest Recipes Delivered to Your email Inbox!

Powered by follow.it
  • Home
  • About Me
  • Recipes

    • Main Course
    • Desserts
    • Snacks

    Uncategorized

    • Chicken
    • Meat
    • Vegetarian
    • Rice
    • Malabar Food
    • Baking
    • Breakfasts
    • Snacks
    • Drinks
    • Pasta
    • Fish
    • Soups
    • Desserts
  • Contact Me

Featured Post

Triple Chocolate Hazelnut Skillet Cookie

Blog Archive

  • ▼  2025 (4)
    • ▼  April (2)
      • 1 minute Chocolate Mug Cake
      • Grilled Cheese California Burrito
    • ►  March (1)
    • ►  February (1)
  • ►  2024 (36)
    • ►  October (4)
    • ►  September (5)
    • ►  July (1)
    • ►  June (2)
    • ►  May (4)
    • ►  April (3)
    • ►  March (10)
    • ►  January (7)
  • ►  2023 (47)
    • ►  December (3)
    • ►  September (2)
    • ►  August (6)
    • ►  July (6)
    • ►  June (9)
    • ►  May (4)
    • ►  April (5)
    • ►  March (6)
    • ►  February (3)
    • ►  January (3)
  • ►  2022 (69)
    • ►  November (4)
    • ►  October (6)
    • ►  September (7)
    • ►  August (9)
    • ►  July (12)
    • ►  June (5)
    • ►  May (5)
    • ►  April (12)
    • ►  March (4)
    • ►  February (2)
    • ►  January (3)
  • ►  2021 (24)
    • ►  November (1)
    • ►  October (2)
    • ►  July (1)
    • ►  June (4)
    • ►  May (6)
    • ►  April (4)
    • ►  February (4)
    • ►  January (2)
  • ►  2020 (82)
    • ►  December (5)
    • ►  November (6)
    • ►  October (4)
    • ►  September (2)
    • ►  August (5)
    • ►  July (10)
    • ►  June (10)
    • ►  May (13)
    • ►  April (12)
    • ►  March (8)
    • ►  February (4)
    • ►  January (3)
  • ►  2019 (22)
    • ►  December (1)
    • ►  November (2)
    • ►  October (6)
    • ►  September (1)
    • ►  August (1)
    • ►  February (3)
    • ►  January (8)
  • ►  2018 (15)
    • ►  December (4)
    • ►  November (6)
    • ►  October (3)
    • ►  September (2)

Subscribe Us

Labels

Bake Biscuits Breakfast Brown rice Burger Cheese Chocolate Dal Egg Emirati Fish Iftar Indonesian Japanese Jeerakashala rice Kerala Keto Kuwait food Lunch Milk Mutton Thai food UAE food afghan cuisine arabic beef biryani bread burnt cheesecake cake chicken cream dessert dinner greek healthy indo chinese lamb malabar prawns pudding puffs quick dinner ideas recipe refreshing drink rice salad sandwich stir fry vegetables vegetarian veggies yemeni

Contact Form


POPULAR POSTS AND PAGES

Kerala Style Squid Roast

Kerala Style Squid Roast

June 18, 2020
Chicken Steak with Creamy Mushroom Sauce

Chicken Steak with Creamy Mushroom Sauce

November 05, 2018
Emirati Chebab

Emirati Chebab

June 01, 2023
Regag - Emirati Flat bread

Regag - Emirati Flat bread

December 02, 2020
Copy Cat Caesars Mini Pizza

Copy Cat Caesars Mini Pizza

March 12, 2024

Pages

  • Home
  • About Me
  • Privacy Policy
  • Contact Me

Copywrite © 2023 TermsFeed®. All rights reserved.

Created By Sora Templates | Distributed By Gooyaabi Templates

Back to top