Search This Blog

Taystit by Hasna

Food, Recipes, and Beyond

  • Home
  • About Me
  • Recipes
    • Main Course
    • Snacks
    • Desserts
  • Uncategorized
    • Chicken
    • Meat
    • Vegetarian
    • Rice
    • Malabar Food
    • Baking
    • Breakfasts
    • Snacks
    • Fish
    • Pasta
    • Drinks
    • Soups
    • Desserts
  • Contact Me

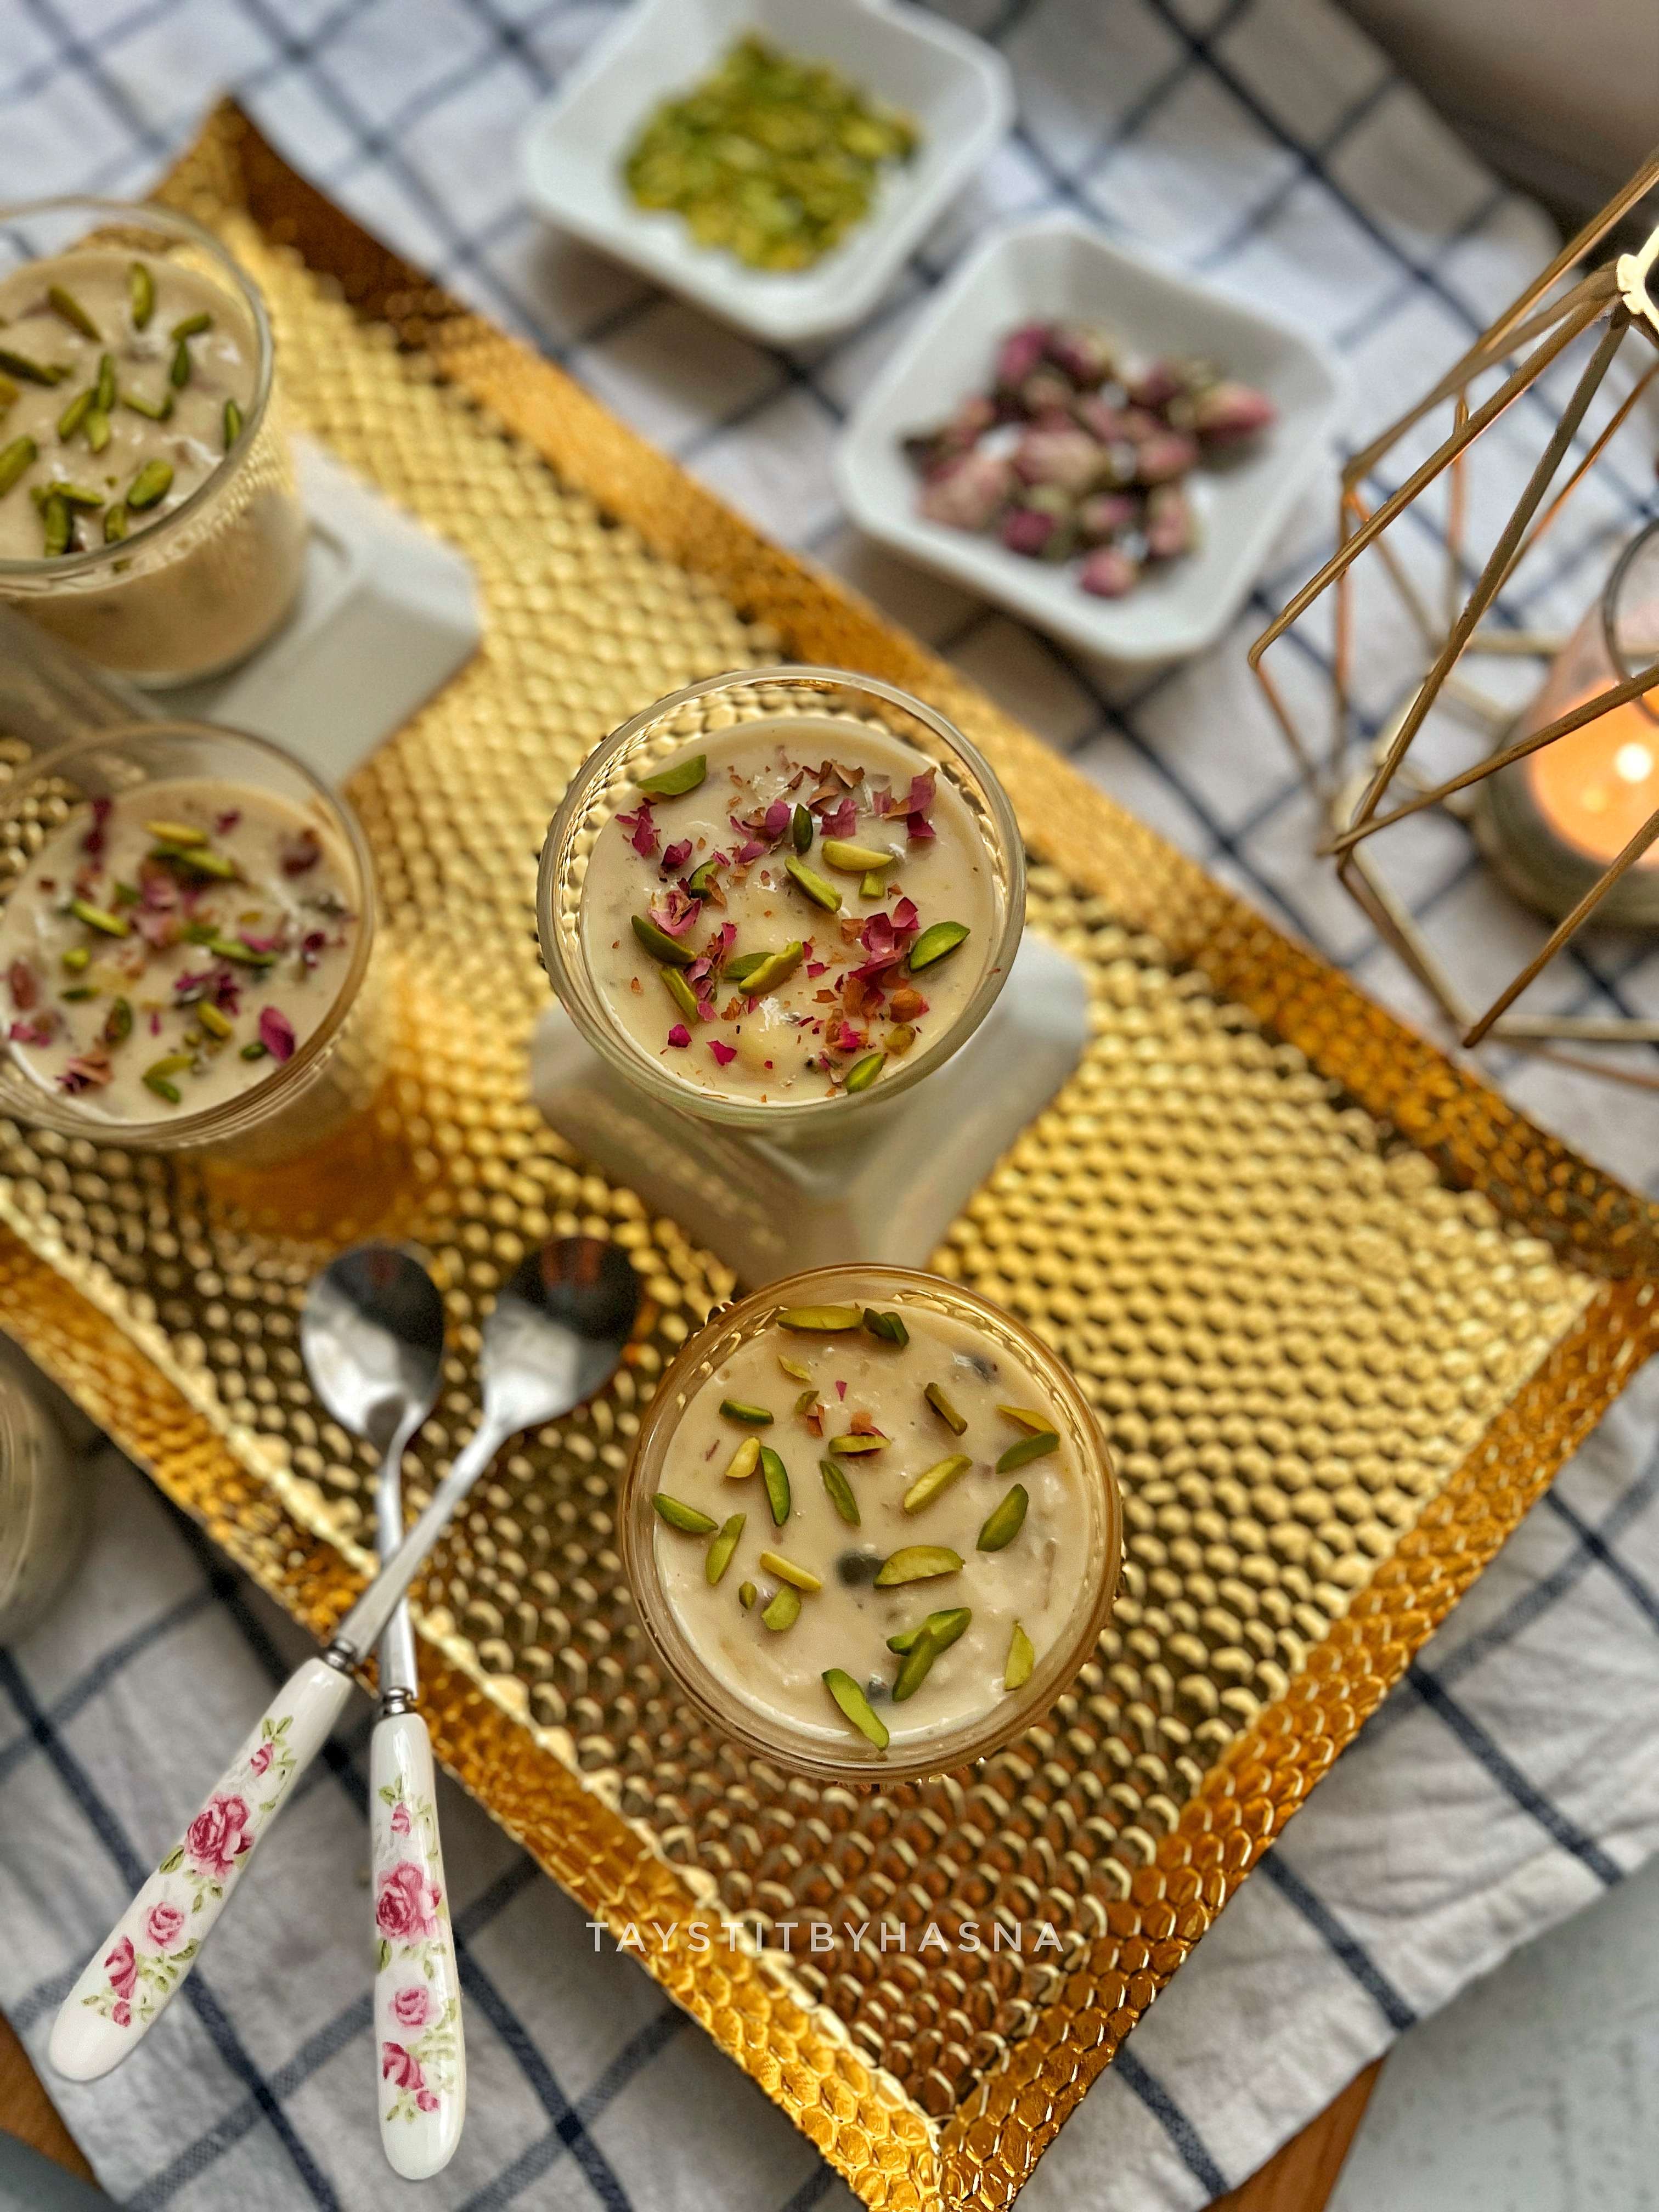
Dried Fig Pudding adorned with Baklawa and Pistachios


Many years back, my dad's cousin had bought a dried Fig pudding for a thakkaram/ salkaram (party given to the groom and his family), and it tasted soo good! I vividly remember asking her for the recipe, but I can't recall the recipe now. So I thought to recreate it this Eid! 

While I tried experimenting with the recipe, I learnt that boiling milk with fig could couagulate the milk, causing it to curdle. So I added the fig paste at the end of the process, yielding the exact result I was looking for, Alhamdulilah ! So make sure not boil milk and fig paste together.

Having at least one dessert on the Eid table is mandatory and everyone waits for that bit. This melt in the mouth dessert is one of a kind! The dessert is made using China grass/ agar-agar. And is very calming on the tummy. The Baklawa sheets that is Smashed and added as a topping gives the dessert an added texture, with the white chocolate and pistachio, everything combined, marries well with each other.


Make this delicious dessert for your family and surprise them!

Ingredients :

  • 200 gms Dried Figs
  • 1/2 cup hot water
  • 10 gms China grass/ agar agar soaked in 4 tbsp water 
  • 1 liter Milk
  • 1/4 cup Sugar
  • 1/2 cup Condensed Milk
  • 2 tbsp Cream (optional)
  • Phyllo sheets
  • Ghee/ Butter
  • Pistachios, ground 
  • White chocolate, melted 

Instructions :

  1. In a deep bowl, add in your dried figs and pour in the hot water and cover and allow to soak at least for half an hour.

  2. At the same time, soak the China grass in water and set aside.
  3. Now grind the figs with little bit water used for soaking. 
  4. In a deep saucepan, pour the milk and allow to bring to a boil. 
  5. Now at the same time, melt the China grass that has been soaking. 
  6. Remove milk from stove. Now, to the boiled milk, add sugar, condensed milk, melted China grass, and beaten cream (optional).
  7. Finally add in the fig paste and combine well using a whisk.

  8. Now pour into individual moulds or a dessert tray. 
  9. Allow to set in the refrigerator (3-4 hours or overnight).
  10. For assembling, brush ghee or butter onto phyllo sheets and bake them for 2-3 minutes at 180 deg C, this step is optional, adds an extra crunchy texture.

  11. Now smash and crumble the baked phyllo sheets and sprinkle as required over the pudding and decorate with melted white chocolate and ground pistachios. 
  12. Serve immediately! 


Do try this recipe and don't forget to share your experience/feedback with me here in the comments or feel free to send me a mail. Also, do tag me at #taystedit if you try out my recipes on Facebook, Instagram etc so that I can see when you make it. ♡♡♡♡

Milky Cheese Cake


Eid Al Adha is in very few days and I came up with this milk cake and cheese cake two in one dessert! If you don’t want to make the cake from scratch you may use store bought vanilla sponge cake. If I have the time I like to make my cake from scratch or else if I am short on time, I resort to store-bought cakes for my desserts.

You may play around with the flavors! This is a basic milk cake flavor but definitely a delicious one! 

I finally garnished it with pistachios and pistachio cream. This is one very easy dessert to try. Hope you guys give this the set a drive.

Ingredients:

  • 4 eggs
  • 1 cup sugar
  • 1/2 cup water
  • 1/2 cup vegetable oil
  • 1 tsp Vanilla Essence 
  • 1 tsp baking powder 
  • 2 cups flour
  • Pistachios, for garnishing

Soaking milk:

  • 300 ml full fat milk
  • 200 ml Evaporated milk

Cheesecake layer:

  • 200 gms Cream Cheese
  • 500 ml Milk
  • 1 can condensed milk
  • 3 tbsp Corn Flour
  • 1 pack Cream

Instructions:

 
  1. To prepare the cake base:
  2. In a bowl, cracked eggs and add in sugar and beat well. Next add in the liquid ingredients like water, vegetable oil, and Vanilla essence.
  3. In another bowl, add the flour and baking powder and mix well with the help of a whisk.
  4. Now slowly little by little, add the flour to the whisked eggs, keep in mind to add flour, makes little at a time and combine the flour mix without any lumps.
  5. Preheat the oven to 180°C into a baking tray, line it with a parchment paper or a baking paper, pour the cake mix over the baking paper.
  6. Allow to bake for around 35 minute until skewer inserted in the middle comes out clean. 

  7. Allow the cake to cool on a cooling rack.
  8. Once the cake has cooled down, remove the parchment paper, and cut the cake into two layers.
  9. Into a saucepan add milk, cornflour and please on the gas stove and keep whisking and combine well without any lumps.

  10. Once the mixture starts thickening, remove the saucepan from the flame and set aside to cool.
  11. In a bowl, add cream cheese, cream and condensed milk. To this add the earlier prepared milk mixture.
  12. Please one layer of the cake slice on the pudding tray and drench the cake slice with evaporated milk or milk.
  13. Now pour the milk and cream cheese custard mix over the cake layer and sprinkle pistachios.

  14. Repeat the same for the other layer of cake and cream cheese too.
  15. Allowed to sit in the refrigerator for 3 to 4 hours.


Do try this recipe and don't forget to share your experience/feedback with me here in the comments or feel free to send me a mail. Also, do tag me at #taystedit if you try out my recipes on Facebook, Instagram etc so that I can see when you make it. ♡♡♡♡

Dulce De Leche 


Unexpectedly it's the Eve of Eid and the end of the holy month of Ramadan. Days just flew by and I am kind of feeling a bit overwhelmed with sadness. I hope our Rabb accepts all our deeds and make us among the righteous until our last breath. 

Without further a do, let's get to our EID dessert and who doesn't love Dulce de Leche? ( Cooked condensed milk)
The dessert is a marriage between the flavors of tiramisu and Dulce de Leche without the addition of coffee.

Try to set the dessert in the refrigerator overnight for better results.

Ingredients:

  • 1 pack Italian Lady finger biscuits
  • 1/3 cup White Sugar
  • 2 tbsp Butter
  • 1/4 cup whole milk
  • 1 Can Condensed Milk
  • 1 cup Milk
  • 7-8 Kiri Cheese Cubes/ Cream Cheese
  • 1 1/4 cup whipping cream 
  • 1/2 tsp Vanilla essence 
  • Cocoa powder

Instructions:

  1. In a non stick pan, allow the sugar to caramelize. 
  2. Add the butter, one tbsp at a time and stir gently. 
  3. Finally pour milk, little at a time and mix well. 
  4. Allow to simmer on low heat for 3-4 until slightly thick. Instant Dulce de Leche is ready!
  5. In a bowl, pour the milk and Dulce de Leche (or blend them). 
  6. Dip the lady finger biscuits in the milk and arrange on a tray.
  7. Beat the whipping cream and set aside 1/4 of the cream for piping as decoration.
  8. In a bowl, cream or mix the Kiri Cheese cubes along with sugar and vanilla essence and add the remaining Dulce de Leche and combine well.
  9. Finally, fold the whipped cream with the cream cheese mix and layer over the arranged biscuits and spread evenly.
  10. Dust with cocoa powder.
  11. Pipe the whipped cream into a crescent shape by making a guideline using the back of a spoon and pipe accordingly. 
  12. Finally pipe the Dulce de Leche for a pop of caramel color and set in the refrigerator overnight or at least 3-4 hours. (For better results keep overnight)

Ps: you may use store bought Dulce de Leche (cooked condensed milk) or you May cook the condensed milk in a pressure cooker submerged in water ( after removing the outer cover of the can ) for 3 whistles and allow to cool overnight.

Do try this recipe and don't forget to share your experience/feedback with me here in the comments or feel free to send me a mail. Also, do tag me at #taystedit if you try out my recipes on Facebook, Instagram etc so that I can see when you make it. ♡♡♡♡

 Malabar Kaayi Curry


What is Eid without the nostalgic Kaayi Curry that we, Malabaris have prepare with lots of love, on the eve of Eid. My husband loves his Grandmom's food and the best of hers being her Kayi porichat (banana fritters), pulivaral (a fried banana dough snack) and our renowned Kayi curry. And for him, whenever I make the pazham pori, it's doesn't come upto her mark, but this one I always nail it, it seems! :D Alhamdulilah! It isn't easy to get his approval.

For me it’s nostalgic as this is what my ummama always offers me whenever we visit her for Perunal (Eid), though I used to dislike kayi curry as a child, I am so fond of it now, as it is a pure labor of love ❤️ 

The name curry, can give a misconception that the recipe has spicy tones to the dish. Well, it's more like a payasam/kheer. Spilt Chana dal is soaked and boiled and kept aside. Ari pidi/ thin rice dumplings are rolled using fingers, steamed and set aside. Then plantains are cooked in the thin coconut milk/ second coconut milk and boiled until cooked well, to which soaked white rice is ground and made to a paste, the paste is added as a thickening agent and to which the first milk or the thick coconut milk is added. I like this curry/ payasam, as it is free of any fatty elements like ghee, cashews etc. (yeah but of course, we have the irreplaceable sugar in it :/)

Kaayi Curry is not only fun to prepare, yet it's easy and delicious. It's something fun to do with your family, the pidi making session is always a family bonding time with giggles and jokes :D


Kaayi curry has a lot of different names, some call it pidi curry, ari pidi Kayi Curry etc. We make this for all occasions too. Let's make some delicious Kaayi curry and surprise your folks at home! :D

Ingredients :

  • 1 cup Ari/ pathiri podi * (rice powder)
  • Salt, as required
  • Water, as required
  • 1/4 Cup Split Chana dal (soaked at least for 4-5 hours)
  • 2 medium plantains/ Kerala banana, slit and chopped
  • 1 cup White granulated Sugar
  • Salt,a pinch
  • 1 box Shredded coconut
  • 1+ 1 1/2 cups warm Water
  • 3 Cardamom pods
  • 3 tbsp Pachari/ white rice (soaked in water at least for 1/2 hr) 

Instructions :

  1. In a bowl, add the ari podi/ rice flour and add in the salt, add enough water and make into a dough (not too loose not too tight)

  2. In a clean banana leaf/ aluminum foil, make thin dumplings by applying oil over your hands, and taking a small ball of the dough on one palm and rolling with the help of the other hand's index finger, into a small and thin cylinder shape. Heap them all together and steam the ari pidi/ rice dumplings for 20- 25 minurtes.
  3. Meanwhile, in a small pot, cook the soaked split Chana dal in water with little salt and cook until soft and not mushy.
  4. Once the ari pidi has steamed, sprinkle water over the steamed dumplings, this step helps the pidi from not sticking to each other.
  5. Extract the thick milk from the shredded coconut , by adding the shredded coconut to a mixer grinder, add in the warm water, and cardamom pods. Sieve, squeeze and extract the thick milk and set aside.

  6. To the same ground and squeezed coconut add it into the mixer, and pour the 1 1/2 cups warm water and repeat the process of extracting again, this is the thin coconut milk/ second

    coconut milk.
  7. In a large pot, add in your slit and chopped plantains, sugar and the extracted thin coconut milk and a pinch of salt, allow to cook until the plantains are tender.
  8. Meanwhile, make a paste by grinding teh soaked white rice with very little water.
  9. Into the pot, add the steamed and cooled ari pidi, cooked Chana dal and bring it to a boil. Check if sugar or salt is required. 
  10. Next add the ground pachari paste and mix simultaneously and allow to thicken.

  11. Finally add in the thick coconut milk and increase flame, one bubbles starts to form at the edges, switch off the flame. Serve warm or cold. Enjoy!

Notes:

* I used Amis Pathiri podi  

Do try this recipe and don't forget to share your experience/feedback with me here in the comments or feel free to send me a mail. Also, do tag me at #taystedit if you try out my recipes on Facebook, Instagram etc so that I can see when you make it. ♡♡♡♡


Kulfi Mahalabia/ Muhallebi


Eid is around the corner. Here I am sharing an Indo Arab fusion dessert, fusion is my speciality.😉 Mahalabia also known as Muhallebi is a middle eastern milk pudding , thickened using corn flour and garnished with nuts and rose petals. I usually do not like corn flour as a setting agent in desserts, so I used a bit of China grass/agar agar as I like the consistency of it. Malai kulfi is an Indian frozen dessert/ice cream where milk is reduced and chopped nuts are added to it and perfumed using strands of saffron and/ cardamom powder. By now you know my love for pistachios and roses. Teehee. Anything that has nuts just takes the flavors to next level and adds to the crunchiness.

Here I have used evaporated milk and cream for added kulfiness 😜😁 you may completely avoid them, they still taste delishaaas. Serve cold for that 'kulfi effect'. 

With ingredients that are available in most homes, you definitely need to try Kulfi Mahalabia for Eid Al Fitr. It is so creamy and so full of flavor. 😋👌


Ingredients: (Makes 5 servings) 

  • 2 - 3 gms China Grass/ agar agar
  • 500 ml Full Cream Milk
  • 30 gms Chopped Almonds
  • 30 gms Chopped Pistachios
  • 1/2 cup Condensed milk
  • 1/4 cup Evaporated Milk(optional) 
  • 3 or 4 strands of saffron
  • 1/4 tsp Cardamom powder
  • 1 tbsp Corn Flour
  • 2 tbsp Cold milk
  • 3 tbsp Thick cream (optional) 

Instructions :

  1. Soak the china grass in 5 tbsp water and set aside.
  2. Bring milk to boil and reduce the quantity of milk to half. 
  3. Melt the china grass after 10 minutes of soaking.
  4. Meanwhile, while China grass melts, to your reduced milk add in evaporated milk (optional), Condensed milk, chopped almonds, chopped pistachios, cardamom powder and saffron strands. 
  5. Let everything come to a boil so that the flavors from all the ingredients will give the Kulfi flavor. The colour of the milk will now change to a creamish shade. 
  6. Make corn flour slurry with cold milk and pour the slurry to the Kulfi mixture while stirring constantly. 
  7. Next add in the melted China grass and thick cream (optional), mix well. 
  8. Now pour ladlefuls to your serving bowls/cups and allow to cool for 10 minutes and allow to set in the refrigerator for 2-3 hours.
  9. Garnish with slivered pistachios and rose petals. Your Kulfi mahalabia is now ready to enjoy! 😋


Do try this recipe and don't forget to share your experience/feedback with me here in the comments or feel free to send me a mail. Also, do tag me at #taystedit if you try out my recipes on Facebook, Instagram etc so that I can see when you make it. ♡♡♡♡

Gajar Ka Halwa Lotus Trifle


Gajar Ka Halwa is one of my favorite Indian desserts.. (after Gulab jamun🙈). This is a dessert that I have been preparing since a very young age, whenever I felt like having desserts. So experimenting a dessert with my favorite gajar ka Halwa toh Banta hai! 😝

Well, lotus spread and their biscuit are now my biggest obsession.. I try adding them in everything knowingly and unknowingly.. If I say that I am going to make some dessert the hubster keeps pestering me asking if I weren't adding lotus biscuits in it! Haha
So now you know! How much I love them. Contradictory to my liking of these yum lotus biscoff, I do not like to have them plain. I specifically like to have them in dessert. Not even with tea or coffee.

Now coming back to the invention of the trifle, like I said I had been craving carrot halwa since a while, so I made it and it's been quite a while now that this recipe has been sitting in my drafts! It was high time I put to some use for our Eid dessert ideas. I am that person who lovesss cooking and experimenting, but if you ask me what are you making for Eid or any other special occasion I just go blank as if I haven't cooked my entire life. Is it just me? Or is some one able to relate? Let me know in the comments below.
So, coming back to the recipe, I wanted my dessert to be nutty (meaning with nuts and tastes like it). For that I added 1/2 tsp of Almond extract, you may add vanilla extract or completely omit the step.

This trifle is basically layers of rich carrot halwa and luscious Lotus biscoff cream piped in and the chopped almonds in the carrot halwa plays with the textures making it even more scrumptious. This recipe is so easy and so versatile. Well, one thing I can assure you is that gajar ka Halwa and biscoff flavors go hand in hand.


Basically this is a dessert that I prepared when cravinga were at its highest. And that feeling of satisfaction is heavenly. This is dedicated to all lotus biscoff lovers. Advance Eid Mubarak wishes to everyone who is reading this. May Allah accept all our Qiyaam, Siyaam, our duaas and all our good deeds. May Allah make us amongst those who witness the next holy month of Ramadan. Taqqabal Allahu minna wa minkum. 🌹🎀🌹

Ingredients :

Gajar Ka Halwa 
  • 500 gms Indian Young carrots*, grated
  • 2 tbsp pure ghee
  • 2 cups milk (or 1 cup milk and 1/2 cup condensed milk)
  • 1/2 cup sugar
  • 1 tsp cardamom powder
  • 4 tbsp chopped almonds
  • 1 tbsp ghee (optional)

Lotus Cream:
  • 1 Sachet dream whip (whipped according to package instructions)
  • 1/2 tsp vanilla/ almond extract (optional)
  • 3 tbsp lotus biscoff spread
  • 3 tbsp thick cream or fresh cream

Instructions:

  1. In a heavy bottom pan bring the milk to a boil. Keep stirring in between, be careful not to burn it.
  2. In a large skillet add 2 tbsp ghee and sautee the carrots until the color changes and water is evaporated .
  3. Next pour half the milk and cook slowly, mixing in between and add rest and aloow to combine while mixing.
  4. Now add 1/2 cup sugar and mix well and add condensed milk if adding.*
  5. Finally when little moisture is left, add your cardamom powder and garnish with chopped almonds and your gajar ka halwa is ready. 
  6. If your halwa doesn't come off your pan or you want that extra richness finish off by adding 1 tbsp ghee.
  7. Now to prepare the lotus biscoff layer, whip the dream whip sachet according to package instructions and vanilla or almond essence (optional)
  8. Add to it add melted and cooled lotus biscoff spread and add in your thick/fresh cream.
  9. Fold everything gently.
  10. Your lotus biscoff cream layer is ready!
  11. Now time to aseemble. Add a few spoons of carrot halwa at the bottom of the desset glass/jar.
  12. Next pipe the prepared lotus cream. Repeat the process until done.
  13. Garnish with almonds and/ leftover gajar ka Halwa. 
Notes: *
  • I could not get Indian carrots, but using Indian carrots is the best.
  • You may use 2 cups whole fat milk or 1 cup milk and 1/2 cup condensed milk.
  • You may sautee your almonds in ghee and add.
  • If you do not like whipped cream, you may use 200 ml thick cream/fresh cream and add 3 tbsp powdered sugar and fold in the melted lotus spread. 


Do try this recipe and don't forget to share your experience/feedback with me here in the comments or feel free to send me a mail. Also, do tag me at #taystedit if you try out my recipes on Facebook, Instagram etc so that I can see when you make it. ♡♡♡♡

Rose Kunafa Cream Pudding


Eid is just around the corner and we are all going to witness for the first time in our lives, the most different eid. Who would have even thought that we wouldn't be going to the mosques on the morning of eid this year? That feeling of happiness after the eid prayer is simply bliss. Now after the eid prayers we often visit our relatives which is so much fun! I know we never expected this to happen, but Qadr Allahumaa sha faa'la (It is the decree of Allah and He does as He wills). But this does remind us to not take things for granted and to stay home and be safe.


What better way to cheer up our folks with some delightful dessert/ pudding experience?! On the eid day it is mandatory to have some sweet/ dessert after the 'mega eid lunch'.. and of course the star is always the mutta maala (traditional thread-like dessert made of eggs also called egg necklace). Mutta maala is customary to be made on eid. Now being a foodie, I like to serve a dessert too that is mostly indulged after a nap session, haha. (Come on! How much food can our tummies take in right after fasting for a month, teehee) So I thought to share a dessert recipe with you guys! I mean come on! How many of us do not like desserts? especially on Eid? 


Well, I am here to share the perfect show stopper for your eid spread! I couldn't wait to develop this recipe that has been in my mind. Now to put what is in your mind to action, is not easy! I looooove kunafa, I mean, who doesn't? Lately, I have been seeing a lot of rose dalgona which inspired me to try this! Thanks to @tableforfive for that! Also another inspiration was the popular mesh umm ali from @cleobuttera that made me try kunafa dough this way. They never cease to blow your mind with their food pictures! Now, coming back to the pudding, as I said I love kunafa, and rose dalgona in trending during ramadan too! So I wanted a bit of both; something crunchy at the same time creamy and with a hint of rose. So I immediately began working on the idea.
Basically, this was an experiment and alhamdulilah it tastes soooo good! Exaclty like I wanted it! Playing with textures is my thing. But the kunafa layer came out perfect and I forgot a huge step, to butter my baking dish, so the kunafa wouldn't budge! My initial plan was to make a rose cream and allow to set and place the sweetened kunafa as the second layer. Now since that the kunafa layer wouldn't budge, I had to pour the rose cream as the second layer. Tasted great! But I would prefer to keep the kunafa layer as the top layer, the next time I make these!
Now if you dont have kunafa you may do the same recipe, by frying the bread in some ghee+oil.
Without further a do, let's prepare this yumm Rose Kunafa Cream Pudding 🍨


Ingredients:

For baking Kunafa :
  • 1/2 package or less kunafa dough (as much as you can fit in one layer of your baking dish) 
  • 4 tbsp Pure ghee
  • 1/4 - 1/2 cup condensed milk
  • 1/4 cup Whipping cream

For the rose cream:
  • 1 cup Whipping cream
  • 2 tbsp rose syrup
  • 1/4 cup condensed milk

For Garnishing 

  • Slivered Pistachios
  • Dried Rose Petals

Instructions:

  1. Preheat your oven to 200°C and butter your baking dish, I used 9 by 7 inch baking dish. 
  2. Place the kunafa dough lengthwise and fill in as tightly as possible. 
  3. Apply ghee evenly over all areas using a brush. 
  4. Bake in a preheated oven 200°C for 20 minutes until golden and crisp. 
  5. Next, pour the condensed milk and heavy cream /Whipping cream over the baked Kunafa and bake again for 5 minutes until the kunafa becomes crisp again. 
  6. Now in a large bowl, whip the cream until medium stiff peaks and add the rose syrup and condensed milk and fold gently. 
  7. Pour this rose cream over the baked Kunafa layer and place it in the refrigerator for 2-3 hours until set or place in the freezer for 1/2 an hour. * (check notes) 
  8. Garnish with slivered pistachios and dried Rose Petals. 
Notes: 
  • I would recommend to set the whipped rose cream in a similar pudding dish and place the baked sweet Kunafa for better crunch and texture. I forgot to apply butter hence I had to pour the rose cream over the kunafa layer.
  • Once the rose cream is set, place the kunafa layer just before serving so that the crunchiness is retained.
  • If you want to use the rose cream as the top layer you may use sliced bread that is fried in ghee+oil for the base, also a great substitute for kunafa.
  • I used a glass baking dish to show the layers as this was an experiment. Use a ceramic baking dish if you have one. 
  • Line the dish with baking paper for easier handling of the sweet Kunafa. 
  • Be careful not to over pour Whipping cream while baking Kunafa, just a tad bit will do. 
  • You may alternatively crush the baked Kunafa slightly with clean and dry hands and layer in mini dessert bowls with slightly crushed Kunafa layer being the first then the cream and again the Kunafa layer. 
  • If you do not have rose syrup, you may use a dash of rose water and red food color, but I wouldn't recommend it coz the pudding would turn runny and also wouldn't taste as good. (had to put down since it's a FAQ)
  • Different ovens have different temperature, keep in mind not to bake for too long after you add Condensed milk to your baked Kunafa, this will result in a hard layer. 

Do try this recipe and don't forget to share your experience/feedback with me here in the comments or feel free to send me a mail. Also, do tag me at #taystedit if you try out my recipes on Facebook, Instagram etc so that I can see when you make it. ♡♡♡♡
Older Posts

Search This Blog

My name is Hasna Haneef, a mommy to a toddler, hailing from Thalassery, Kerala. Welcome to my humble abode on the Internet; wherein I share all my recipes and experiments. I am glad to have you on board!

TRENDING POSTS

  • Kerala Style Squid Roast
  • Chicken Steak with Creamy Mushroom Sauce
  • Emirati Chebab
  • Regag - Emirati Flat bread
  • Copy Cat Caesars Mini Pizza
  • Kerala Beef Fry/ Nadan beef dry fry

About Me

May peace be with you!

Welcome to my blog.

I am delighted to have you on board. My name is Hasna Haneef, a mommy to a toddler, hailing from Thalassery, Kerala. My homeplace being Dubai, as I am born and brought up here and I am very influenced by the lifestyle and the variety of authentic cuisines I get to try from here, which has made me try anything that comes across me
, click here →

Stay Connected!

Join Our Madness!

Join with Thousands Of Subscribers ! Get Our Latest Recipes Delivered to Your email Inbox!

Powered by follow.it
  • Home
  • About Me
  • Recipes

    • Main Course
    • Desserts
    • Snacks

    Uncategorized

    • Chicken
    • Meat
    • Vegetarian
    • Rice
    • Malabar Food
    • Baking
    • Breakfasts
    • Snacks
    • Drinks
    • Pasta
    • Fish
    • Soups
    • Desserts
  • Contact Me

Featured Post

Triple Chocolate Hazelnut Skillet Cookie

Blog Archive

  • ▼  2025 (4)
    • ▼  April (2)
      • 1 minute Chocolate Mug Cake
      • Grilled Cheese California Burrito
    • ►  March (1)
    • ►  February (1)
  • ►  2024 (36)
    • ►  October (4)
    • ►  September (5)
    • ►  July (1)
    • ►  June (2)
    • ►  May (4)
    • ►  April (3)
    • ►  March (10)
    • ►  January (7)
  • ►  2023 (47)
    • ►  December (3)
    • ►  September (2)
    • ►  August (6)
    • ►  July (6)
    • ►  June (9)
    • ►  May (4)
    • ►  April (5)
    • ►  March (6)
    • ►  February (3)
    • ►  January (3)
  • ►  2022 (69)
    • ►  November (4)
    • ►  October (6)
    • ►  September (7)
    • ►  August (9)
    • ►  July (12)
    • ►  June (5)
    • ►  May (5)
    • ►  April (12)
    • ►  March (4)
    • ►  February (2)
    • ►  January (3)
  • ►  2021 (24)
    • ►  November (1)
    • ►  October (2)
    • ►  July (1)
    • ►  June (4)
    • ►  May (6)
    • ►  April (4)
    • ►  February (4)
    • ►  January (2)
  • ►  2020 (82)
    • ►  December (5)
    • ►  November (6)
    • ►  October (4)
    • ►  September (2)
    • ►  August (5)
    • ►  July (10)
    • ►  June (10)
    • ►  May (13)
    • ►  April (12)
    • ►  March (8)
    • ►  February (4)
    • ►  January (3)
  • ►  2019 (22)
    • ►  December (1)
    • ►  November (2)
    • ►  October (6)
    • ►  September (1)
    • ►  August (1)
    • ►  February (3)
    • ►  January (8)
  • ►  2018 (15)
    • ►  December (4)
    • ►  November (6)
    • ►  October (3)
    • ►  September (2)

Subscribe Us

Labels

Bake Biscuits Breakfast Brown rice Burger Cheese Chocolate Dal Egg Emirati Fish Iftar Indonesian Japanese Jeerakashala rice Kerala Keto Kuwait food Lunch Milk Mutton Thai food UAE food afghan cuisine arabic beef biryani bread burnt cheesecake cake chicken cream dessert dinner greek healthy indo chinese lamb malabar prawns pudding puffs quick dinner ideas recipe refreshing drink rice salad sandwich stir fry vegetables vegetarian veggies yemeni

Contact Form


POPULAR POSTS AND PAGES

Kerala Style Squid Roast

Kerala Style Squid Roast

June 18, 2020
Chicken Steak with Creamy Mushroom Sauce

Chicken Steak with Creamy Mushroom Sauce

November 05, 2018
Emirati Chebab

Emirati Chebab

June 01, 2023
Regag - Emirati Flat bread

Regag - Emirati Flat bread

December 02, 2020
Copy Cat Caesars Mini Pizza

Copy Cat Caesars Mini Pizza

March 12, 2024

Pages

  • Home
  • About Me
  • Privacy Policy
  • Contact Me

Copywrite © 2023 TermsFeed®. All rights reserved.

Created By Sora Templates | Distributed By Gooyaabi Templates

Back to top