Search This Blog

Taystit by Hasna

Food, Recipes, and Beyond

  • Home
  • About Me
  • Recipes
    • Main Course
    • Snacks
    • Desserts
  • Uncategorized
    • Chicken
    • Meat
    • Vegetarian
    • Rice
    • Malabar Food
    • Baking
    • Breakfasts
    • Snacks
    • Fish
    • Pasta
    • Drinks
    • Soups
    • Desserts
  • Contact Me

 Malabar Kaayi Curry


What is Eid without the nostalgic Kaayi Curry that we, Malabaris have prepare with lots of love, on the eve of Eid. My husband loves his Grandmom's food and the best of hers being her Kayi porichat (banana fritters), pulivaral (a fried banana dough snack) and our renowned Kayi curry. And for him, whenever I make the pazham pori, it's doesn't come upto her mark, but this one I always nail it, it seems! :D Alhamdulilah! It isn't easy to get his approval.

For me it’s nostalgic as this is what my ummama always offers me whenever we visit her for Perunal (Eid), though I used to dislike kayi curry as a child, I am so fond of it now, as it is a pure labor of love ❤️ 

The name curry, can give a misconception that the recipe has spicy tones to the dish. Well, it's more like a payasam/kheer. Spilt Chana dal is soaked and boiled and kept aside. Ari pidi/ thin rice dumplings are rolled using fingers, steamed and set aside. Then plantains are cooked in the thin coconut milk/ second coconut milk and boiled until cooked well, to which soaked white rice is ground and made to a paste, the paste is added as a thickening agent and to which the first milk or the thick coconut milk is added. I like this curry/ payasam, as it is free of any fatty elements like ghee, cashews etc. (yeah but of course, we have the irreplaceable sugar in it :/)

Kaayi Curry is not only fun to prepare, yet it's easy and delicious. It's something fun to do with your family, the pidi making session is always a family bonding time with giggles and jokes :D


Kaayi curry has a lot of different names, some call it pidi curry, ari pidi Kayi Curry etc. We make this for all occasions too. Let's make some delicious Kaayi curry and surprise your folks at home! :D

Ingredients :

  • 1 cup Ari/ pathiri podi * (rice powder)
  • Salt, as required
  • Water, as required
  • 1/4 Cup Split Chana dal (soaked at least for 4-5 hours)
  • 2 medium plantains/ Kerala banana, slit and chopped
  • 1 cup White granulated Sugar
  • Salt,a pinch
  • 1 box Shredded coconut
  • 1+ 1 1/2 cups warm Water
  • 3 Cardamom pods
  • 3 tbsp Pachari/ white rice (soaked in water at least for 1/2 hr) 

Instructions :

  1. In a bowl, add the ari podi/ rice flour and add in the salt, add enough water and make into a dough (not too loose not too tight)

  2. In a clean banana leaf/ aluminum foil, make thin dumplings by applying oil over your hands, and taking a small ball of the dough on one palm and rolling with the help of the other hand's index finger, into a small and thin cylinder shape. Heap them all together and steam the ari pidi/ rice dumplings for 20- 25 minurtes.
  3. Meanwhile, in a small pot, cook the soaked split Chana dal in water with little salt and cook until soft and not mushy.
  4. Once the ari pidi has steamed, sprinkle water over the steamed dumplings, this step helps the pidi from not sticking to each other.
  5. Extract the thick milk from the shredded coconut , by adding the shredded coconut to a mixer grinder, add in the warm water, and cardamom pods. Sieve, squeeze and extract the thick milk and set aside.

  6. To the same ground and squeezed coconut add it into the mixer, and pour the 1 1/2 cups warm water and repeat the process of extracting again, this is the thin coconut milk/ second

    coconut milk.
  7. In a large pot, add in your slit and chopped plantains, sugar and the extracted thin coconut milk and a pinch of salt, allow to cook until the plantains are tender.
  8. Meanwhile, make a paste by grinding teh soaked white rice with very little water.
  9. Into the pot, add the steamed and cooled ari pidi, cooked Chana dal and bring it to a boil. Check if sugar or salt is required. 
  10. Next add the ground pachari paste and mix simultaneously and allow to thicken.

  11. Finally add in the thick coconut milk and increase flame, one bubbles starts to form at the edges, switch off the flame. Serve warm or cold. Enjoy!

Notes:

* I used Amis Pathiri podi  

Do try this recipe and don't forget to share your experience/feedback with me here in the comments or feel free to send me a mail. Also, do tag me at #taystedit if you try out my recipes on Facebook, Instagram etc so that I can see when you make it. ♡♡♡♡


Chemmeen Kinnapathiri/ Prawns Kinnaroti


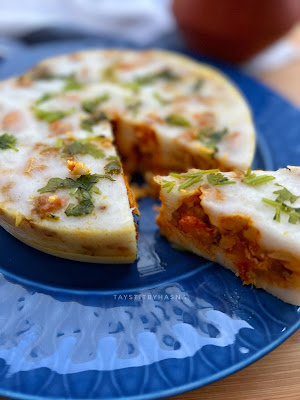
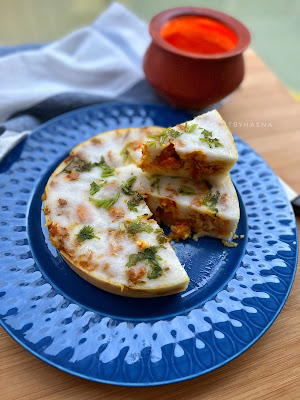
Kinnam basically translates to a vessel in which we pour rice batter, the rice-coconut milk batter is poured into ghee greased 'kinnam' and steamed in layers to get them cooked properly. These can be made with or without masala fillings. These are also known as thirul pathiri, adukkuroti, ithalroti, etc. As these are prepared in layers, it can be separated once cooked too.

The one's without masala's are usually had with mutton/chicken stew or any of your favorite curries. This roti is prepared in many ways, some methods call for the use of eggs, which would require the use of cardamom. I usually use soaked rice (pachari, preferably jeerakashala rice), freshly squeezed coconut milk and cooked rice with salt. Other versions use shallots, fennel seeds or cardamom etc. So you can try out depending on your taste preferences . The main speciality of this dish is that, prawns and coconut milk are an undeniable combination, and the dish is so wholesome, and delicious as the roti, or the batter is very light and melt in mouth. The secret to the perfect Kinnapathiri is that if the batter is thinner, the better. This is not done by adding water to the batter, this will destroy its original deliciousness. You can add the second extracted coconut milk from the same coconut that you took to extract the first thick coconut milk.

This is a very simple and healthy recipe, that is usually prepared during ramadan, and for dinner too. Some of you had requested to share the recipe here, hence do try and let me know how you liked it. 😊


Ingredients: (Makes 2 medium Kinnapathiris)

For Kinnapathiri:

  • 2 glass pachari (white rice, preferably jeerakashala rice), soaked for at least 2 hours
  • 4 tbsp Cooked Rice* (check notes)
  • 1 glass thick coconut milk
  • 1 glass thin coconut milk(add more coconut milk if batter is not thin enough)
  • Salt, as required

For Prawns fry:

  • 3-4 tbsp Coconut oil
  • 200 gms cleaned and deviened prawns
  • 1/4 turmeric powder
  • 1 tsp Kashmir chilli powder
  • 1/2 tsp garlic paste
  • Salt, as required

For Prawns masala:

  • 1 tsp ghee + 1 tsp for brushing over each layer of batter
  • 2 medium onion, chopped finely
  • 1 tsp ginger garlic paste
  • 1 Green chilli
  • 2 sprigs of curry leaves
  • 1/4 tsp turmeric powder
  • 1 tsp Kashmir Chilli powder
  • 1/4 tsp Garam masala powder

Instructions:

  1. First prepare the prawns masala and set aside. To do this, marinate the prawns under prawns fry and fry in coconut oil for 3-4 minutes and set aside. Once cooled, chop and keep aside.

  2. Next, in a kadai pour the coconut oil from the leftover oil after frying prawns and add 1 tsp ghee and add in your chopped onions, add salt and saute well until the onions are translucent. 
  3. Next add in your ginger garlic paste and curry leaves, saute until the raw smell disappers.
  4. Now add in your spice powders like turmeric powder, chilli powder, and garam masala powder.
  5. Finally add in your fried and chopped prawns are combine well. Set aside.
  6. Now prepare your rice batter by washing your soaked rice and drain and add to the mixer, add in your extracted thick coconut milk, and cooked rice, and add salt as required.
  7. The batter should be thin, the thinner the softer your Kinnapathiri will be.
  8. In a steamer, place your ghee greased kinnam (vessel) and pour in your rice batter around 3 ladlefuls and close the lid for around 4-5 minutes so that the first layer almost gets almost cooked.
  9. Next add your prawns masala by scattering all over the first layer and pour your second layer of rice batter (again three ladlefuls of batter) and close the lid and allow to steam for around 4-5 minutes. Repeat the process until you are done with at least 3 layers. * and add chopped coriander leaves in the final layer after 2 minutes of steaming. 
  10. Allow to steam for a total of around 40- 45 minutes and slide a butter knife on the sides and flip the kinnams over a plate and serve sliced, the garnished side up.


Notes:

  • With this rice quantity you can make 2 (5 inch) kinnams of Kinnapathiri if you prepare 3 layers each.
  • My rice batter was not thin enough, since it’s been ages since I made them;I forgot that the batter had to be loose. Add in more thin coconut milk to make the batter loose. The thinner the batter, the softer your Kinnapathiri will be. 
  • *For cooked/boiled rice you can use boiled rice of Jeerakashala rice, white rice or ponni rice.
  • For extracting thick coconut milk use 1 glass water for 1 pack of shredded coconut (if you live in GCC) or else 1 coconut shredded to 1 1/2 water for exatracting thick coconut milk.
  • Similarly for thin coconut milk, use the extracted coconut add 1 1/2 glass water and extract thin coconut milk by straining and squeezing the coconut fiber. (You can increase the water quantity for extraction if your batter is not loose enough)


Do try this recipe and don't forget to share your experience/feedback with me here in the comments or feel free to send me a mail. Also, do tag me at #taystedit if you try out my recipes on Facebook, Instagram etc so that I can see when you make it. ♡♡♡♡


Chicken Leg Kakkathil


Being a thalasserykari (Thalassery is a place in the Malabar coast in Kannur district) , it's a shame I haven't shared this easy and delicious recipe on my blog yet.. So I thought why not share it with you guys, especially in Ramadan, so that you do not have to waste your time in slogging long hours in the kitchen.

Some of my lovely readers had asked me to share dinner recipe ideas during Ramadan.. So here you go!

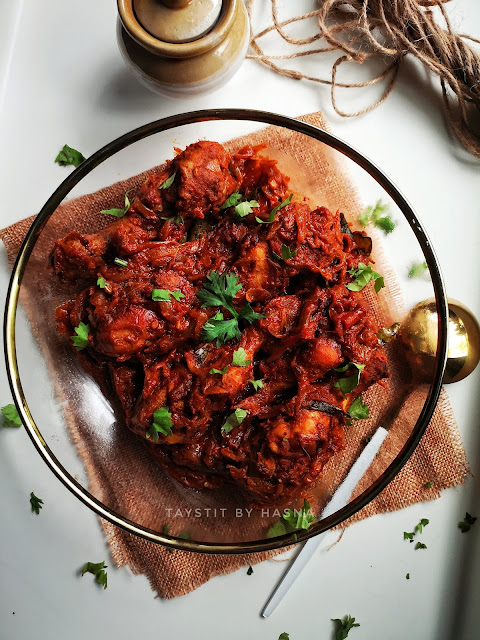
The chicken is slow cooked along with all basic ingredients and other spices that every Indian kitchen has. Then the chicken is fried in coconut oil, finally the chicken gravy is reduced along with the fried chicken which gives its color and taste. In Thalassery, feasts and parties are very common, and this is one dish that is mandatory.

My mom makes it slightly different, she cooks the chicken along with spices and the juice/broth that oozes out is set aside. After which the chicken is fried, and onions etc are sautéed and cooked, and the chicken and broth is added to the Masala which is then reduced to give you a delicious chicken dry fry with semi gravy. 🤤

It is usually enjoyed with rotis and bread like chappathi, rice pathiri, Battoora, godambu Dosa (wheat dosa) etc.

Ingredients :

  • 500 gms Chicken Leg pieces
  • 2 tbsp Ghee 
  • 2 Onions, sliced
  • 1 tbsp ginger garlic paste
  • 2 tomatoes, roughly chopped
  • 1 green chili, slit*
  • 2 - 3 sprigs of curry leaves
  • 1/4 tsp Turmeric powder 
  • 2 tsp Red Chilli Powder
  • 1 tsp Coriander powder
  • 1 tsp Garam Masala 
  • 1/4 tsp Black pepper powder 
  • Salt, as required 
  • Coconut Oil, for shallow frying

Instructions:

  1. In a pot add in your cleaned chicken Leg pieces, along with onion, tomatoes, green chillies, ginger garlic paste and other spices, all in the same pot along with salt. 
  2. Add around 1/4 cup of water and combine well with your clean hand. 
  3. Close lid and allow to cook for 15 minutes. 
  4. Next, in a deep fry pan pour 5 tbsp coconut oil and fry the chicken Leg pieces just for 2 minutes until fried on the outside. 
  5. Next add the fried chicken pieces to the gravy and allow the gravy to reduce until the color of the chicken and gravy turns to a dark and beautiful red hue. 
  6. Finally garnish with some chopped Coriander and serve hot with roti, breads like chappathi etc


Notes :

Keep in mind your spice level and add your spices like red chilli powder, pepper powder, green chillies etc accordingly


Do try this recipe and don't forget to share your experience/feedback with me here in the comments or feel free to send me a mail. Also, do tag me at #taystedit if you try out my recipes on Facebook, Instagram etc so that I can see when you make it. ♡♡♡♡

Malabar Mini Vella pola


I am finally posting this here, it is the 26th of Ramadan. Vella pola is a dish that immediately brings in childhood memories of Ramadan. Vella pola is an epitome of Malabar food especially during Ramadan. 

This brings in a lot of comfort and warmth when you have it, feels like your ancestors are sitting and smiling at you and giving you a hug while you relish them. These are super soft and spongy fermented rice cakes or buns. Traditionally this requires 2-3 days of preparation of the dish in which the batter is poured to ferment. It is a long process. So I always stopped myself from trying to make these. 

My grandmother and great grandmothers used to prepare the vessel to help the fermentation process by soaking Pappadam (Pappad) in coconut water for 2-3 days (not exactly able to recall the process) . This is the traditional method and if at all someone I know who makes really tasty traditional food is my mom's uncle's wife. I just love her food that whenever I visit my native she always prepares these traditional dishes for me and either brings them home or sends them over. I can't stress enough, the amount of love she puts in her food. I know you might now think is love even an ingredient. My answer - yes! You NEED to put in a lot of love when you prepare something for someone and it surely shows when you taste it. When I have any doubts regarding traditional food, she is my go-to person. The last time I went to visit her she gave me these fluffy polas that I couldn't get enough of! I had to ask her the recipe and as my memory is always super weak I asked her daughter, Rishooty, my mom's cousin, to send me the recipe through Whatsapp. After hearing the process I have been ever so lazy to make these. Of course we have no patience like the women of the previous generations have had 🙈😅

Recently my mom told me to try it with yeast and voila I couldn't believe it, it was exactly the same but so effortless. I couldn't believe the results. It was the same or even better 😍

The person who came up with this idea is a genius! Now we all can make this at home.. Alhamdulilah. This for suhoor is so soothing. I love to have it for suhoor. Vella pola are normally prepared and steamed in steel plates or any mould that you have. My mom made these in Idli moulds a few days back and everyone wanted to know the recipe, and it looked super cute. I love anything in small portion sizes, unlike the normal Vella polas are cut into squares or triangle.

These vella polas are poured with cardamom flavored coconut milk, small kerala bananas and sugar. Smash the whole thing with your hands and have it with your hands. Specifically, no spoon🙈 I can't tell you how divine it is, until you try it! 😍

My miss fussy eater also loved it, she kept asking for more! Vella pola is like a malabar essential for Ramadan so let's not waste any time and make this right away!

Ingredients:

  • 1 glass Pachari/ white rice
  • 1/2 glass boiled rice 
  • 1 glass water
  • 1 tsp yeast
  • 2 tsp sugar
  • 2 Pappadam (Pappad) /2 tsp Uzhun  (soaked along with rice) 
  • Salt

For the banana curry

  • 2 small bananas, chopped
  • 1 cup freshly squeezed coconut milk
  • 5 - 6 tbsp sugar
  • A pinch of salt
  • 1/2 tsp cardamom powder

Instructions 

  1. Wash and soak rice for at least 5 hours or overnight. 
  2. Grind the soaked rice, boiled rice, pappadam/Uzhunn, yeast, and sugar and add water. 


  3. Transfer to a large bowl (the batter will rise), cover the batter with a lid and allow to ferment for at least 3-4 hours.
     
  4. Add salt before steaming. 
  5. Apply oil in Idli moulds or any steel plate, pour the batter to the moulds and steam.
  6. In Idli moulds you need no more than 12- 15 minutes.
  7. Allow to rest and cool for 5 minutes and combine the ingredients of the banana curry.
  8. Pour over the Vella pola, smash and have them with your hands. It's amazingly soft. 👌👌


  • Notes : If you do not have white rice (Pachari) you may use Jeerakashala rice instead. 
  • I made 12 small polas with this measurement. 
  • If you do not have pappadam (pappad) you may use Urad dal ( I believe this is because pappad is made from Urad dal and this acts as a substitute for Pappadam) 

Do try this recipe and don't forget to share your experience/feedback with me here in the comments or feel free to send me a mail. Also, do tag me at #taystedit if you try out my recipes on Facebook, Instagram etc so that I can see when you make it. ♡♡♡

Malabar Kai Pola


Good evening lovelies.. I have been MIA for a couple of days now. It's just that it is Ramadan and I am not getting time to post much here.! But I have lots to share with you guys.

Anyways, let get back to business! Today I am sharing my Kai pola recipe which is the easiest sweet snack you can make for iftar. Since this year's Ramadan started I have been cooking mostly traditional dishes for iftar.. Which is good in a way. I didn't want to make new dishes that I have in my mind, because Ramadan memories for all of us is about our traditional mom cooked dishes that we mostly devour during iftar.

Kai pola is one of the most authentic and popular  dishes of the Malabar cuisine. Makes the perfect sweet treat for iftar! 

Well this is one such recipe, many of us might already know how to prepare Kayi Pola (Plantain Kums/Cake), but off late I have been receiving a lot of requests for preparing Kayi pola perfectly!

I am one person who loves the kayi to be caramelized well before it goes into the pola mixture to be cooked on low. In my beginning days of cooking I always burnt the down part of the kayi pola and always went mad thinking why this happened and started decreasing the sugar amount. Even thought the pola comes out great, but the sweetness would be off side. So I was on a search to perfect my Kai pola without decreasing the sugar content, (as having more sugar content helps the pola to turn brown. Or burn more quickly without the insides being cooked properly).

So one fine day my bhabhi comes up with the idea of how her mother does this part. After you pour the pola mixture to the pan greased with ghee, keep the pan closed for 5 minutes on medium low heat and whilst that cooks, keep a flat pan/tawa on the lowest heat setting. Right after the 5 minutes move the lid, add the roasted cashews and close the lid and place the pan with pola on the flat tawa for 20-25 minutes, check if it cooked by inserting a toothpick.

Also what I have noticed is that many YouTube videos and other recipes shows that the egg and sugar is blended in a mixer jar before pouring into the ghee greased pan. This is a big no no, the mixing of eggs and sugar accumulates bubbles in the mixture which might look like you would get a fluffy Kai pola. But once the kayi pola is cooked it comes out all shrinked.

These tips might be nothing new to many of you but there are a few newbies struggling to perfect a kayi pola without burning the base and sides of the pola. Hope this helps!

Let's move on the ingredients, which are minimal and let's get started to prepare the easiest kayi pola.

Ingredients :

  • For 2 ripe Platains
  • 4 Eggs
  • 10 leveled tsp Sugar/according to taste
  • Pinch of Salt
  • 1/4 Cardamom powder
  • 8-10 Cashews and Raisins
  • Ghee 3 tbsp

Instructions :

  1. Chop the ripe plantains into cubes and fry them in the ghee until dark brown.

  2. In the same ghee brown the cashews and Raisins, be careful not to burn
  3. In a bowl Crack 4 eggs and add the sugar, cardamom and pinch of salt to balance the sweetness. And mix using a fork until incorporated.
  4. Next in a non stick small pan/vessel pour the ghee used and smear on all sides and pour in the egg mixture and sprinkle the fried plantains and finally garnish with cashew cut into halves. Now keep the pan on med low flame for 5 minutes while heating a flat pan. 
  5. After 5 minutes place the vessel with kayi pola on the flat pan and let it get done for another 20-25 minutes on low heat.
  6. Insert a toothpick in the middle and check if it's done.

Easy Kayi Pola ready! Enjoy! 😋


Notes - for all tips and tricks please read the blog post ❤️

Do try this recipe and don't forget to share your experience/feedback with me here in the comments or feel free to send me a mail. Also, do tag me at #taystedit if you try out my recipes on Facebook, Instagram etc so that I can see when you make it. ♡♡♡♡

Effortless Malabar Style Chemmeen Thenga Chor


Have you had situations where you are already late and tired to make lunch? Well, this recipe is here to the rescue! Definitely, a must-try if you love 'naadan' food and tastes like its right from 'The God's Own Country'. 

This Chemeen thenga chor is something that is made quite often at home since childhood. I have always been a picky eater when I was smaller and used to completely dislike when mama made this, then least favorite rice. Only after I grew did I know that I was missing out so much on this Chor (rice) and its flavors in my life! 🤣Ever since this rice has always been my last minute resort which is equally delicious compared to basic meals from our place! So of course, this is my mommy 's recipe! This might not be authentic but that's how me and my mama cooks🤷‍♀️😀 We don't follow any particular recipe or go for proper measurements! 😅

Let's move on to the recipe now. The rice is very pungent and flavorful, you would not want to miss out on its flavors. As the name suggests, it is so effortlessly made. All you need are cleaned prawns and 30 minutes of your time in total. That easy I must say.

Basically, it is rice cooked in a masala of turmeric, chilli powder, coriander powder and garam masala in small proportions, in which the prawns are cooked in the gravy and coconut milk is added to escalate its flavor profile. Here, I have used coconut milk powder in the recipe for ease of accessibility but does the job well. You may use freshly squeezed coconut milk too (any day better)!  🤣

The rice is often accompanied by some mango-coconut chutney and pappadam (pappad) and/ raita. Here I did not have pappad with me, hence only the coconut chutney is pictured. 
Let's get going and make this super delicious and effortless Thenga Chor with Chemmen. 

Ingredients:

(Makes for 3 people) 


  • 2 glass Ponni Rice/ Jeerakashala
  • Water (check notes) *
  • 15-20 Prawns, cleaned and deveined
  • 1 medium Onion, sliced
  • 2 tbsp ginger garlic paste
  • 1 small tomato, chopped
  • 3 green chilies
  • 2-3 sprig of curry leaves
  • 1/4 Turmeric powder
  • 1 1/2 tsp Chilli Powder
  • 1 tbsp Coriander powder
  • 3/4 tsp Garam Masala
  • 1/2 cup Coconut milk powder

Instructions :


  1. Pour the coconut oil in a large pot and Sautee the onions until translucent and add in your ginger garlic paste and curry leaves. Saute till the raw smell disappears.
  2. Now add the slit green chilies and chopped tomatoes, and cook for a couple of minutes until the tomatoes mash.
  3. Now add all the spices and Sautee on low till the spices have no raw smell, about 2 minutes.
  4. Add the cleaned and deveined prawns to this and sautee
  5. Next, add the washed and drained rice and add water as required (refer notes)*.
  6. Add the coconut milk (mix 2 tbsp water to the coconut milk powder and make a paste) to the rice and close the lid and allow to cook. For cooking time for the different types of rice check notes.*
  7. Voila, and you are done! Effortless Chemmeen Thenga Chor is done.
  8. Garnish with fried curry leaves and a Mango coconut chutney on the side.! (recipe below 👇) 

Notes*-

  • You may always use freshly squeezed Coconut milk if you have the time, it is definitely much better!
  • For Jeerakashala : water ratio is 1 : 1 1/2 glass
          Ponni rice : water ratio is 1 : 2 1/4 glass


  • For cooking Jeerakashala rice - After 10 minutes give a mix, and close the lid and let it cook on simmer for another 5 minutes and it's done! (If using Jeerakashala I prefer using ghee instead of coconut oil)
  • For cooking Ponni rice - Cook covered for at least 25 minutes and check it's doneness and cook more if required. 


Mango Coconut Chutney


  • 1/2 cup grated coconut 
  • 1 small garlic clove
  • 1 side slice of green mango, chopped
  • 1/2 tsp Kashmiri Chilli powder
  • Salt

Grind in a grinder all the above ingredients or use a mortar and pestle for better results. 

Do try this recipe and don't forget to share your experience/feedback with me here in the comments or feel free to send me a mail. Also, do tag me at #taystedit if you try out my recipes on Facebook, Instagram etc so that I can see when you make it. ♡♡♡♡

Kaju chicken curry


The easiest chicken curry you can make! The only chopping required is for the onions. Other than that all the ingredients are blended or ground. Now you can imagine how easy it is going to be. Cashew paste makes the Curry even more rich and tastier. It is up to you to totally omit the cashew paste, you still have a thick and yummy chicken curry.

This curry is the perfect recipe for newbies to the kitchen, momma's with small babies, working moms, in fact anyone who has no time to spent in the kitchen all day and when hotel food is BOO. Also who doesn't like cheat days in kitchen, teehee. Well, this effortless curry is going to bring all smiles on your family's faces, this curry recipe is surely a keeper The recipe is so simple and effortless with minimal ingredients. I guarantee you this curry won't take you more than 30 minutes from start to end.

I was planning to make some naadan type chicken curry to go with my Ney pathil for breakfast. While I was in the mood for experimenting (yet I was starting to have strong symptoms of bad cold), so you know how badly I wanted to run from the kitchen. To top it my hubby was in a hurry and I had to make a curry super quick.

I had no time to think much so I did what I felt like and voila! It turned out so good Alhamdulilah!
This curry is made in a pressure cooker, yes! Thank god for pressure cookers. Always comes to the rescue when you are short on time. (I prefer to do it in a pot itself tough if I had the time), here I am using the cooker so that my onions are pressure cooked well in the masala and mashed well.


Rich and delicious cashew chicken curry can be accompanied with Ney pathil (oil fried rice pancakes), Ari dosa (rice crepe), ghee rice, appam, noolputtu/iddipyappam, chappathi, etc.

Guys! Please do give the recipe a try and let me know how you liked it! I am sure your family will love the curry😋👌

Ingredients:


  • 700 gms - Fresh Chicken (both with bone and boneless)
  • 2-3 tbsp any vegetable oil
  • 1 and 1/2 medium-sized Onions sliced
  • 2 medium Tomatoes (roughly chopped if required)
  • 3 large green Chillis
  • 6 Cloves of garlic
  • 1-inch piece of ginger
  • 2 sprigs of curry leaves
  • 10 Cashews
  • 1/2 cup Hot water
  • 1/4 cup milk
  • 1/4 tsp Turmeric powder
  • 2 1/2 tsp Kashmiri Chilli Powder
  • 5 tsp Coriander powder, leveled
  • 3/4 tsp Garam Masala powder
  • 1/2 cup water
  • Salt, as required

Instructions :


  1. In a heatproof bowl, place the cashews and pour hot water. Keep aside.
  2. Grab a pressure cooker, pour in the oil.
  3. Add the sliced onions, while sautéing grind tomatoes, ginger and garlic in a blender/grinder.
  4. Add in the Curry leaves and slit green chillies.
  5. Now pour in the prepared tomato mixture and add in the spice powders and the chicken along with 1/2 cup water.
  6. Finally add salt and close lid. And cook for 2 whistles and off the flame.
  7. While the pressure goes prepare the cashew paste by grinding cashew and milk, adding milk little at a time.
  8. Once the pressure is gone, add the prepared cashew paste and stir well and add water as required and bring it to a boil. Garnish with chopped Coriander leaves and you are done! Enjoy❤️

Do try this recipe and don't forget to share your experience/feedback with me here in the comments or feel free to send me a mail. Also, do tag me at #taystedit if you try out my recipes on Facebook, Instagram etc so that I can see when you make it. ♡♡♡♡
Older Posts

Search This Blog

My name is Hasna Haneef, a mommy to a toddler, hailing from Thalassery, Kerala. Welcome to my humble abode on the Internet; wherein I share all my recipes and experiments. I am glad to have you on board!

TRENDING POSTS

  • Kerala Style Squid Roast
  • Chicken Steak with Creamy Mushroom Sauce
  • Emirati Chebab
  • Regag - Emirati Flat bread
  • Copy Cat Caesars Mini Pizza
  • Kerala Beef Fry/ Nadan beef dry fry

About Me

May peace be with you!

Welcome to my blog.

I am delighted to have you on board. My name is Hasna Haneef, a mommy to a toddler, hailing from Thalassery, Kerala. My homeplace being Dubai, as I am born and brought up here and I am very influenced by the lifestyle and the variety of authentic cuisines I get to try from here, which has made me try anything that comes across me
, click here →

Stay Connected!

Join Our Madness!

Join with Thousands Of Subscribers ! Get Our Latest Recipes Delivered to Your email Inbox!

Powered by follow.it
  • Home
  • About Me
  • Recipes

    • Main Course
    • Desserts
    • Snacks

    Uncategorized

    • Chicken
    • Meat
    • Vegetarian
    • Rice
    • Malabar Food
    • Baking
    • Breakfasts
    • Snacks
    • Drinks
    • Pasta
    • Fish
    • Soups
    • Desserts
  • Contact Me

Featured Post

Triple Chocolate Hazelnut Skillet Cookie

Blog Archive

  • ▼  2025 (4)
    • ▼  April (2)
      • 1 minute Chocolate Mug Cake
      • Grilled Cheese California Burrito
    • ►  March (1)
    • ►  February (1)
  • ►  2024 (36)
    • ►  October (4)
    • ►  September (5)
    • ►  July (1)
    • ►  June (2)
    • ►  May (4)
    • ►  April (3)
    • ►  March (10)
    • ►  January (7)
  • ►  2023 (47)
    • ►  December (3)
    • ►  September (2)
    • ►  August (6)
    • ►  July (6)
    • ►  June (9)
    • ►  May (4)
    • ►  April (5)
    • ►  March (6)
    • ►  February (3)
    • ►  January (3)
  • ►  2022 (69)
    • ►  November (4)
    • ►  October (6)
    • ►  September (7)
    • ►  August (9)
    • ►  July (12)
    • ►  June (5)
    • ►  May (5)
    • ►  April (12)
    • ►  March (4)
    • ►  February (2)
    • ►  January (3)
  • ►  2021 (24)
    • ►  November (1)
    • ►  October (2)
    • ►  July (1)
    • ►  June (4)
    • ►  May (6)
    • ►  April (4)
    • ►  February (4)
    • ►  January (2)
  • ►  2020 (82)
    • ►  December (5)
    • ►  November (6)
    • ►  October (4)
    • ►  September (2)
    • ►  August (5)
    • ►  July (10)
    • ►  June (10)
    • ►  May (13)
    • ►  April (12)
    • ►  March (8)
    • ►  February (4)
    • ►  January (3)
  • ►  2019 (22)
    • ►  December (1)
    • ►  November (2)
    • ►  October (6)
    • ►  September (1)
    • ►  August (1)
    • ►  February (3)
    • ►  January (8)
  • ►  2018 (15)
    • ►  December (4)
    • ►  November (6)
    • ►  October (3)
    • ►  September (2)

Subscribe Us

Labels

Bake Biscuits Breakfast Brown rice Burger Cheese Chocolate Dal Egg Emirati Fish Iftar Indonesian Japanese Jeerakashala rice Kerala Keto Kuwait food Lunch Milk Mutton Thai food UAE food afghan cuisine arabic beef biryani bread burnt cheesecake cake chicken cream dessert dinner greek healthy indo chinese lamb malabar prawns pudding puffs quick dinner ideas recipe refreshing drink rice salad sandwich stir fry vegetables vegetarian veggies yemeni

Contact Form


POPULAR POSTS AND PAGES

Kerala Style Squid Roast

Kerala Style Squid Roast

June 18, 2020
Chicken Steak with Creamy Mushroom Sauce

Chicken Steak with Creamy Mushroom Sauce

November 05, 2018
Emirati Chebab

Emirati Chebab

June 01, 2023
Regag - Emirati Flat bread

Regag - Emirati Flat bread

December 02, 2020
Copy Cat Caesars Mini Pizza

Copy Cat Caesars Mini Pizza

March 12, 2024

Pages

  • Home
  • About Me
  • Privacy Policy
  • Contact Me

Copywrite © 2023 TermsFeed®. All rights reserved.

Created By Sora Templates | Distributed By Gooyaabi Templates

Back to top