Search This Blog

Taystit by Hasna

Food, Recipes, and Beyond

  • Home
  • About Me
  • Recipes
    • Main Course
    • Snacks
    • Desserts
  • Uncategorized
    • Chicken
    • Meat
    • Vegetarian
    • Rice
    • Malabar Food
    • Baking
    • Breakfasts
    • Snacks
    • Fish
    • Pasta
    • Drinks
    • Soups
    • Desserts
  • Contact Me

Pizza Bombs


It’s not easy to impress little kids that are fasting. So this little pizza bomb is here to their rescue. Kids love pizza! And this has to be the perfect snack for the little ones to open their fast. 

The dough is made using the Caesar style pizza dough (recipe already in my blog) and stuffed with a saucy filling and mozzarella cheese.

If you make the dough ahead of time, it’s an easy snack to prepare. Without further a do, let’s get started!

Ingredients:

  • 150 gms Boneless Chicken 
  • 1 tsp White pepper 
  • 1 tsp Paprika powder/ Red Chilli powder 
  • 1/4 tsp Garlic powder
  • Salt
  • Olive oil- to shallow fry the chicken 
  • 1 tbsp Butter
  • 1 tbsp Flour
  • 1/4-1/2 cup Milk
  • 1/4 tsp Red Chilli Flakes
  • 1/4 tsp Oregano
  • 1/4 cup Capsicum, chopped finely (optional)
  • 1 tbsp Black Olives, sliced (optional)
  • 2 tbsp Tomato Ketchup 
  • Mozzarella Cheese
  • Egg whites 
  • Bread Crumbs 
  • Vegetable Oil for frying

Instructions :

  1. Marinate the chicken pieces with white pepper, garlic powder, paprika powder and salt and shallow fry in olive oil no more than 5 minutes and set aside and chop with finely once cooled. 

  2. In to the same pan, add a butter slice, sauté the flour and switch off the flame and pour the milk little by little, whilst stirring constantly. 
  3. Into the bechamel/ white sauce, add your chilli flakes, Oregano, White pepper powder and salt. 
  4. Chop up the chicken pieces and add the chicken to the prepared sauce. 
  5. Next add in your capsicum, olives and tomato ketchup.
  6. Onto a clean counter top, place your risen dough and make small balls from it and flatten using a rolling pin and add in the thickened filling and Mozzarella Cheese and roll into balls and remove the excess dough if necessary.
  7. Finally dip and roll the ball in egg whites and coat in bread crumbs.


  8. Fry in a deep curved wok (to get the pizza bombs cooked thoroughly). - Make sure the flame is not too high or too low. 
  9. Enjoy with some ketchup! 
Do try this recipe and don't forget to share your experience/feedback with me here in the comments or feel free to send me a mail. Also, do tag me at #taystedit if you try out my recipes on Facebook, Instagram etc so that I can see when you make it. ♡♡♡♡

 Copy Cat Caesars Mini Pizza

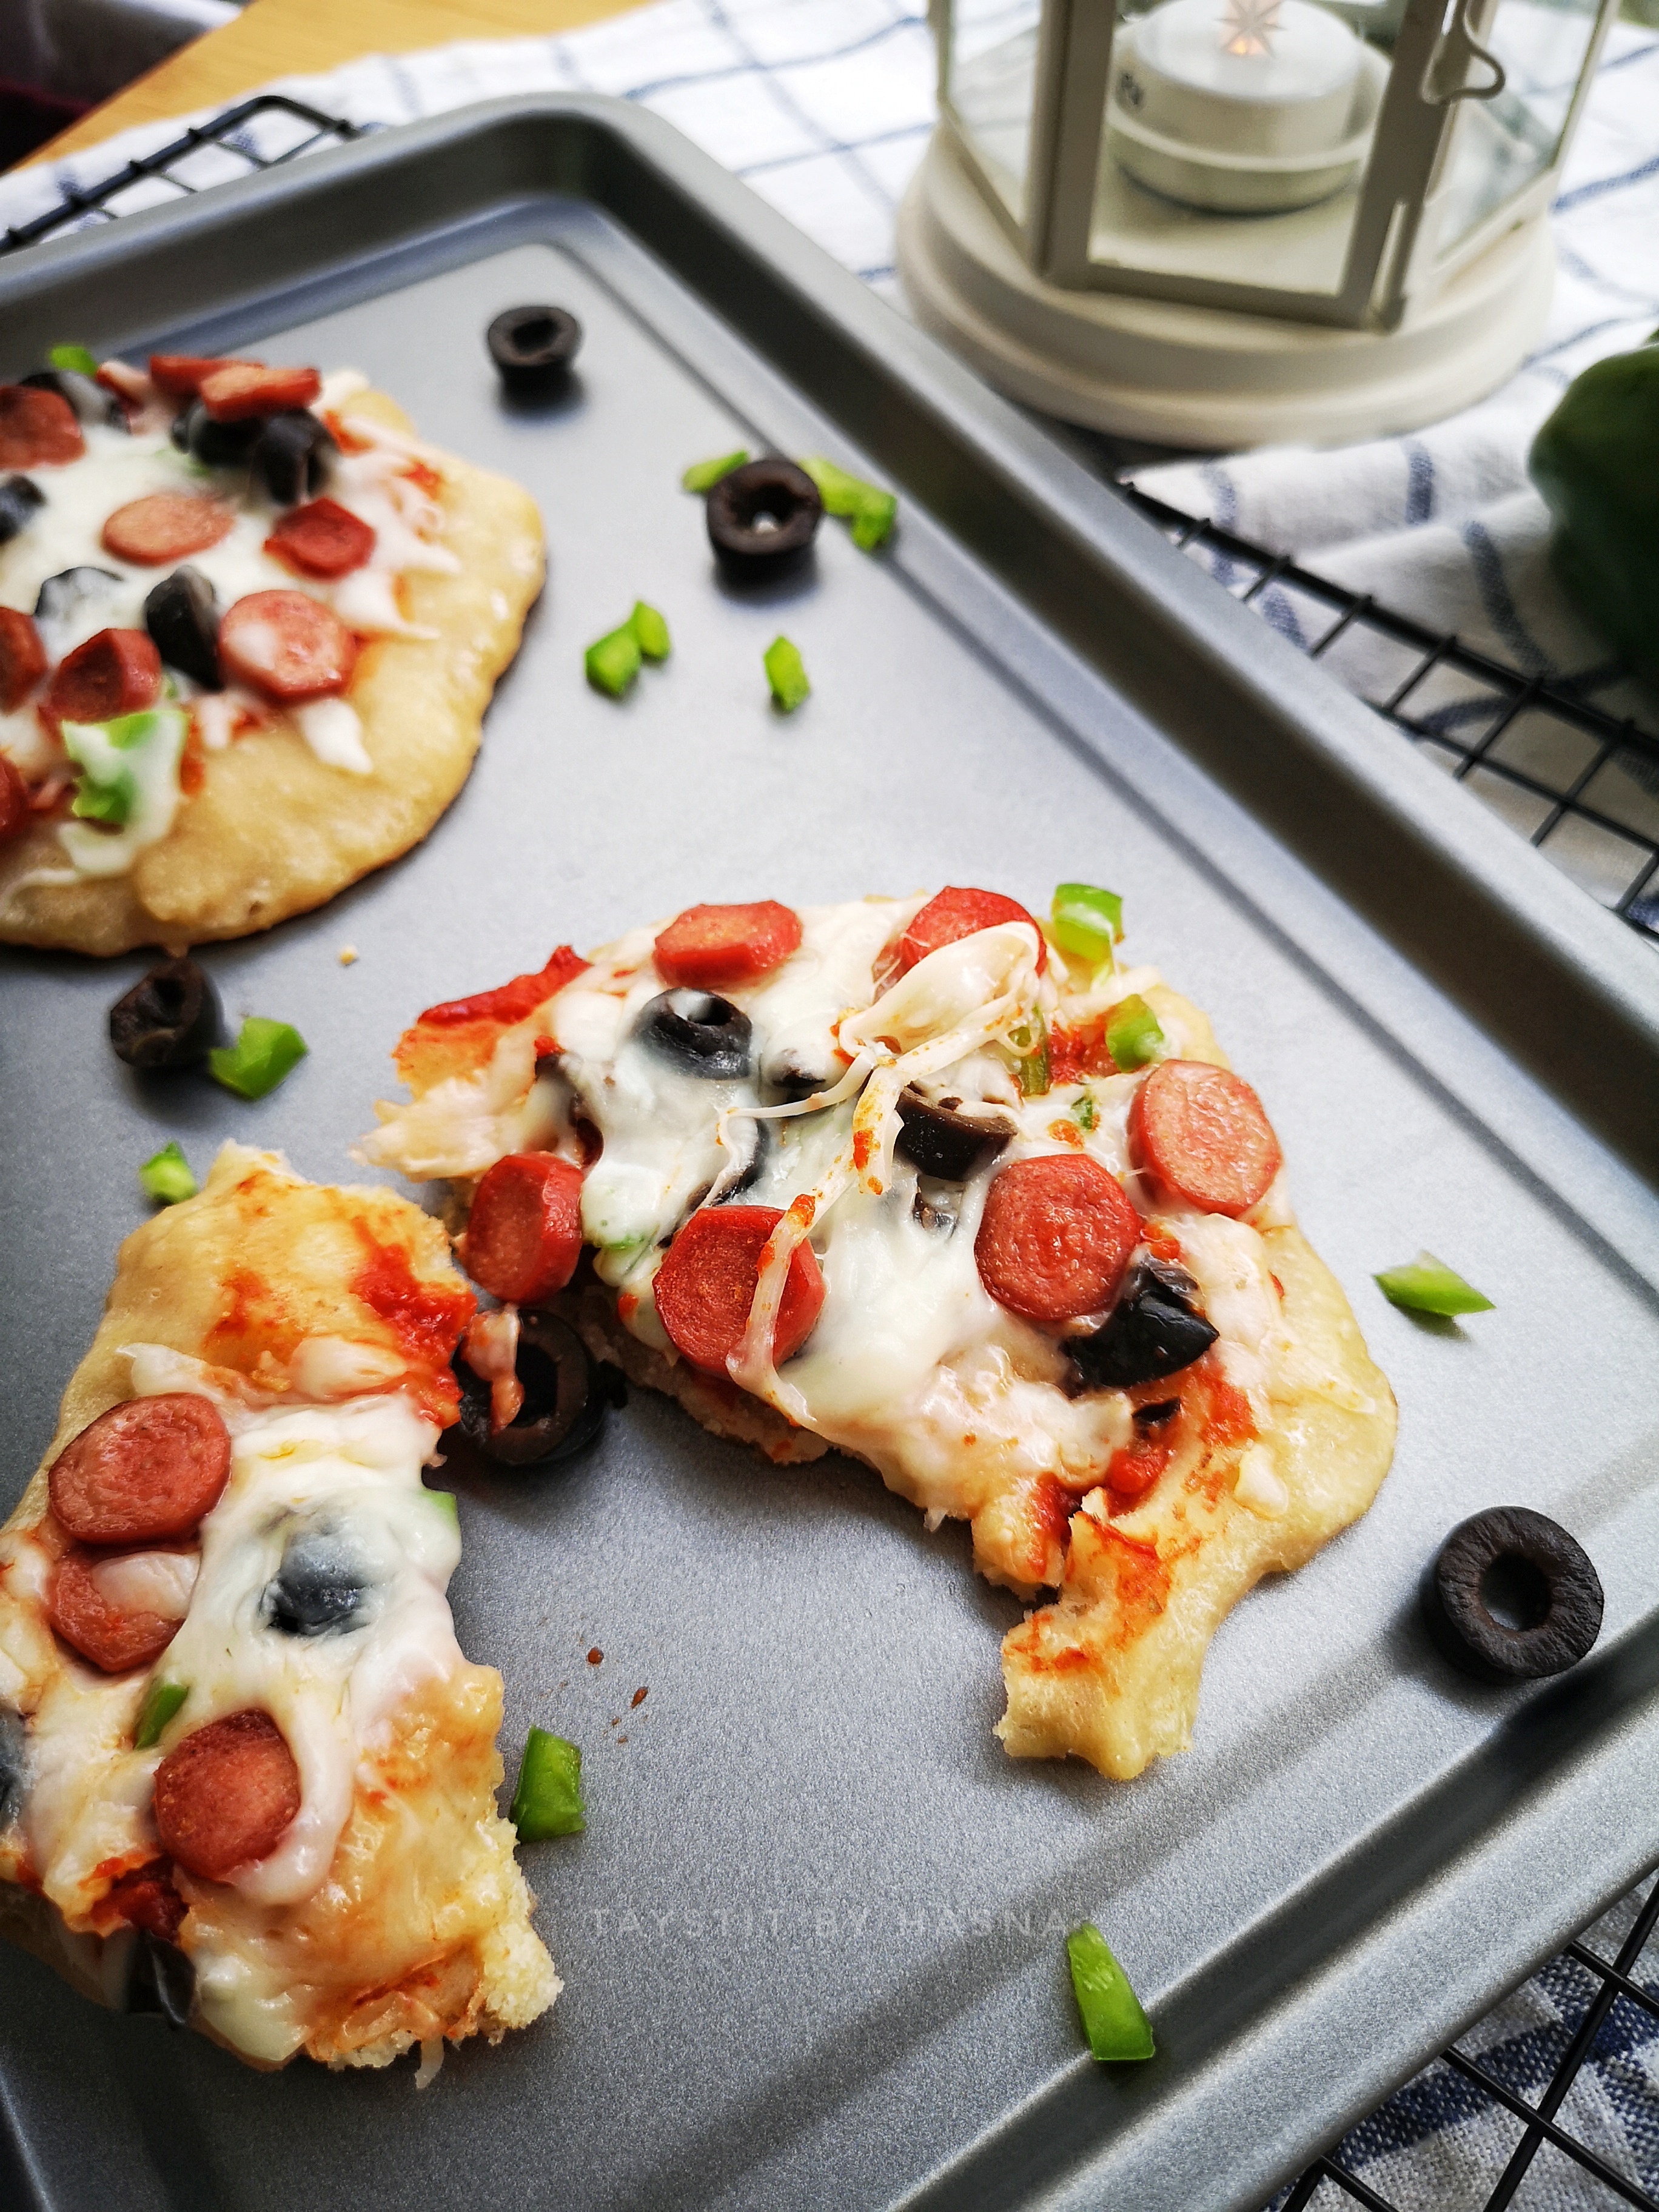
If you are bought up in the UAE, you know what this pizza means to adults and kids who have devoured them in their childhhod! 1 dirham for this yummiest mini pizza (though now prices have changed), the taste is the same nostalgic one!

I tried recreating these yummy bites, though they are not as good as the original, but definitely taste close to it! The emmental cheese is what gives it the similar taste of Caesars Mini pizza. I have been experimenting this recipe for sometime now, and finally we have this delicious Caesars mini pizza recipe.

Unlike other mini pizza, there are no veggies and chicken or other protein involved in the original version, but you may add it depending on you. Since it's Ramadan and kids may fast, making these easy pizzas at home is such a life saviour! And these freeze well too, they are a great snack for school lunch box too!!

Ingredients :

For the dough

  • 1/2 Cup water
  • 5 tbsp Xtra Virgin Olive Oil/ 1/4 cup Vegetable oil
  • 1 1/2 cup All Purpose Flour
  • 1 tbsp Sugar
  • 1 tsp Instant Yeast
  • 1/2 tsp Salt
  • 1 tbsp Tomato paste 
  • 3-4 tbsp Tomato Ketchup
  • A dash of Oregano
  • Emmental Cheese, shredded

 Instructions:

  1. In a bowl, mix together the lukewarm water, olive oil, sugar and salt.
  2. In another bowl, combine the yeast and all purpose flour, and gradually add the water mixed with olive oil, salt, and sugar.
  3. Mix together to form a dough and knead well. 
  4. In a greased bowl, place the dough and cover with a cloth or cling wrap and keep the bowl in a warm place.
  5. Allow to rise for 60-90 minutes.
  6. Make the sauce by mixing the tomato paste, tomato ketchup and oregano. 
  7. Place small balls and using a roller, flatten into small thin discs (they will rise when baking/ airfrying), smear the prepared sauce and finally sprinkle some shredded Emmental Cheese generously.

  8. Bake or airfry in a preheated oven at 170 deg C for 10-15 minutes or until the pizza bread just bakes and the cheese melts. 

  9.  Your Caesar style mini pizza are ready!  


Note:

You may use half and half ratio of water and milk instead of only water for the dough, but you will have to bake it at the lowest temperature, as the milk can make the pizza bread bake and change color faster, turning it to harder exteriors.

Do try this recipe and don't forget to share your experience/feedback with me here in the comments or feel free to send me a mail. Also, do tag me at #taystedit if you try out my recipes on Facebook, Instagram etc so that I can see when you make it. ♡♡♡♡

 Pizza Rolls Bake 


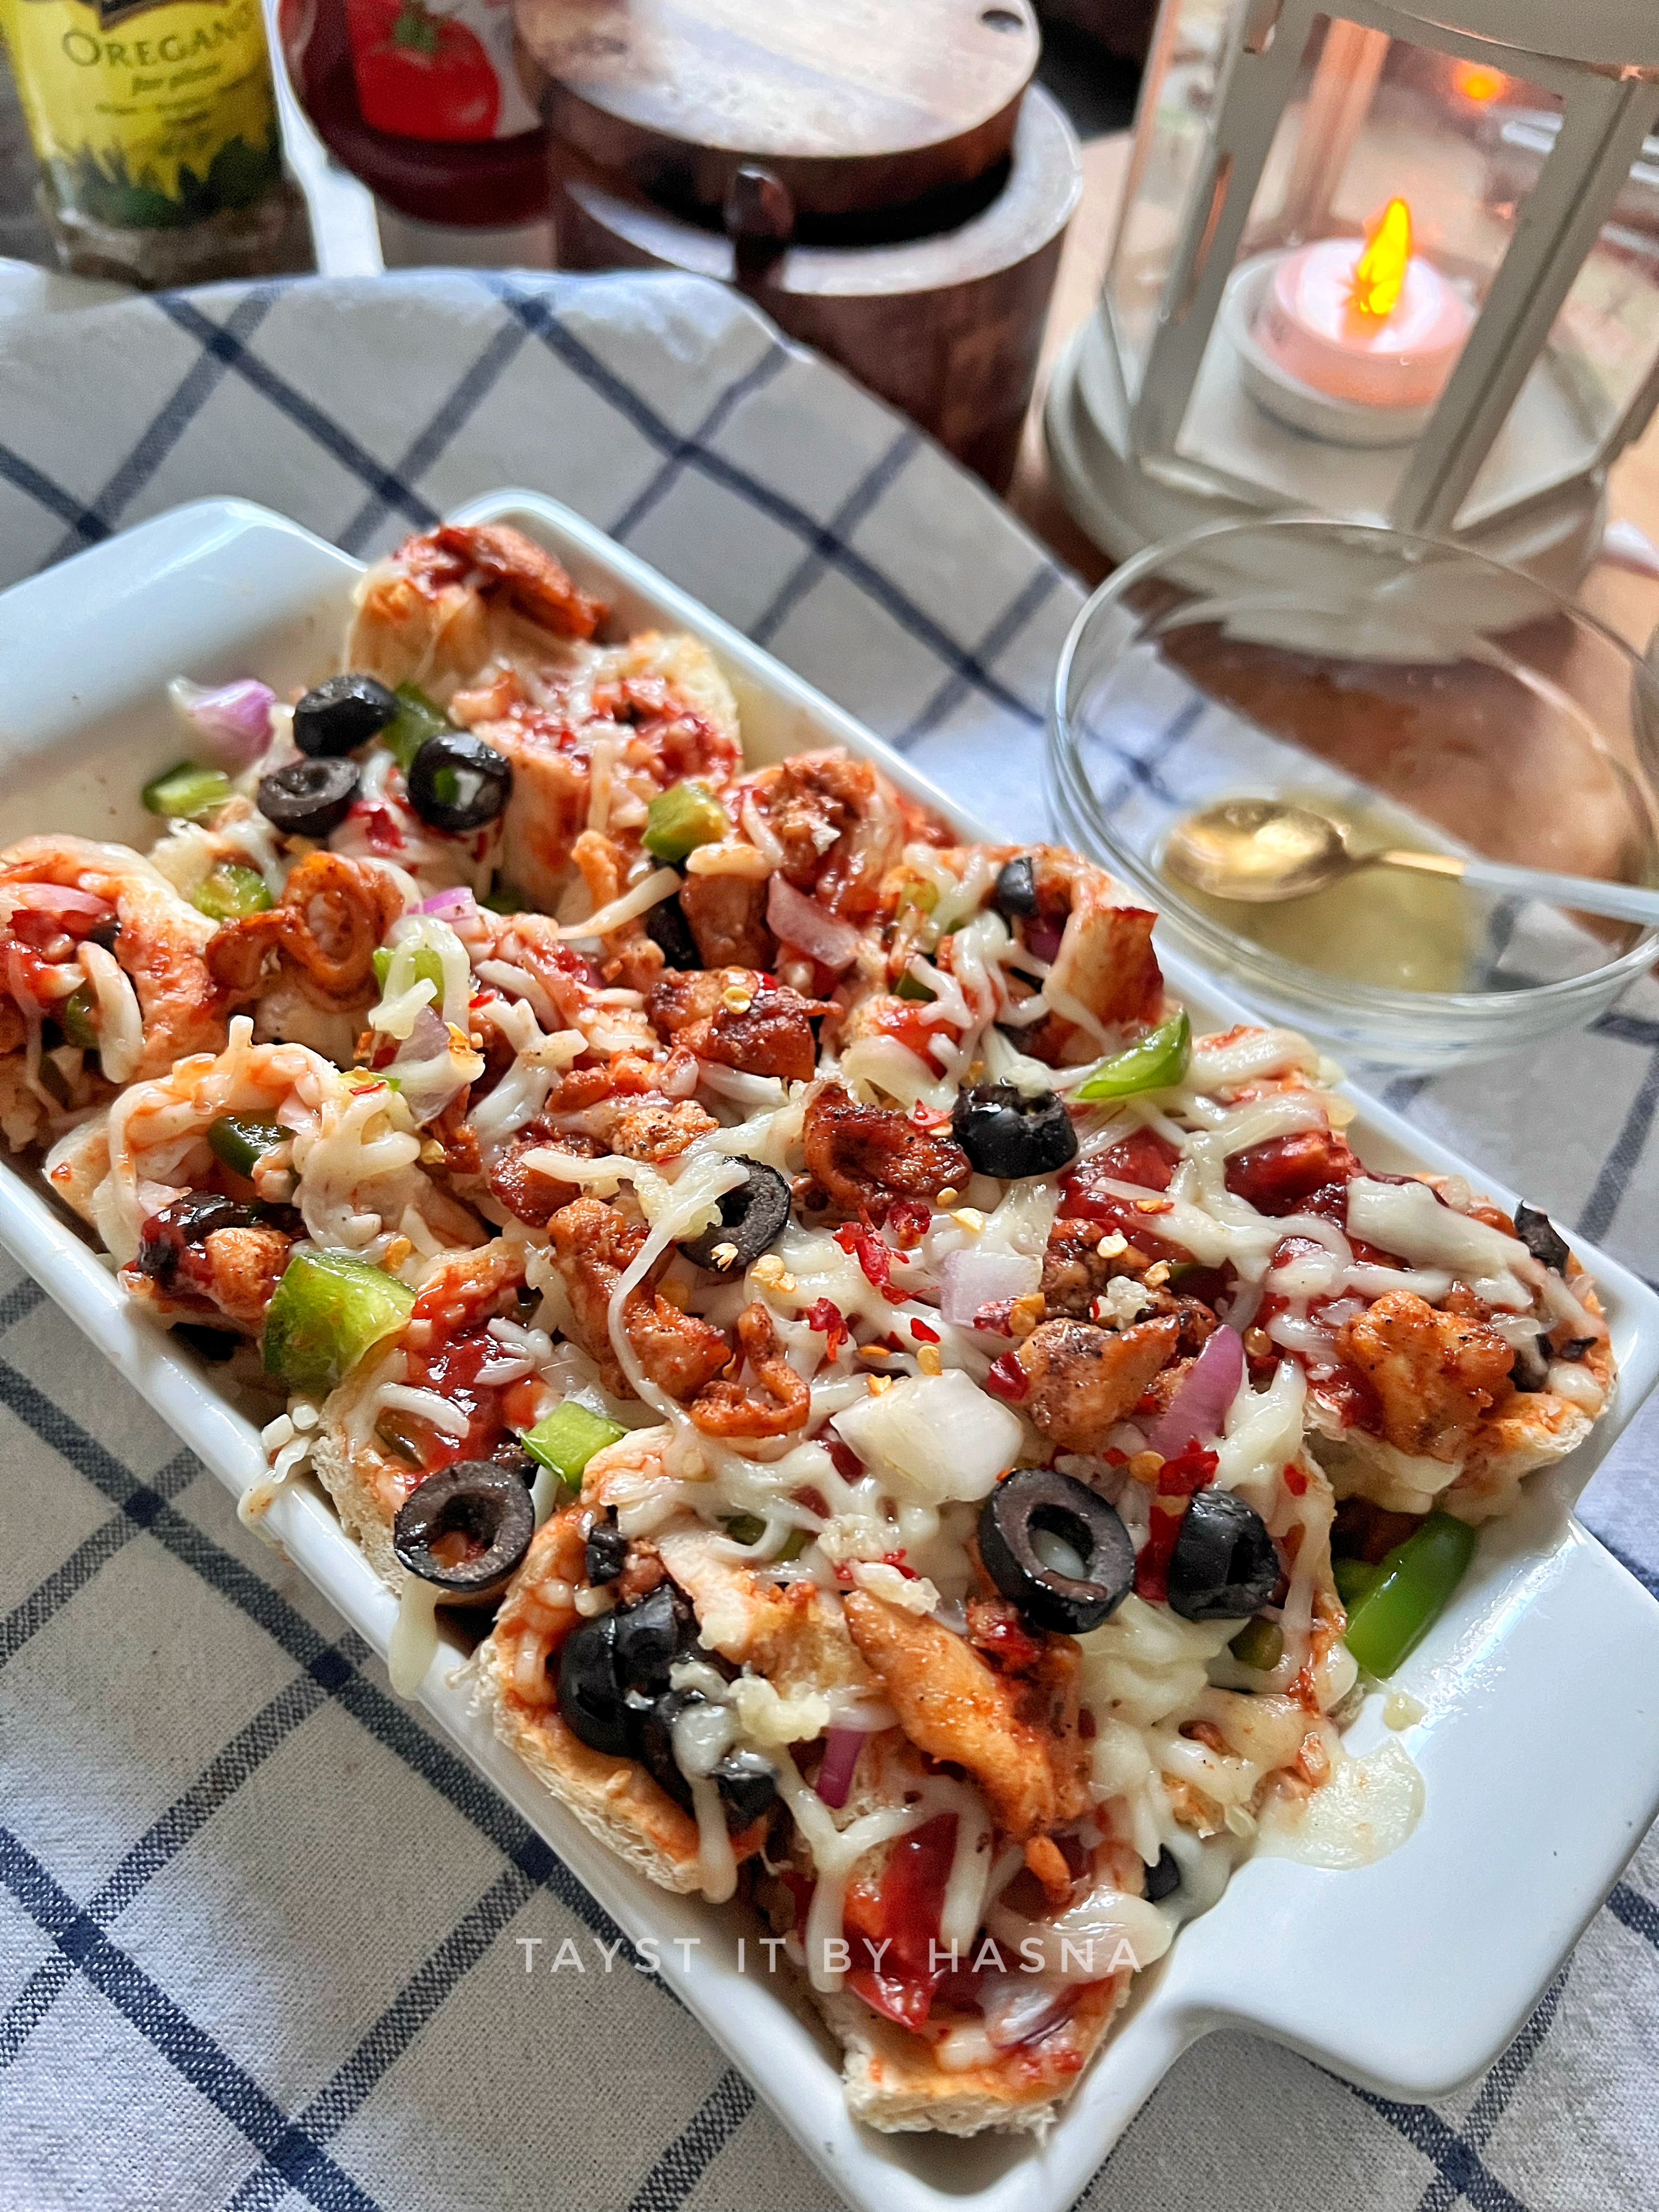
It's not easy to please kids with snacks that they can devour when they open their fast. Well, you can be sure, they are going to love this one! With some basic ingredients available at home, you can win the hearts of your little ones! I did win my picky eater girl's heart! :D

The pizza rolls are made usimg bread slices, that are moistened and rolled to flatten to which the prepared pizza sauce is spread, onto that, add Mozzarella cheese, chopped veggies and the fried chicken pieces. These rolls are so yum! I feel like making them again already! (especially because it's so easy to prepare, hehe) Slice the rolls and place them on a baking tray, so read the remaining sauce, and sprinkle Mozzarella cheese and bake until the cheese melts. Soo good I must say!

Let's get the ingredients :

Ingredients:

  • 6-7 Bread slices 
  • 150 grams Boneless Chicken, sliced
  • 1/2 tsp Garlic paste
  • 1 tsp Kashmiri Chilli powder 
  • 1/4 tsp Pepper powder
  • Salt, as required 
  • 1/2 Onion, chopped 
  • 1/2 Capsicum, chopped
  • 4-5 tbsp Tomato Ketchup
  • 1 tsp Tomato paste
  • Freshly minced garlic, a pinch
  • 1/4 tsp Oregano
  • 3-4 tbsp Black Olives, sliced
  • Mozzarella Cheese
  • Red Chilli flakes, a pinch (optional)
  • 2 tbsp Butter 
  • 1/2 tsp garlic, freshly minced
  • Salt

Instructions:

  1. Marinate the sliced chicken with Kashmiri Chilli powder, garlic paste, black pepper powder and salt.
  2. Fry the chicken pieces in vegetable oil and set aside.

  3. To make the pizza sauce, to a small bowl, add the tomato ketchup, tomato paste, oregano, minced garlic (only a pinch, as the garlic can over power)
  4. Next, trim the sides of the bread slices. 
  5. Moisten the bread with fingertips, and flatten using a roller.

  6. Spread the pizza sauce over the bread, sprinkle mozzarella cheese, add the chopped onion and capsicum, and top up with sliced black olives. Place 2-3 pieces of the fried chicken pieces and roll them. At the end of the bread,dampen with water and press the roll to the end and seal it.
  7. Cut the roll into half and place both the roll on a small baking dish, cut side facing up. Similarly do rest of the bread slices and fill the baking dish.

  8. Finally, mix softened butter with minced garlic and salt and apply over the rolls and spread the remaining pizza sauce over the rolls and add leftover chicken pieces and chopped veggies.
  9. Now sprinkle mozzarella cheese generously, and sprinkle little red Chilli flakes (avoid if children can’t stand spice)
  10. Bake/ microwave until the cheese melts and serve warm! 


Do try this recipe and don't forget to share your experience/feedback with me here in the comments or feel free to send me a mail. Also, do tag me at #taystedit if you try out my recipes on Facebook, Instagram etc so that I can see when you make it. ♡♡♡♡

Pepperoni Pizza Pancakes


I am all in for easy recipes especially for iftar and if it is oil free and healthy double points! 😍 😍

I made a batter that can be used as a pizza base and requires no oven.. Pizza made on a pan with a simple batter. To make it healthy I have used half wheat flour and half of all Purpose Flour* and just a tbsp of olive oil. 

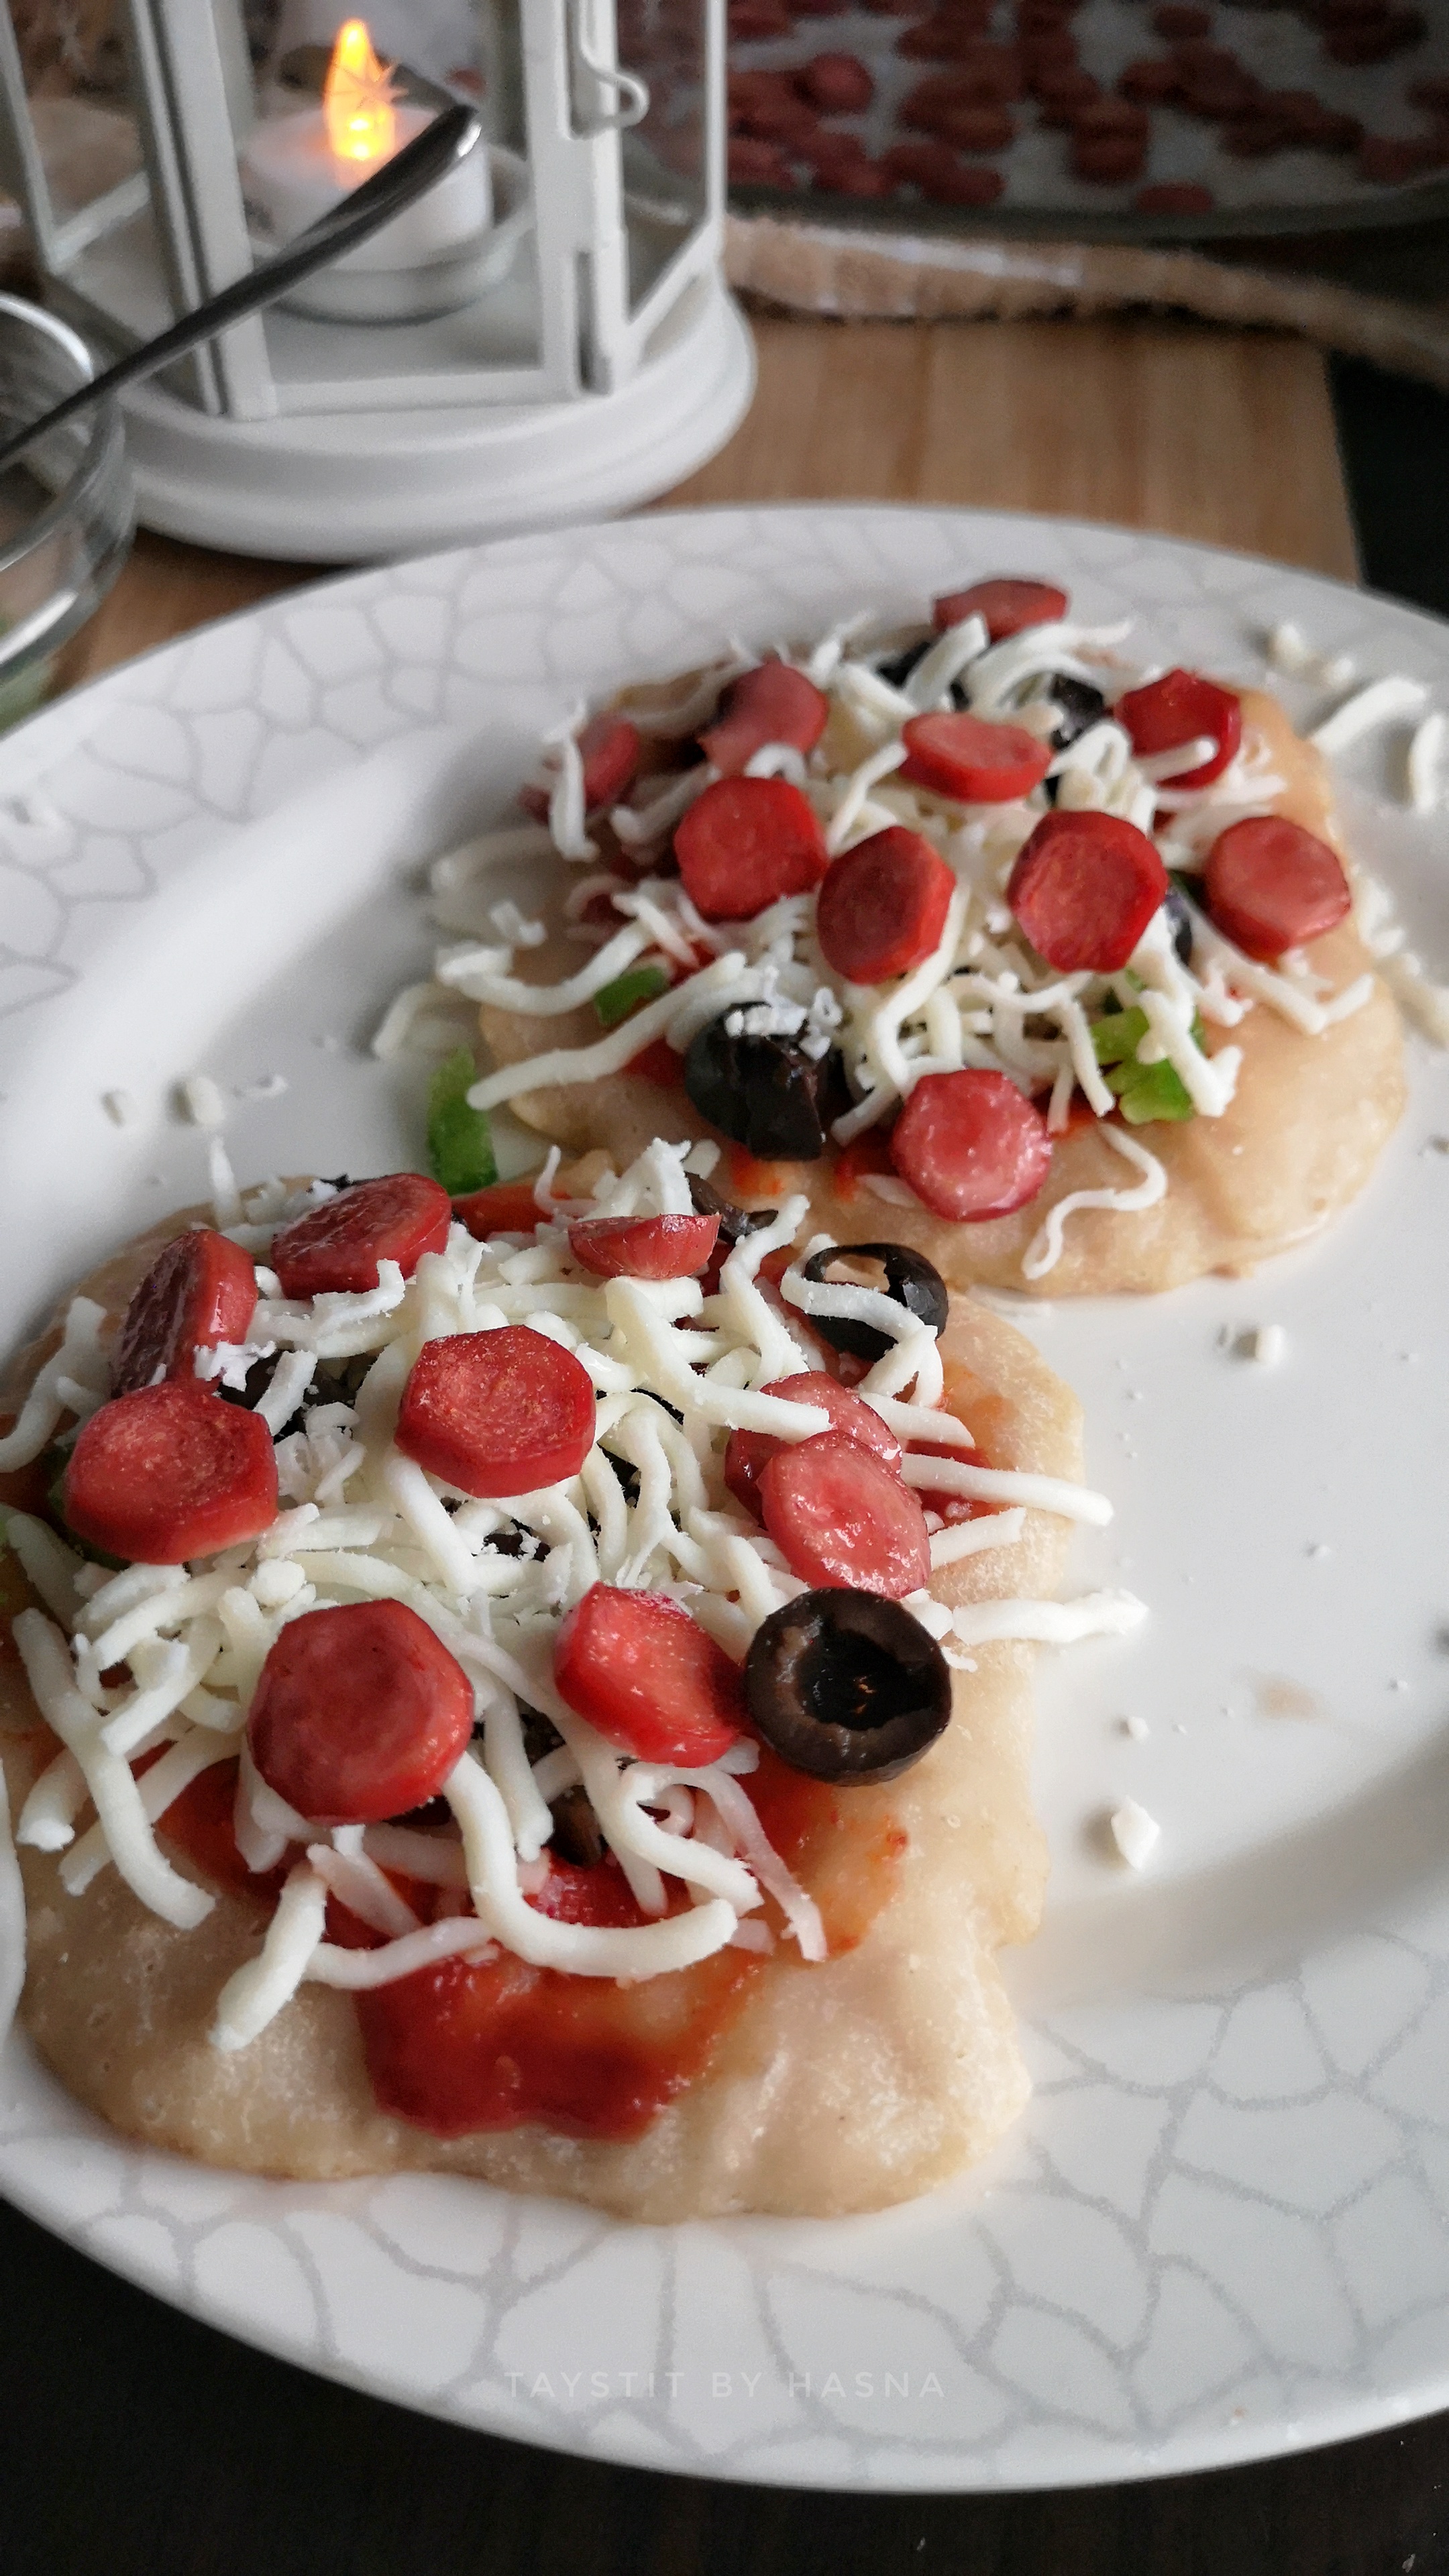
For toppings you may use any pizza sauce/bbq/ ranch sauce. I just used a basic pizza sauce here, that I demonstrate in the video/ recipe. I wanted to make mini pepperoni Pizza. But since the real pepperonis were too big for these mini pizza pancakes, I dehydrated my sliced sausage in the oven, for that crispy pepperoni look. Pepperonis are basically sausages with pepper. You may add pepper prior to baking if you like. 


This pancake pizza was such a hit! I was so happy to see the happy faces. The batter shouldn't be too thick not too thin, just make sure to prepare a batter with no lumps. The dry ingredients are gradually added one tbsp at a time to the wet ingredients. This batter method is easy during iftar preps so that you don't end up with messy hands, which happens while making the real pizza. 

You may use onions and other toppings as per your taste. Pizza is something that adults and kids unanimously love, so it is definitely going to be a hit on your iftar table and healthy and oil free too. 


Ingredients :

  • 7-8 Chicken Sausages / Franks
  • 1 Cup All Purpose Flour 
  • 1 Cup Whole wheat flour
  • 1 egg
  • 1 cup warm milk
  • 1/2 cup warm water
  • 1 tbsp melted butter 
  • 1 tsp baking powder 
  • 1 tsp instant yeast 
  • 3 tsp Sugar
  • Salt as required 
  • 1/4 cup Chopped Capsicum 
  • 1/4 cup Black Olives, sliced
  • 1 cup Shredded Mozzarella 

Tomato Sauce Base:

  • 3 tbsp Tomato paste
  • 2 tbsp Tomato Ketchup 
  • 1/4 tsp Oregano 
  • 1/2 of a Garlic clove, minced
  • 3 tbsp Water 
  • Salt, as required 

Instructions :

  1. To prepare your Pizza Sauce, in a bowl, add tomato paste, tomato ketchup, Oregano, minced garlic clove, salt and water, mix well. 
  2. Slice your sausages thin and place on your baking tray lined with baking paper, sprsy some oil and bake for around 10 minutes or until almost crisp. *

  3. In a bowl prepare your dry ingredients, ie, all Purpose Flour, whole wheat flour, baking powder, instant yeast, sugar and salt and mix well with a dry whisk and set aside. 
  4. In another bowl, pour your lukewarm milk, lukewarm water, melted butter, egg and mix well. 
  5. Slowly and gradually add in your dry ingredients to your wet ingredients bowl, 1 tbsp at a time, so that no lumps form. 
  6. Mix well and make sure there are no lumps. 
  7. In a pan, greased with some olive oil/ butter pour your batter and cook covered for 3-4 minutes on low. 
  8. Open the lid and spread your pizza sauce, add in your toppings, here I have used finely chopped Capsicum and sliced black Olives, Shredded Mozzarella and Pepperoni (prepared earlier).

  9. Cover and cook until cheese melts. 
  10. Your no Bake, 20 minute Pepperoni Pizza Pancakes are ready! 😋😋🍕

Notes:

  • *You may add pepper powder on your sausage prior to baking. 
  • You may also shallow fry the sliced sausages if you do not have an oven. 
  • You may use only all Purpose Flour for better texture and results. But since it's for iftar, I wouldn't want to have it that way.
  • For easier pouring of pizza batter, to get perfect rounds, you may use a small pan for it, in which you will to pour one pizza base at a time. 
  • You may use toppings like cooked chicken, Mushroom, sliced onions etc. 


Do try this recipe and don't forget to share your experience/feedback with me here in the comments or feel free to send me a mail. Also, do tag me at #taystedit if you try out my recipes on Facebook, Instagram etc so that I can see when you make it. ♡♡♡♡

Mexican Pizza Bites with Guacamole 


When you are a person who gets this instant cravings of pizza and you are in a mood to spice things up, then here I am to introduce you to this super easy Mexican Pizza.

Here I have used bread slices as the base. You may use Tortilla too. The only problem with the recipe is that, you need to consume it as soon as possible as the color may change the more it stays out. So, it is best served as a starter or a snack. 

If I had a few sliced black olives, I would use it to top up the snack bites, but since I ran out of it, I couldn't not get the disired color contrast in the final product. This is one of my experimental inventions that happened to be a part of my Ramadan snack ideas, as innovative food is what I love to do. All this while, it remained in my drafts, was contemplating whether to share or not, as my hubb is not a fan of guacamole. But I tell you, it's the best bite sized pizzas ever. The rest of the fam was raving about it. And then a few blogger friends invited to do a collaboration on Instagram on the theme Fusion Food! That is when I realized the time has come to reveal these yummy bites. I loved it and is such an easy recipe to nail. I would suggest not prepare a large quantity of guacamole as discoloration might occur. This is one easy recipe that I make when the hubster is not at home and there are avos smiling at me. 😀

When I thought about Italian cuisine and Mexican cuisine, the first things that popped in my mind was the Italian Pizza and Mexican Guacamole, So I immediately started creating the recipe plan! Guacamole, a Mexican invention, is an avocado dip, or spread that is now found in American cuisine as a condiment too. Avocado pieces are mashed using a mortar and pestle and fresh ingredients like onion, tomato and cilantro (Coriander leaves) takes it to a next level. As avocado is quite bland, this method definetly brings out the flavors of the avocado and it is sooo good and the final squeeze of lemon brings out the freshness in the dip which is the Icing on the cake! 😋👌

And the magic that stands out from normal guacamole is the maggi cube crumbs, which is completely optional. 

Definitely do give it a try and let me know your thoughts too❤️

Lets get started!


Ingredients :

  • 250 gms tender Chicken Breast, sliced
  • 2-3 tbsp olive oil
  • 1 tsp Garlic paste
  • 1 tsp paprika powder
  • 1/4 tsp Turmeric powder
  • 3/4 tsp Kashmiri Red chilli powder
  • Salt as required

For the base:

  • 4 Slices White Bread
  • 2 tbsp Salted butter
  • 1/2 tsp Garlic paste
  • 1/2 tsp Oregano
  • 1/4 tsp Red Chilli Flakes

Guacamole:

  • 1/2 avocado, sliced into cubes
  • 1/2 tsp Garlic paste
  • 2 tsp Coriander leaves
  • 2 tbsp Onion, finely chopped
  • A good squeeze of lemon 
  • 2 tbsp Tomato, finely chopped
  • Crumbs of Maggi Chicken Cube

Instructions :

  1. Slice the tender chicken breasts and marinate using the spices mentioned. 
  2. Fry in a couple of tbsps of olive oil and set aside. 
  3. Prepare the guacamole by mixing all the ingredients mentioned under guacamole using a mortan and pestle if possible. This method helps to bring out its flavor better. 
  4. Don't forget to squeeze the lemon juice and consume the guacamole immediately. *
  5. Now make a spread that consists of butter, garlic paste, oregano and red chilli flakes. Spread on each bread slice and toast to golden perfection. 


Notes:

  • Use the guacamole as soon as possible, as the color of the avocado changed the more it sits out. Lemon juice helps to retain the color to an extent.
  • If you'd like, you may use ketchup too. But the guacamole has enough strong flavors😊


Do try this recipe and don't forget to share your experience/feedback with me here in the comments or feel free to send me a mail. Also, do tag me at #taystedit if you try out my recipes on Facebook, Instagram etc so that I can see when you make it. ♡♡♡♡
Pizza pocket


Pizza pocket is again a fusion recipe that I created in my own kitchen. Fusion food are always so tempting and delicious. You get the best of both cuisines. To me that is exactly what would satisfy my taste buds. I call these pockets fusion because the pockets are basically pita bread whose origin is of middle east and the other we have everyone's favorite Italian pizza filling.

Now, I sat there pondering if I had created any pizza dishes in my kitchen during this Ramadan. And it was a no! I haven't made any pizza versions, I myself couldn't believe as I am a big time pizza fan. I am someone if ever see a slice somewhere I just have to try at least one slice hahah. Now coming back to the point, so I had to attempt something that was filling, at the same time healthy, and delicious, after all that is what we all want to have for iftar yea and do our tummy a favor by not over burdening it with fried food. One among my favorite creations are the pizza cups, which I haven't shared here yet, in Sha Allah will do that soon as for this Ramadan I have shared a cheesey bread cups recipe! Do check out if you haven't yet! They are yummilicious😍😍

The dough is pretty simple to make. I am usually an instant dough person, lol. I don't have that kind of "saboor" (patience). But I always convince myself saying that by the time I finish doing the filling, the dough will be ready. But proofing can take time, sometimes 1 hour or maybe upto 2 hours. I was running late on time and it was almost iftar time when pizza craving hit and the recipe developer in me didn't allow me to settle for the good ol' mini pizzas. 🙈😂 

Here I am going reveal what I did to cause the proofing work faster. I preheat my oven to 140° C or the lowest heat setting for 2 minutes, place my dough covered in the oven, without completely closing the oven door and voila! In 15-20 minutes maximum you have your dough risen well, now this was an experiment and alhamdulilah it turned out great. Now no more worries of the Proofing time if you are anything like me.. 😂😂


This recipe is quick, easy, filling and hassle free.. I was so happy with the outcome that now I can't wait to share it with you guys despite all the recipes that are sitting in my drafts. Now without further a do, let's get started!

Ingredients :
For the dough (makes at least 12 pitas) :
  • 1 cup Whole wheat flour/ Aatta
  • 1 cup All purpose flour
  • 1 1/2  cup or more All purpose flour to combine the dough
  • 1/2 tbsp active dry yeast
  • 1/2 cup warm milk
  • 1 cup warm water
  • 1 tbsp sugar
  • Salt, required
  • 3 tbsp olive oil
For the pizza filling:


  • 250 gms boneless tender chicken breasts, cut into small strips
  • 1/4 tsp Turmeric powder
  • 1/2 tsp Kashmiri Red chilli powder
  • 1/2 tsp Paprika (optional)
  • 1/2 tsp Red chili flakes
  • 1/2 tsp ginger garlic paste
  • 1/2 tsp Garlic powder
  • 1 tbsp Soy sauce
  • 1/2 of medium onion, chopped roughly into squares.
  • 1/4 Capsicum, chopped
  • 1 cup Mozzarella Cheese
  • 1/4 cup black olives, sliced
  • 1 tsp oregano
  • 3-4 tbsp Tomato sauce
  • 1 tbsp ketchup
  • 1 garlic clove, minced
Instructions :
To make the pita bread:
  1. In a large bowl combine yeast, warm water, warm milk and sugar. Stir gently, close with a lid or a plate and set aside for 10 minutes for the yeast to bloom.
  2. After the 10 minutes add in your salt, wheat flour and all purpose flour along with olive oil and combine well.
  3. After the mixture is well combined, add in 1/2 cups of all purpose flour until you get the desired consistency.
  4. The dough will be soft and pliable once it reaches the desired consistency. (check notes*)
  5. Place the dough back in the bowl and allow to proof. Preheat your oven to 140° C or the lowest heat setting for 2 minutes, place your dough covered in the oven, without completely closing the oven door and voila! In 15-20 minutes maximum you have your dough risen well.
  6. Beat the risen dough using your fists and knead for a couple of minutes and make them into small round balls, flatten using a rolling pin and cook them on a tawa for 2 minutes or until it puffs up so that there is a cavity for the filling (flipping every other minute).
To make the pizza filling:
  1. Cut the chicken into small strips, place it in a bowl. Now add salt, ginger garlic paste, Turmeric powder, chili powder, paprika.
  2. Onto a fry pan pour some olive oil and Sautee your onions. Next add your Capsicum and mince 1 garlic clove to this.
  3. Add in your marinated chicken and cook on medium high.
  4. Add soy sauce and Sautee well.
  5. Next add in your garlic powder and Chilli Flakes.
  6. While the chicken gets done. Prepare the pizza sauce.
  7. In a bowl add tomato paste, ketchup, oregano, a tsp of olive oil and a garlic clove, finely chopped, add salt to taste, if required. Mix and set aside.
  8. Cut the pita bread into halves so that you have two pita pockets with cavity. Spread the sauce inside and fill in your chicken filling, add your olives and finally add Mozzarella.
  9. Grill them on a grill pan on Sim with lid on so that the cheese melts, can be done in a fry pan too.
  10. Voila! And your pizza pockets are ready, Enjoy!


Note:
  • We are a fam of 3, so I didn't require so much dough, so I kept the extra dough in the fridge. Next time when I use it, I thaw it well and use.
  • This filling recipe is perfect for 6 pitas where you will get 12 pockets.
  • Make sure you don't use hot water, this will kill the yeast.
  • You may add Mayo for a more creamy texture, I did not add it as I wanted to make the flavor to be authentic. 
  • You may make the same recipe with all purpose flour completely, but I wanted a healthier version.
  • *To get the desired consistency of the dough, do not add too much flour, it should be workable. 
Do try this recipe and don't forget to share your experience/feedback with me here in the comments or feel free to send me a mail. Also, do tag me at #taystedit if you try out my recipes on Facebook, Instagram etc so that I can see when you make it. ♡♡♡♡

Turkish Pide


Turkish Pide resembles pizza just like the name suggests. It is one of the most popular foods in Turkey. A flatbread that is boat-shaped consists of meat toppings (minced meat etc), chopped veggies which includes onion, tomatoes etc herbs such as parsley and spices along with some cheese or egg mixture which is completely optional; it is what Turkish Pide comprises. The flatbread is similar to pita bread or the Italian pizza crust. It is known as their fast food that is "slow-cooked". Lahmacun is another dish that is similar to the Turkish Pide. Turkish Pide is made into a boat shape/oval flatbread whereas lahmacun is round in shape made of thin dough topped with minced meat and vegetables. Another name for Turkish Pide is Kiymali Pide.

The flavor-packed Turkish pide is much thicker and they are served in slices. Some people like to bake the pide with raw meat filling, but I like to cook my filling first to be on the safer side and then top it up with the filling. Cooking the meat mince first with the other ingredients like the veggies, spices and herbs helps the flavors to combine well so, we can make sure if the filling is well seasoned/cooked etc.

If you are somone like me who loves simple and easy recipes for lunch/dinner then thi sis defineely one recipe you got to try! The steps seem very intricate and the dish itself looks very sophisticating but I guarantee you one you are done you are going to feel it was so easy and so much FUN to make it! I myslef when I tried it for the first time I was surprised that it was done effortlessly rather I enjoy making it! If you have a kid grab him/her along to bake these 'Pides'. Ask them to help to make the boat shape or maybe to brush some egg wash on already prepared 'Pide'. I bet they are going to love it; not only to bake them but to gorge into them too. This Turkish Pide recipe is BOMB.


I hope you enjoy recreating this Turkish speciality with your loved ones! 

Ingredients:

For the dough:
  • 350 gms/ 2 and ½ cups All-purpose Flour
  • 2 tsp Active dried Yeast
  • 1 cup Warm Water
  • 3 tsp Olive oil 
  • Salt as required

For the Filling:
  • 400 gms minced meat (beef/lamb)
  • 1 medium Onion, chopped finely
  • ½ Green Capsicum/ Bell pepper, chopped finely
  • 1 medium Tomato, chopped
  • 1 medium Carrot, chopped finely
  • 3 Cloves of Garlic
  • 1 tbsp Lemon Juice
  • 1 tbsp Olive Oil
  • 1tbsp Butter
  • ¼ tsp Black Pepper powder
  • ¼ tsp Paprika
  • ¼ tsp Cajun Spice/ Oregano
  • Salt as required

Instructions: 

  1. In a small bowl stir in the yeast to ½ cup warm water. Close the bowl with a lid and set aside for 5-10 minutes for the yeast to activate and froth.
  2. In a large bowl, combine the flour and salt and make a well in the middle and pour in the olive oil and the yeast mixture.
  3. Pour in the remaining ½ cup water and combine to bring the dough from the sides of the bowl and scrape the dough from the bowl completely onto a clean countertop and knead well using your hands.
  4. Work the dough for 3-5 minutes until the dough is soft and smooth. The more you work with the dough it might start to get sticky, add in a couple of tbsps of flour and olive oil to hep shape into a soft dough.
  5. Transfer the dough into the large bowl and cover the bowl with a cling film and set aside for 1 hour until it doubles in size.


  6. While the dough rises the filling can be prepared.
  7. In a heavy large pan add a tbsp of butter and pour in some olive oil, once the butter is melted, add the chopped onions and saute well.
  8. Season with some salt for the onions to cook faster.
  9. Next, add the minced garlic and saute well until fragrant.
  10. Now add in your veggies - carrot, capsicum, tomatoes and cook well in medium flame.


  11. Now season with salt and pepper and spices like paprika, cajun/oregano etc and squeeze in a tbsp of lemon juice.
  12. Once the veggies are done add in some tomato paste which is optional so that it makes the filling look more colorful. 
  13. Add in the minced meat and salt and pepper as required.
  14. Cook until the meat renders some water and the water is reduced. Add in some chili flakes for some fire.
  15. Preheat the oven to 350°F/ 180°C
  16. Now take the risen dough and place it on a lightly floured countertop and knead for a minute and divide the dough into 4 equal portions.

  17. Next, roll the dough balls into 4 boat shape/oval shape and transfer the rolled dough into a baking tray lined with baking paper sprinkled with some semolina which helps in even baking.

  18. Now place and spread the filling leaving the edges with no filling about 2 cm border. (Please see images for better understanding)


  19. Fold the edges to act as a barrier so that the filling stays intact. Press the dough at the 2 ends of the oval shape to form a pointy boat shape.
  20. Beat an egg in a small bowl with some olive oil and brush the dough with the mixture using a pastry brush.
  21. Bake the Pide for approximately 20-25 minutes or until golden.


Notes:
It is easier to fill the flatbread with the topping while the flatbread is placed on the baking tray.


Do try this recipe and don't forget to share your experience/feedback with me here in the comments or feel free to send me a mail. Also, do tag me at #taystedit if you try out my recipes on Facebook, Instagram etc so that I can see when you make it. ♡♡♡♡

Older Posts

Search This Blog

My name is Hasna Haneef, a mommy to a toddler, hailing from Thalassery, Kerala. Welcome to my humble abode on the Internet; wherein I share all my recipes and experiments. I am glad to have you on board!

TRENDING POSTS

  • Emirati Chebab
  • Kerala Style Squid Roast
  • Chicken Steak with Creamy Mushroom Sauce
  • Kethel's Chicken
  • Yemeni Mutton Haneeth
  • Thalassery Style Kozhi kaal/ Koyikaal

About Me

May peace be with you!

Welcome to my blog.

I am delighted to have you on board. My name is Hasna Haneef, a mommy to a toddler, hailing from Thalassery, Kerala. My homeplace being Dubai, as I am born and brought up here and I am very influenced by the lifestyle and the variety of authentic cuisines I get to try from here, which has made me try anything that comes across me
, click here →

Stay Connected!

Join Our Madness!

Join with Thousands Of Subscribers ! Get Our Latest Recipes Delivered to Your email Inbox!

Powered by follow.it
  • Home
  • About Me
  • Recipes

    • Main Course
    • Desserts
    • Snacks

    Uncategorized

    • Chicken
    • Meat
    • Vegetarian
    • Rice
    • Malabar Food
    • Baking
    • Breakfasts
    • Snacks
    • Drinks
    • Pasta
    • Fish
    • Soups
    • Desserts
  • Contact Me

Featured Post

Triple Chocolate Hazelnut Skillet Cookie

Blog Archive

  • ▼  2026 (3)
    • ▼  September (1)
      • Homemade Cerelac for Babies
    • ►  May (1)
    • ►  April (1)
  • ►  2025 (4)
    • ►  April (2)
    • ►  March (1)
    • ►  February (1)
  • ►  2024 (36)
    • ►  October (4)
    • ►  September (5)
    • ►  July (1)
    • ►  June (2)
    • ►  May (4)
    • ►  April (3)
    • ►  March (10)
    • ►  January (7)
  • ►  2023 (47)
    • ►  December (3)
    • ►  September (2)
    • ►  August (6)
    • ►  July (6)
    • ►  June (9)
    • ►  May (4)
    • ►  April (5)
    • ►  March (6)
    • ►  February (3)
    • ►  January (3)
  • ►  2022 (69)
    • ►  November (4)
    • ►  October (6)
    • ►  September (7)
    • ►  August (9)
    • ►  July (12)
    • ►  June (5)
    • ►  May (5)
    • ►  April (12)
    • ►  March (4)
    • ►  February (2)
    • ►  January (3)
  • ►  2021 (24)
    • ►  November (1)
    • ►  October (2)
    • ►  July (1)
    • ►  June (4)
    • ►  May (6)
    • ►  April (4)
    • ►  February (4)
    • ►  January (2)
  • ►  2020 (82)
    • ►  December (5)
    • ►  November (6)
    • ►  October (4)
    • ►  September (2)
    • ►  August (5)
    • ►  July (10)
    • ►  June (10)
    • ►  May (13)
    • ►  April (12)
    • ►  March (8)
    • ►  February (4)
    • ►  January (3)
  • ►  2019 (22)
    • ►  December (1)
    • ►  November (2)
    • ►  October (6)
    • ►  September (1)
    • ►  August (1)
    • ►  February (3)
    • ►  January (8)
  • ►  2018 (15)
    • ►  December (4)
    • ►  November (6)
    • ►  October (3)
    • ►  September (2)

Subscribe Us

Labels

Bake Biscuits Breakfast Brown rice Burger Cheese Chocolate Dal Egg Emirati Fish Iftar Indonesian Japanese Jeerakashala rice Kerala Keto Kuwait food Lunch Milk Mutton Thai food UAE food afghan cuisine arabic beef biryani bread burnt cheesecake cake chicken cream dessert dinner greek healthy indo chinese lamb malabar prawns pudding puffs quick dinner ideas recipe refreshing drink rice salad sandwich stir fry vegetables vegetarian veggies yemeni

Contact Form


POPULAR POSTS AND PAGES

Kerala Style Squid Roast

Kerala Style Squid Roast

June 18, 2020
Emirati Chebab

Emirati Chebab

June 01, 2023
Chicken Steak with Creamy Mushroom Sauce

Chicken Steak with Creamy Mushroom Sauce

November 05, 2018
Yemeni Mutton Haneeth

Yemeni Mutton Haneeth

October 20, 2022
Copy Cat Caesars Mini Pizza

Copy Cat Caesars Mini Pizza

March 12, 2024

Pages

  • Home
  • About Me
  • Privacy Policy
  • Contact Me

Copywrite © 2023 TermsFeed®. All rights reserved.

Created By Sora Templates | Distributed By Gooyaabi Templates

Back to top