Search This Blog

Taystit by Hasna

Food, Recipes, and Beyond

  • Home
  • About Me
  • Recipes
    • Main Course
    • Snacks
    • Desserts
  • Uncategorized
    • Chicken
    • Meat
    • Vegetarian
    • Rice
    • Malabar Food
    • Baking
    • Breakfasts
    • Snacks
    • Fish
    • Pasta
    • Drinks
    • Soups
    • Desserts
  • Contact Me


Biscoff Brownies


If you love chocolate, Brownies are your best friend. I cannot stress how much my family loves it when I make brownies. It just escapes into thin air as soon as it is served.
Imagine giving it a lotus biscoff makeover. The lotus spread gives it a nutty taste to the ever-awesome fudgy brownies. If you don't like fudgy brownies or haven't tried one yet, you are missing out so much in life. It is the best cheat indulgence you could ever have!

Well ever since I got my hands on the popular lotus biscoff spread, I have wanted to experiment with it in many ways. I have won hearts making lotus biscoff pudding, which I shall share with you guys soon. I have had many recipe requests using lotus biscoff spread. So this is one of them that is definitely a hit here.

However, if you aren't a lotus biscoff lover you may simply make a super delish fudgy brownie excluding the lotus biscoff part. The recipe stays the same.


I cannot stress enough on how fudgy these are. They aren't just exquisite, these are super delicious too. Quite often I make a batch and keep, to satisfy my sudden sweet tooth cravings. These stay fresh in airtight containers up to 3-4 days. These are super easy to make. Gets done in no time and in fact I love Brownies more than indulging in chocolate because there is more texture to it and of course tastes even better.
I am a brownie person, this is something anyone who knows me well, will acknowledge.
When I can't think of something to gift someone, it's these brownies that always come to my rescue. And I guarantee you, these are the best call you could ever have. Without further ado let's get baking!


Ingredients -


  • 200 gms Dark chocolate (good quality)
  • 100 gms Unsalted butter
  • 3 tbsp any Vegetable Oil
  • 4 Medium or 3 Large eggs
  • 1 cup Sugar
  • 3/4 cup All purpose flour/ Cake flour
  • 1/4 cup cocoa powder
  • 1/4 cup semi sweet chocolate chips (optional)
  • 1 tsp Vanilla Essence/Extract
  • Salt, a pinch
  • 7-8 Lotus Biscoff Biscuits
  • 1/2 cup Lotus Biscoff Spread

Instructions:


  1. Preheat your oven to 180°C and line your 9*9 inches baking pan with baking paper.
  2. In a microwave-safe bowl melt the chopped/broken dark chocolate and butter and microwave in 30 seconds bursts. Allow to melt and mix until smooth.
  3. While it cools, prepare the egg batter by whisking eggs and sugar using a hand blender/ electric mixer/ fork for no more than 3 minutes. It becomes like a mousse, Thick, and Creamy.
  4. Now add in the vanilla extract/essence and vegetable oil.
  5. Next pour in the chocolate-butter mixture and fold carefully. Do not over mix.
  6. After a few folds add in your flour, and cocoa powder. Carefully fold your batter using a spatula until almost combined.
  7. Do not deflate the whisked eggs by mixing vigorously. Now slowly pour the brownie batter to your prepared baking pan.
  8. Now break up the biscoff biscuits using your hands and sprinkle them onto the batter and using a fork mix up the batter lightly.
  9. Using two teaspoons scoop dollops of biscoff spread onto the brownie batter in rows, about 15 or more dollops and using a matchstick make swirls of the spread to make the Brownies look extra appealing and so that the biscoff spread seeps a little inside the batter.


  10. Bake the Brownies for 25-30 minutes and insert a Toothpick and if the crumbs are sticking onto the Toothpick the Brownies are probably done as these are fudgy Brownies.
  11. Allow the brownies to cool at least for 15 minutes before removing from pan and slicing.
  12. Your brownies are ready to indulge!


Notes:

  • Do not keep the Brownies in the oven for too long, keep checking every 5-10 minutes after the 30 minutes timer.
  • If you aren't a fan of lotus biscoff you may completely avoid that and it still makes an awesome fudgy brownie.
  • Allow the brownies to cool in the pan itself for at least 15 minutes.
  • The more it cools the better and easier to cut the Brownies into perfect squares.
  • These stay fresh for 4-5 days in an airtight container (only if you have something left 😅)

Do try this recipe and don't forget to share your experience/feedback with me here in the comments or feel free to send me a mail. Also, do tag me at #taystedit if you try out my recipes on Facebook, Instagram etc so that I can see when you make it. ♡♡♡♡

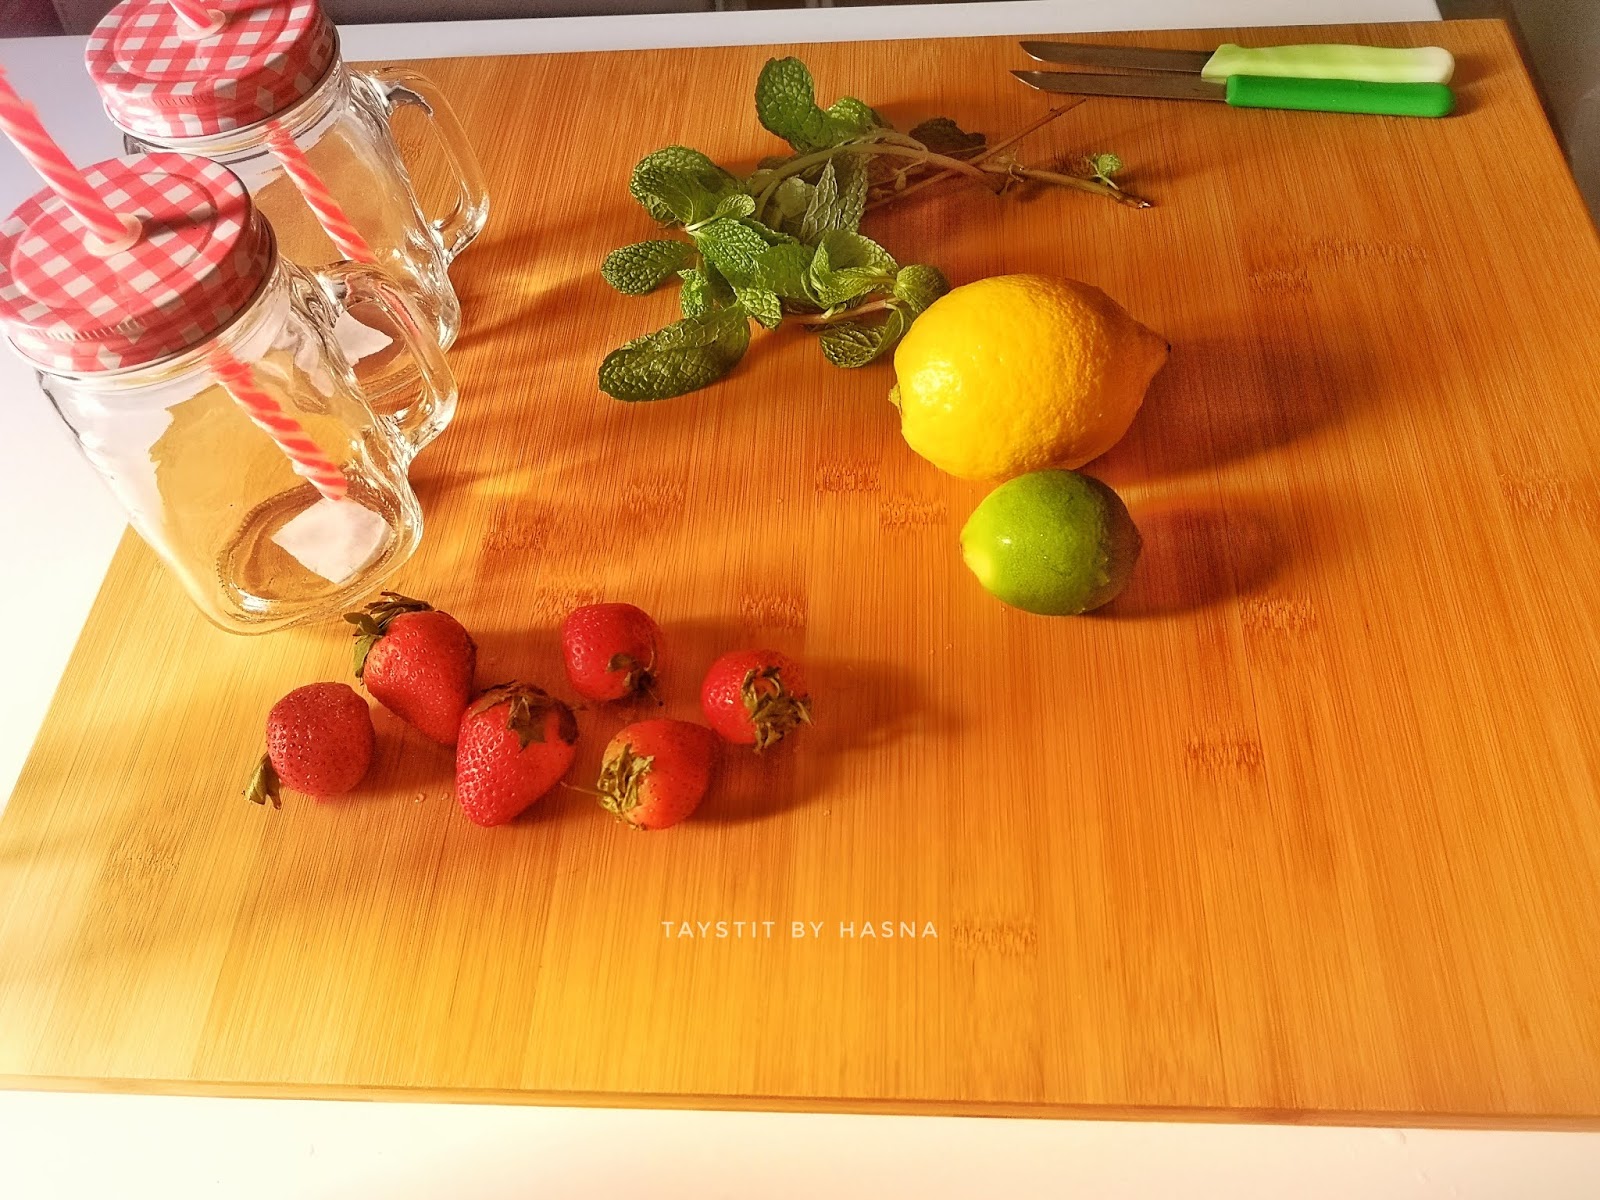
Sparkling Strawberry Mocktail


Hi folks! Howdy? Summer being right up the sleeve, and humidity is already draining after a short while when out, I thought it's the best time to share the recipe of this refreshing Mocktail which is perfect for summer days.
So let's buckle up and prepare for summer! Here I have made it even before the summer has started, because the Mr loves Mocktails and Virgin Mojito. I am not a fan of bare soda, unlike the Mr! Always love adding flavors to it. This time I had a lot of frozen strawberries leftover in the freezer and I wondered how to use them up when I came up with the idea of making the Mocktail. I always loved to serve my guests something different and special. The sparkling strawberry Mojito is definitely eye-catching and keeps your table spread a part higher.


I am sure your family and friends will love it. You have no idea how I had to deal with my family who was literally on their toes to grab a glass of this refreshing mocktail. I bet you this is going to be your favorite summer drink! It is all the zest that is required for you to amaze your folks during the summer days. It has all that is required to freshen you up, antioxidants from the Strawberries and mint and vitamin C from the lemon!
Virgin Mojito is quite familiar with most of us but this one with the strawberry flavor is a game changer!

This is the perfect drink to jazz up your party table with this welcome drink! If you plan to make them for guests muddle up Mint and squeeze in the lemon, set aside and blitz the frozen strawberries with sugar and keep in the fridge in advance until guests arrive. Mix the above mixture to soda and serve immediately! Let's beat the heat in style! 😍


Ingredients 


  • 10-12 frozen Strawberries
  • A few mint leaves
  • 1-2 lemon, squeezed
  • 1/2 cup simple syrup */ 1/4 cup sugar
  • 2 Can Soda
  • Ice, as required
  • Fresh Strawberries for garnishing

Instructions :


  1. In a bowl or Mason jar muddle up the mint leaves, lemon juice and sugar(if using).
  2. Blitz the frozen Strawberries with the ice for 2-3 seconds.
  3. Now to the Mason jar add the above mix, simple syrup (if sugar isn't being used) and more ice, if required.
  4. Stir gently. Garnish with mint leaves and fresh Strawberries! Serve immediately and enjoy! 👌👌

Note: If you have simple syrup you may use that, simple syrup is prepared by boiling equal parts of sugar and water and cooled.


Do try this recipe and don't forget to share your experience/feedback with me here in the comments or feel free to send me a mail. Also, do tag me at #taystedit if you try out my recipes on Facebook, Instagram etc so that I can see when you make it. ♡♡♡♡
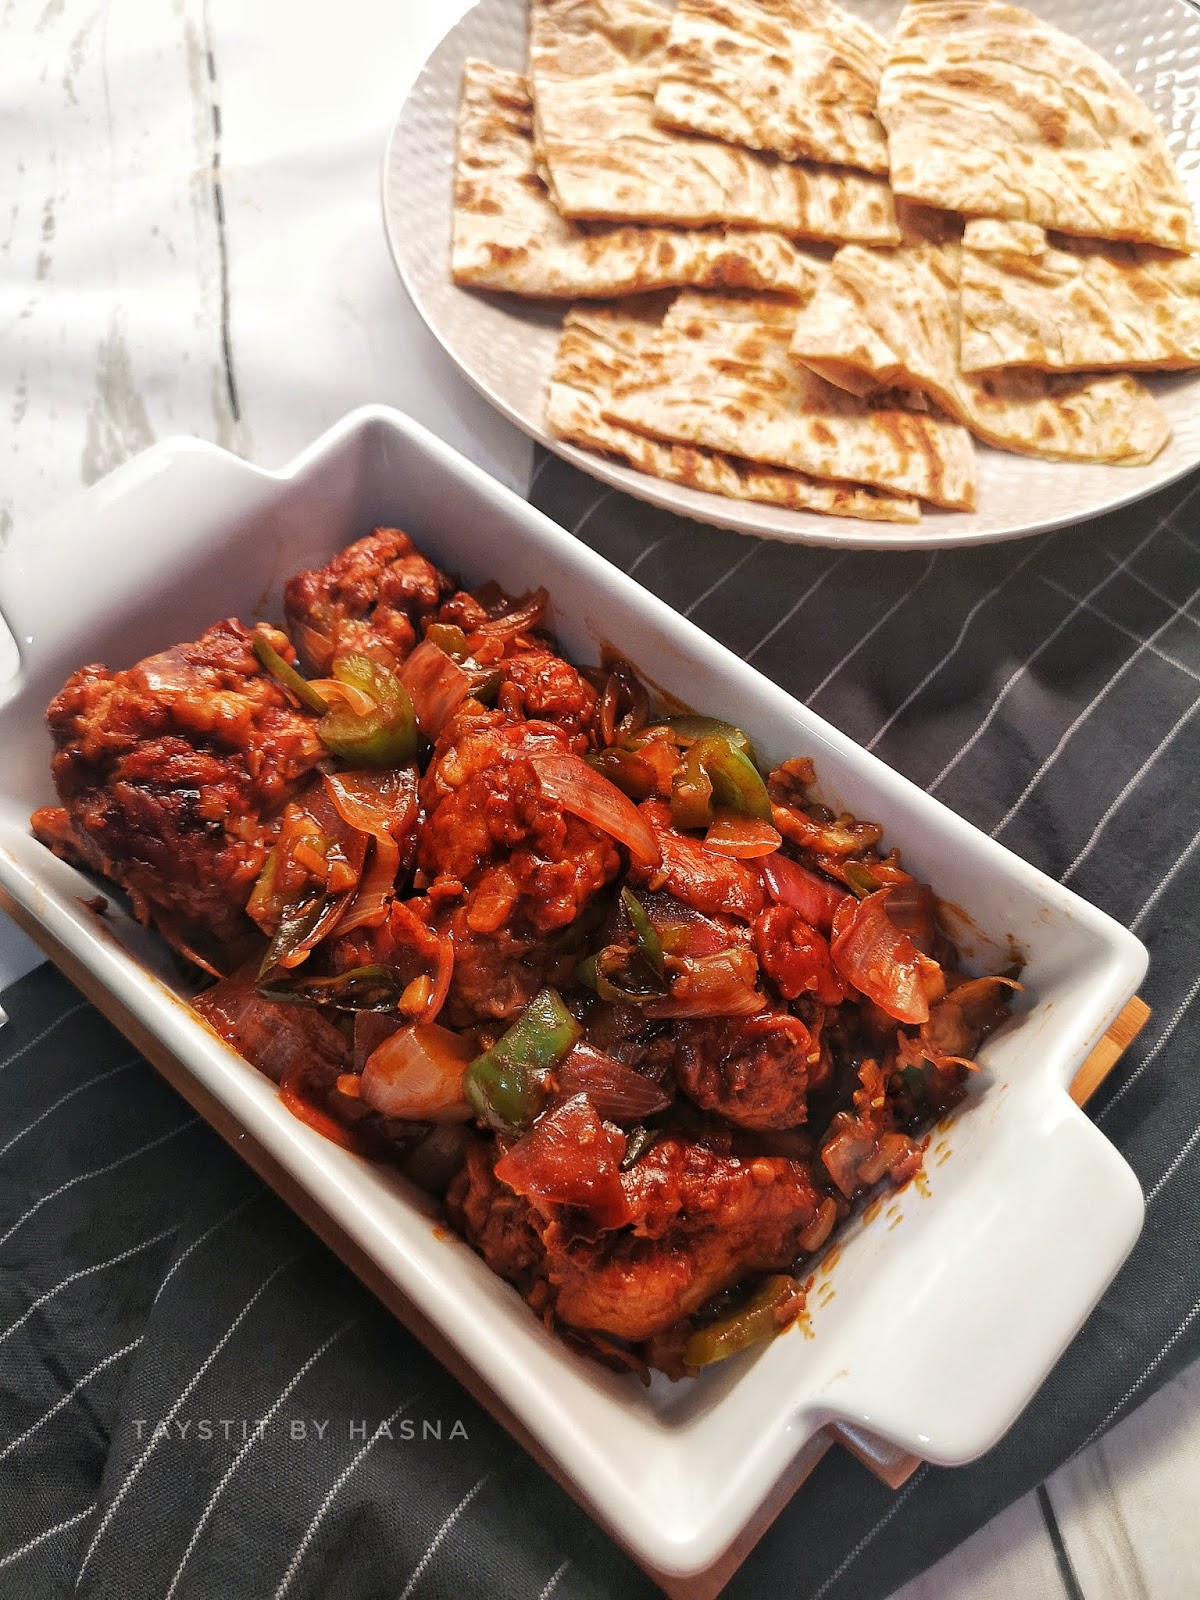
Restaurant Style Chilli Chicken

without artificial colorings


This is one recipe that is close to my heart. It simply is common and most of you already might know how to make chilli chicken, but for me and hubsy chilli chicken is all about the one we get from "Raravis" in Thalassery. It is one of the most popular restaurants in Thalassery. Now if you ask me what is so special in their chilli chicken, its the simplicity that makes it special. My hubster is all about the chilli chicken and porotta (paratha) of Raravis. He is always all praises about it.

My hubb used to work in Banglore when I had got married to him. So one fine day he calls and tells me that his friend was leaving for Bangalore in the evening and that he missed home-cooked food (this is when he never knew I was someone who loved cooking and the bachelors know very well how horrible it is to have hotel food every day). And that if possible to send something with him by evening. I was terrified, like for the first time I had to cook something for him and send a parcel (the first impression is the best impression, yea?). Like any other wife who cooks the first time for the husband, I was super worried about how it would turn out and started brainstorming on what to cook.
Finally, it dawned upon me that I would make Chilli Chicken (which is his fav from the restaurant is all that I knew). I had to do this! I had to impress him I said to myself. So I began the cooking and it was a completely new atmosphere for me, at my in-law's kitchen. I am a person who likes to cook with the utensils and ladles I have been using and I am comfortable cooking that way. Every girl goes through this and it shall pass. I made this delicious Chilli Chicken, all ready to be picked up, I waited for the chicken to cool down a bit so that I could pack and send it. The friend comes and collects it and he leaves. Now while I sat there waiting for my hubs call, he tells me that the bus to Bangalore had left and his friend missed the bus! Can you believe that? The pain, the remorse, the flush of anger I went through. I was disheartened and sad. Imagine yourself in my shoes. And once again my husband calls to tell me that his friends had it and they were all praises and said they never had such tasty chilli chicken before. I am not bragging here but imagine my poor hubster when he heard that from his friends. I was happy that it tasted good but sad that all that pain went into vain. But all is well that ends well, at least I was happy it never got wasted and someone's stomach was filled, alhamdulillah!

Now that the mister heard about all the raving he wanted to have them too, so the next time he came home I made it and alhamdulillah he was like no wonder why the boys said like that and imagine how much I blushed then, haha! Good old days <3

So since then, this is his favorite. It might be similar to what you guys make too, but ever since I had posted the cooking scenes on my stories on IG of this chilli chicken my DM was filled with messages for the recipe. I was a little hesitant to share it here as it is quite common, but when everyone wants me to share it, then I thought to myself why not share it with you guys! So here I am sharing the recipe of the most requested Restaurant Style Chilli Chicken...

Ingredients:


  • 600 Gms Chicken with bone and boneless
  • 1 tbsp Ginger Garlic paste
  • 1/2 tsp crushed black pepper powder (optional)
  • 1/2 tsp black pepper powder
  • 1/2 tsp white pepper powder (optional)
  • 1/4 tp red chilli flakes
  • 1 egg
  • 3 tbsp All-purpose Flour/ Maida
  • 3 tbsp Corn Flour
  • 1-2 tbsp Vegetable oil (optional)
  • 8-10 garlic cloves, chopped/minced finely 
  • 1-inch ginger, chopped/minced finely
  • 1 large onion, in cubes
  • 1/2 of large Capsicum, in cubes
  • 3 green Chillies
  • 3 tbsp Soy sauce
  • 2 tbsp Ketchup
  • 1 tbsp green chilli sauce
  • 2-3 tsp Kashmiri Red Chilli Powder
  • 1 tbsp Corn Flour


Instructions:


  1. Prepare the chicken by marinating with salt, ginger-garlic paste, crushed black pepper, black pepper, and white pepper powder, and some red chili flakes. Mix well.
  2. Next crack in an egg, maida, and cornflour. Mix well and add a couple of tbsp of vegetable oil if the batter is too dry.
  3. Heat oil in a deep pan and check if it hot enough by dropping in little batter. Fry the chicken pieces 10 minutes on each side (if the chicken used is with bone, for boneless chicken check notes.
  4. Flip and cook for another 8-10 minutes. Cook all the chicken pieces in batches.
  5. While the chicken gets fried prepare the other ingredients for the gravy.
  6. Chop ginger garlic finely, chop the onion and capsicum in cubes and the green chillies lengthwise.
  7. Now to a bowl mix in all the sauces- soy sauce, ketchup, green chilli sauce, Kashmiri Red chili powder and cornflour, and 1/2 cup water.
  8. Next in a large wok/ pan add in the oil that has been used to fry the chicken and saute the ginger-garlic and green chilies till the raw smell disappears.
  9. Next add the onions and capsicum and cook on high for the veggies to stay crunchy.

  10. Add in the earlier prepared sauce mixture. Little more soy sauce if required and finish off with a dash of black and white pepper. 
  11. Add in your chicken pieces and cook on high for 2 minutes until the chicken is covered in the gravy and garnish with spring onions.
  12. Serve hot with Paratha, Chappathi, Puri, Fried Rice, etc.

Bon Appetit!

Notes:

  • I have used white pepper powder which is completely optional, I had it with me so I used it.
  • It is always a good idea to marinate and keep the chicken aside for at least half an hour with salt, ginger garlic paste, but here I demonstrate without marinating.
  • I have used chicken with pieces for this dish as everyone here loves that cut more, you may use boneless, but do not cook it for more than 10-12 minutes in total.
  • I have used 3 green chillies here, please use chillies according to your spice level, we like it spicy here. Please keep in mind other spices go in the marinade like pepper powders and red chilli flakes.
  • Make sure the quantity of garlic used in the gravy is more than ginger for better flavor.

Do try this recipe and don't forget to share your experience/feedback with me here in the comments or feel free to send me a mail. Also, do tag me at #taystedit if you try out my recipes on Facebook, Instagram etc so that I can see when you make it. ♡♡♡♡

Easy and Crispy Masaledar Fries 


Good morning lovelies!

Do you love French Fries? Like who doesn't? It is something that is universally loved among adults and children. And when you transform " French" fries to "Desi" Fries by making it Masaledar, I am sure the fries are going to munched in a blink of an eye. When I made this for a trial it just vanished into thin air.

Pan-Seared Butter Steak with Creamy Mushroom Sauce


Well, steak is something that I love! But unfortunately, the Mister doesn't like it much. So it's a rare scene that we go out to dine in and order a steak.

So one fine day, I was craving for steak so badly. And I was visiting the local grocers. It is an Indian grocery store so when I asked for the steak he just cut me a chunk of meat and gave. I was confused if he heard me right. I wanted ribeye steak and now I have this. He asked me to try this and if it comes out good he would give similar cuts the next time.

Effortless Malabar Style Chemmeen Thenga Chor


Have you had situations where you are already late and tired to make lunch? Well, this recipe is here to the rescue! Definitely, a must-try if you love 'naadan' food and tastes like its right from 'The God's Own Country'. 

This Chemeen thenga chor is something that is made quite often at home since childhood. I have always been a picky eater when I was smaller and used to completely dislike when mama made this, then least favorite rice. Only after I grew did I know that I was missing out so much on this Chor (rice) and its flavors in my life! 🤣Ever since this rice has always been my last minute resort which is equally delicious compared to basic meals from our place! So of course, this is my mommy 's recipe! This might not be authentic but that's how me and my mama cooks🤷‍♀️😀 We don't follow any particular recipe or go for proper measurements! 😅

Let's move on to the recipe now. The rice is very pungent and flavorful, you would not want to miss out on its flavors. As the name suggests, it is so effortlessly made. All you need are cleaned prawns and 30 minutes of your time in total. That easy I must say.

Basically, it is rice cooked in a masala of turmeric, chilli powder, coriander powder and garam masala in small proportions, in which the prawns are cooked in the gravy and coconut milk is added to escalate its flavor profile. Here, I have used coconut milk powder in the recipe for ease of accessibility but does the job well. You may use freshly squeezed coconut milk too (any day better)!  🤣

The rice is often accompanied by some mango-coconut chutney and pappadam (pappad) and/ raita. Here I did not have pappad with me, hence only the coconut chutney is pictured. 
Let's get going and make this super delicious and effortless Thenga Chor with Chemmen. 

Ingredients:

(Makes for 3 people) 


  • 2 glass Ponni Rice/ Jeerakashala
  • Water (check notes) *
  • 15-20 Prawns, cleaned and deveined
  • 1 medium Onion, sliced
  • 2 tbsp ginger garlic paste
  • 1 small tomato, chopped
  • 3 green chilies
  • 2-3 sprig of curry leaves
  • 1/4 Turmeric powder
  • 1 1/2 tsp Chilli Powder
  • 1 tbsp Coriander powder
  • 3/4 tsp Garam Masala
  • 1/2 cup Coconut milk powder

Instructions :


  1. Pour the coconut oil in a large pot and Sautee the onions until translucent and add in your ginger garlic paste and curry leaves. Saute till the raw smell disappears.
  2. Now add the slit green chilies and chopped tomatoes, and cook for a couple of minutes until the tomatoes mash.
  3. Now add all the spices and Sautee on low till the spices have no raw smell, about 2 minutes.
  4. Add the cleaned and deveined prawns to this and sautee
  5. Next, add the washed and drained rice and add water as required (refer notes)*.
  6. Add the coconut milk (mix 2 tbsp water to the coconut milk powder and make a paste) to the rice and close the lid and allow to cook. For cooking time for the different types of rice check notes.*
  7. Voila, and you are done! Effortless Chemmeen Thenga Chor is done.
  8. Garnish with fried curry leaves and a Mango coconut chutney on the side.! (recipe below 👇) 

Notes*-

  • You may always use freshly squeezed Coconut milk if you have the time, it is definitely much better!
  • For Jeerakashala : water ratio is 1 : 1 1/2 glass
          Ponni rice : water ratio is 1 : 2 1/4 glass


  • For cooking Jeerakashala rice - After 10 minutes give a mix, and close the lid and let it cook on simmer for another 5 minutes and it's done! (If using Jeerakashala I prefer using ghee instead of coconut oil)
  • For cooking Ponni rice - Cook covered for at least 25 minutes and check it's doneness and cook more if required. 


Mango Coconut Chutney


  • 1/2 cup grated coconut 
  • 1 small garlic clove
  • 1 side slice of green mango, chopped
  • 1/2 tsp Kashmiri Chilli powder
  • Salt

Grind in a grinder all the above ingredients or use a mortar and pestle for better results. 

Do try this recipe and don't forget to share your experience/feedback with me here in the comments or feel free to send me a mail. Also, do tag me at #taystedit if you try out my recipes on Facebook, Instagram etc so that I can see when you make it. ♡♡♡♡

SIMPLE SAMBAR RECIPE


Good evening folks!


I have always felt Sambar making is a big headache, but that is only if you want it to be a long and authentic one. Normally Sambar is prepared by stir-frying or sautéing grated coconut with other spices like powders, garlic, etc are Sautéed till it browns and the coconut mixture is ground to a paste and added to the dal-veg curry prepared earlier and lastly, for tempering - mustard seeds, dried red chilies, and curry leaves are used. A long process isn't it? Well, that is the authentic one. 🤷‍♀️
I am here to share with you the Simple Sambar recipe which is the best when you have time constraints. I somehow don't like the 'varutharacha sambar' (Sautéed and ground Coconut mixture Sambar) and it is super time-consuming.
Storytime- Once back in the good old days when I was in high school we used to have a carpenter who used to single-handedly do neat furniture for us. One fine day it was declared hartal and the very famous 'national hotel' was not opened that day. So I had to cook food for him too as mama was here in Dubai and I had already started my work for Sambar. I was quite hesitant to agree to cook for him as he is a local from our place and I am sure he would die laughing asking if this really was Sambar. I was new to my kitchen then, if at all I never tried Sambar much, there was a lot of pressure on me. I felt it like a mission. I did whatever I could to my understanding and prepared the Sambar. Voila and mission accomplished! My heart went *dhuck dhuck dhuck* in a fast rate. And I was indeed surprised when he said that this was the best Sambar he ever had! I was astonished 😲 I quite didn't know what to say as I didn't see this coming. So I thought to myself maybe he was just trying to make me happy as I was a little girl. Then he kept asking things like did someone help you in the kitchen and what all did you add in etc. I was overwhelmed and when he finally said to my dad that the guy who marries your daughter is the luckiest guy, I was blushing. @haseeb.hsb you lucky man😝
Not writing to brag about it here but isn't this one of the best critics a girl in her teens can get. Alhamdulilah since then I felt like I wanted to cook more. And try more. Always remember your motivation, encouragement and your kind words can always have a big impact on the lives of our children.
Anyhow, I never liked Sambar much and don't make it that often. Also, I hate making the varutharacha style, so will be sharing the "Simple Sambar" recipe on my blog. No videos or aesthetic pics as I never thought of putting this up here. But due to many requests for the recipe of easy Sambar came in, I thought I would share this beautiful story with you guys too! ❤️
Let's hop on and make this Simple Sambar!

Ps: Will update with pictures and videos the next time I make it. In Sha Allah ❤️

Serves: 4

Ingredients :

For sambar:


  • 1/2 glass Toor dal
  • 2 green chillies
  • 1 small onion slices
  • 1/2 tomato
  • 1 sprig curry leaves
  • 1 tsp Ginger garlic paste
  • 1/4 tsp Turmeric powder
  • 1/2 tsp chilli powder
  • A pinch of asafoetida/hung (optional)
  • Salt as required
  • 1 potato, chopped
  • 1 carrot, chopped
  • 2 drumsticks/ beans/ ladies finger etc. *

For tempering:


  • 2 tbsp coconut oil
  • 1/4 tsp Mustard seeds
  • 2 sprig curry leaves
  • 2 dried red chillies
  • 2 tsp Sambar powder*
  • Other ingredients :
  • About 2 tbsp tamarind pulp*
  • 1 tsp Jaggery (optional)


Instructions :


  1. Pressure cook everything in the list under 'for Sambar' except for the vegetables in about 1 and half cup to 2 cup water for 3 whistles.
  2. Once the pressure is released on its own, let the cut vegetables cook in the dal curry mixture for about 15 minutes or until knife passes through the vegetables easily.
  3. Temper the ingredients under the list 'for tempering' in coconut oil and add the Sambar powder and mix until raw smell of powders dissappear, (be careful not to burn) and toss it into the Curry and let it all boil well. Lastly add the tamarind pulp and Jaggery. Adjust salt and your Sambar is ready! 😋
Note: *If using ladies finger sautee them in coconut oil separately for 2-3 minutes and add to the Sambar
* Sambar powder quantity depends on the brand used, some are strong some aren't.
*tamarind pulp is prepared by adding hot water and set aside and strain the liquid and use the liquid in the Curry. 

Do try this recipe and don't forget to share your experience/feedback with me here in the comments or feel free to send me a mail. Also, do tag me at #taystedit if you try out my recipes on Facebook, Instagram etc so that I can see when you make it. ♡♡♡♡
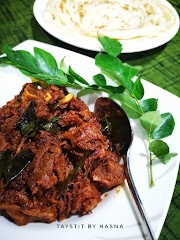
Kaju chicken curry


The easiest chicken curry you can make! The only chopping required is for the onions. Other than that all the ingredients are blended or ground. Now you can imagine how easy it is going to be. Cashew paste makes the Curry even more rich and tastier. It is up to you to totally omit the cashew paste, you still have a thick and yummy chicken curry.

This curry is the perfect recipe for newbies to the kitchen, momma's with small babies, working moms, in fact anyone who has no time to spent in the kitchen all day and when hotel food is BOO. Also who doesn't like cheat days in kitchen, teehee. Well, this effortless curry is going to bring all smiles on your family's faces, this curry recipe is surely a keeper The recipe is so simple and effortless with minimal ingredients. I guarantee you this curry won't take you more than 30 minutes from start to end.

I was planning to make some naadan type chicken curry to go with my Ney pathil for breakfast. While I was in the mood for experimenting (yet I was starting to have strong symptoms of bad cold), so you know how badly I wanted to run from the kitchen. To top it my hubby was in a hurry and I had to make a curry super quick.

I had no time to think much so I did what I felt like and voila! It turned out so good Alhamdulilah!
This curry is made in a pressure cooker, yes! Thank god for pressure cookers. Always comes to the rescue when you are short on time. (I prefer to do it in a pot itself tough if I had the time), here I am using the cooker so that my onions are pressure cooked well in the masala and mashed well.


Rich and delicious cashew chicken curry can be accompanied with Ney pathil (oil fried rice pancakes), Ari dosa (rice crepe), ghee rice, appam, noolputtu/iddipyappam, chappathi, etc.

Guys! Please do give the recipe a try and let me know how you liked it! I am sure your family will love the curry😋👌

Ingredients:


  • 700 gms - Fresh Chicken (both with bone and boneless)
  • 2-3 tbsp any vegetable oil
  • 1 and 1/2 medium-sized Onions sliced
  • 2 medium Tomatoes (roughly chopped if required)
  • 3 large green Chillis
  • 6 Cloves of garlic
  • 1-inch piece of ginger
  • 2 sprigs of curry leaves
  • 10 Cashews
  • 1/2 cup Hot water
  • 1/4 cup milk
  • 1/4 tsp Turmeric powder
  • 2 1/2 tsp Kashmiri Chilli Powder
  • 5 tsp Coriander powder, leveled
  • 3/4 tsp Garam Masala powder
  • 1/2 cup water
  • Salt, as required

Instructions :


  1. In a heatproof bowl, place the cashews and pour hot water. Keep aside.
  2. Grab a pressure cooker, pour in the oil.
  3. Add the sliced onions, while sautéing grind tomatoes, ginger and garlic in a blender/grinder.
  4. Add in the Curry leaves and slit green chillies.
  5. Now pour in the prepared tomato mixture and add in the spice powders and the chicken along with 1/2 cup water.
  6. Finally add salt and close lid. And cook for 2 whistles and off the flame.
  7. While the pressure goes prepare the cashew paste by grinding cashew and milk, adding milk little at a time.
  8. Once the pressure is gone, add the prepared cashew paste and stir well and add water as required and bring it to a boil. Garnish with chopped Coriander leaves and you are done! Enjoy❤️

Do try this recipe and don't forget to share your experience/feedback with me here in the comments or feel free to send me a mail. Also, do tag me at #taystedit if you try out my recipes on Facebook, Instagram etc so that I can see when you make it. ♡♡♡♡

Roasted Garlic Fried Rice 


Good day folks! It's freezing cold today. Very windy and with slight rain falls.. Loving the weather every bit!

When it's lunch time you always want to gorge on something yummy and here I am with the recipe of Roasted Garlic Fried Rice! So yumm that you will keep wanting it more.. A whole garlic bulb is chopped apart at the top and the garlic is placed in a foil and drizzled with olive oil which helps to release the lovely aroma of the roasting garlic😋😋

And this perfectly roasted garlic brings out so much of flavor in the fried rice, it's super delish!
Now to go with it I made General Tso's Chicken which I will be doing a post on it soon! That is a super simple side dish recipe, you wouldn't want to miss!


Back to the roasted garlic fried rice, if you love garlic but not it's strong pungent smell but love the amazing aroma it brings out when it is sautéed in oil or butter, this recipe is going to be your best friend as roasted garlic gives out a delicate and a not so intense flavor. 😋

And for the perfect fried rice, I would suggest you use spring onions too but since I didn't have them I haven't used it here. Also for the ratio of the garlic bulb for making the fried rice, it would 1 bulb for 2 person's quantity.

This garlic roasting technique is a game-changer - you may use it to substitute any recipe that calls for raw garlic and if you want a milder taste. Roasting garlic makes your kitchen smell killer, that's a bonus! Roasting Garlic takes about 20-25 minutes in the oven, you may also break open the bulb and keep the garlic cloves with skin on and cover in foil with the drizzle of olive oil if you are short on time. It is insanely creamy and rich that you would want to use it on anything and upgrade the food - soups, salad dressings, mashed potatoes, dips,etc. The options are endless 😋😋
I can't wait to try my hands on many other recipes using this technique! 😍

Also in the rush to feed my little girl, I forgot the eggs - keeping it real! So you may scramble eggs with a dash of salt and pepper or you may also do a sunny side up, which was my plan initially. Anywhoo, if you are not a fan of burnt garlic fried rice or intense garlicky flavor, then do try this recipe and let me know in the comments how you liked it ❤️

Ingredients :

For roasting garlic :

  • 1 Garlic bulb
  • Foil paper
  • Olive oil

For the rice:

  • 1 glass Jasmine rice/ Basmati/ Jeerakashala rice
  • 200 gm Chicken breast, boiled with salt and pepper
  • 1 carrot, chopped finely
  • 1 cup French beans, chopped finely
  • 2 tbsp Soy Sauce
  • 1 tsp Black Pepper
  • 1 tsp white pepper (optional)
  • 1/4 tsp red chilli flakes (optional)
  • 1 spring onion, chopped
  • 1/2 cup Corn niblets
  • 1/2 Maggi Chicken Cube
  • 2 tsp green chili sauce (optional)
  • Salt, as required


Instructions:


Roasting garlic :

1. Chop off the head of the garlic bulb and place the garlic in foil and drizzle some olive oil and cover it to form into a ball.


2. Using a muffin pan (If making many roasted garlic) or a ramekin, roast the garlic in the oven while you prep your veggies.

Roasted Garlic Fried Rice:

1. Cook the rice and set aside to cool.
2. Squeeze out the roasted garlic and sautee it in butter for 15 seconds and add in your veggies and the Maggi chicken cube.


3. Now add in your spices like black pepper powder, white pepper powder, red chilli flakes, and sauces like soy sauce and green chili sauce.
4. Finally add your boiled and shredded chicken to the veg mix. 


5. Now in a wok on high flame pour in some oil, the chicken-veg mix and cooked rice along with a  couple of tbsp of soy sauce and mix well, finally add some pepper powder and garnish with a sunny side up. 


6. While you make any sides just place the used garlic bulb leftover in the middle and close the lid. This is optional.
  • Note: I have used Jeerakashala rice here, as I did not have Jasmine rice with me. You may use whichever you have in hand and cook the rice according to its nature beforehand. 
  • I haven't used a wok here as I made for a large quantity and added more roasted garlic. I highly recommend cooking this in a wok on high heat. 

Do try this recipe and don't forget to share your experience/feedback with me here in the comments or feel free to send me a mail. Also, do tag me at #taystedit if you try out my recipes on Facebook, Instagram etc so that I can see when you make it. ♡♡♡♡
Newer Posts
Older Posts

Search This Blog

My name is Hasna Haneef, a mommy to a toddler, hailing from Thalassery, Kerala. Welcome to my humble abode on the Internet; wherein I share all my recipes and experiments. I am glad to have you on board!

TRENDING POSTS

  • Kerala Style Squid Roast
  • Emirati Chebab
  • Chicken Steak with Creamy Mushroom Sauce
  • Kethel's Chicken
  • Kerala Beef Fry/ Nadan beef dry fry
  • Yemeni Mutton Haneeth

About Me

May peace be with you!

Welcome to my blog.

I am delighted to have you on board. My name is Hasna Haneef, a mommy to a toddler, hailing from Thalassery, Kerala. My homeplace being Dubai, as I am born and brought up here and I am very influenced by the lifestyle and the variety of authentic cuisines I get to try from here, which has made me try anything that comes across me
, click here →

Stay Connected!

Join Our Madness!

Join with Thousands Of Subscribers ! Get Our Latest Recipes Delivered to Your email Inbox!

Powered by follow.it
  • Home
  • About Me
  • Recipes

    • Main Course
    • Desserts
    • Snacks

    Uncategorized

    • Chicken
    • Meat
    • Vegetarian
    • Rice
    • Malabar Food
    • Baking
    • Breakfasts
    • Snacks
    • Drinks
    • Pasta
    • Fish
    • Soups
    • Desserts
  • Contact Me

Featured Post

Triple Chocolate Hazelnut Skillet Cookie

Blog Archive

  • ▼  2026 (2)
    • ▼  May (1)
      • Breakfast Waffles
    • ►  April (1)
  • ►  2025 (4)
    • ►  April (2)
    • ►  March (1)
    • ►  February (1)
  • ►  2024 (36)
    • ►  October (4)
    • ►  September (5)
    • ►  July (1)
    • ►  June (2)
    • ►  May (4)
    • ►  April (3)
    • ►  March (10)
    • ►  January (7)
  • ►  2023 (47)
    • ►  December (3)
    • ►  September (2)
    • ►  August (6)
    • ►  July (6)
    • ►  June (9)
    • ►  May (4)
    • ►  April (5)
    • ►  March (6)
    • ►  February (3)
    • ►  January (3)
  • ►  2022 (69)
    • ►  November (4)
    • ►  October (6)
    • ►  September (7)
    • ►  August (9)
    • ►  July (12)
    • ►  June (5)
    • ►  May (5)
    • ►  April (12)
    • ►  March (4)
    • ►  February (2)
    • ►  January (3)
  • ►  2021 (24)
    • ►  November (1)
    • ►  October (2)
    • ►  July (1)
    • ►  June (4)
    • ►  May (6)
    • ►  April (4)
    • ►  February (4)
    • ►  January (2)
  • ►  2020 (82)
    • ►  December (5)
    • ►  November (6)
    • ►  October (4)
    • ►  September (2)
    • ►  August (5)
    • ►  July (10)
    • ►  June (10)
    • ►  May (13)
    • ►  April (12)
    • ►  March (8)
    • ►  February (4)
    • ►  January (3)
  • ►  2019 (22)
    • ►  December (1)
    • ►  November (2)
    • ►  October (6)
    • ►  September (1)
    • ►  August (1)
    • ►  February (3)
    • ►  January (8)
  • ►  2018 (15)
    • ►  December (4)
    • ►  November (6)
    • ►  October (3)
    • ►  September (2)

Subscribe Us

Labels

Bake Biscuits Breakfast Brown rice Burger Cheese Chocolate Dal Egg Emirati Fish Iftar Indonesian Japanese Jeerakashala rice Kerala Keto Kuwait food Lunch Milk Mutton Thai food UAE food afghan cuisine arabic beef biryani bread burnt cheesecake cake chicken cream dessert dinner greek healthy indo chinese lamb malabar prawns pudding puffs quick dinner ideas recipe refreshing drink rice salad sandwich stir fry vegetables vegetarian veggies yemeni

Contact Form


POPULAR POSTS AND PAGES

Emirati Chebab

Emirati Chebab

June 01, 2023
Kerala Style Squid Roast

Kerala Style Squid Roast

June 18, 2020
Chicken Steak with Creamy Mushroom Sauce

Chicken Steak with Creamy Mushroom Sauce

November 05, 2018
Butter Chicken Parcels

Butter Chicken Parcels

April 29, 2020
Kerala Beef Fry/ Nadan beef dry fry

Kerala Beef Fry/ Nadan beef dry fry

October 08, 2019

Pages

  • Home
  • About Me
  • Privacy Policy
  • Contact Me

Copywrite © 2023 TermsFeed®. All rights reserved.

Created By Sora Templates | Distributed By Gooyaabi Templates

Back to top